
Rest and JSON
Recommended Reading
- Java API for JSON Processing: An Introduction to JSON by Oracle
- Working with JSON by Mozilla
- JSON Tutorial by restfulapi.net
- JSON Tutorial by Baeldung
Java And JSON And Rest
Okay, now on to the last part of our great journey with JSON. If you remember from our Rest module, we really couldn't pass any complex data objects back and forth with our Rest web application. As you might suspect, JSON solve this for us nicely...well sort of nicely.
As I've said several times in the class, the difficulty in configuring development environments is often overlooked or ignored. Fortunately (or unfortunately), this last section is going to demonstrate how to integrate Java, JSON and Rest into a web application. Now rather than creating a fully functional web app, we are going to simplify things somewhat, and yet show you a great development tool that aids in creating these types of apps.
So, we've already seen some of the libraries needed for Rest and JSON, to get them to work together with Jersey means not only will we need the Rest and JSON libraries, but two more JAR files that will allow the integration of these services within the development environment.
Now the JAX-RS API (aka Jersey) interfaces with the JAX-B (JSON/XML binding) API when configured properly. The JAX-B API will provide some annotations that mark methods that will handle input/output from the clients.
- JSON passed in conjunction with appropriate @Consumes annotation will use JAX-B to deserialize JSON into objects. As you remember, we used @Consumes in the Rest lecture to pass simple text, once we are done, it will pass a JSON object instead.
- Java Objects passed in conjunction with the appropriate @Produces annotation will use JAX-B to serialize Objects into JSON. Likewise, the @Produces will no produce a JSON object instead of simple text.
All Jersey projects must have a JAX-B implementation to support those API calls or they will fail.
- You can use the default JAX-B API implementation packaged with Jersey, but it doesn't use the nicer annotation available in Faster XML/Jackson
- You can replace the default JAX-B implementation with alternative JAX-B implementations (e.g. Faster XML/Jackson) through library configuration and some code configuration, resulting in Jersey using the Faster XML/Jackson solution vice its own internal one.
What you need to get it working
First you need the Faster XML/Jackson libraries to process the underlying Plain Old Java Objects (POJOs) and the JSON mappings
- jackson-core
- jackson-databind
- jackson-annotations
Ah, but we'll need some additional libraries that account for Jackson under the Java API for RESTful Web Services (JAX-RS).
- jackson-module-jaxb-annotations
- jersey-media-json-jackson
As I've already mentioned, Jersey does provide a default JAXB API implementation. To use another implementation, and appropriate JAR file must be provided for the new implementation and it must be added as a resource so that it is recognized by Jersey at runtime
- jersey-entity-filtering
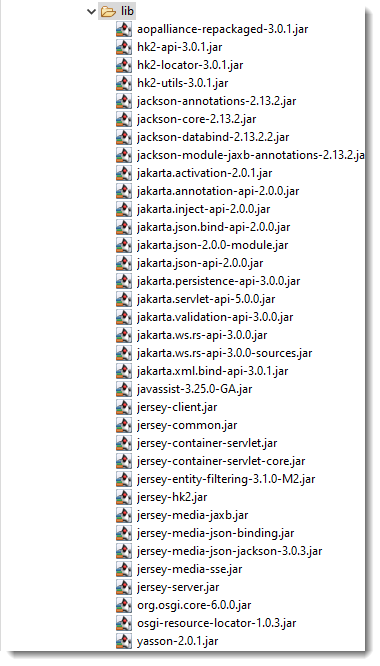
We'll go over the actually addition of these libraries later in this example. But in the end, your project will have quite a few jar files from several sources when it is configured properly.

This configuration will support the following abilities when completed:
- Crate POJOs that will be mapped to the desired JSON (and vice-versa)
- Optionally, employ Jackson annotations on an Object to dictate mapping features (field names, order, ignore, etc)
- Employ the Objects in a ReST service method as parameters or return variables in conjunction with @Produces and @Consumes annotations
Now in order to "develop" our solution, I'm going to slowly "grow" our simple ReST and JSON examples into the integrated example.
Step 1: Build a simple ReST application
You know, some of you might think that copying our original ReST application and building on it would be a great idea...Let's just copy the ReST project to something called JsonReST. Problem is, copying the app doesn't really rename everything you need it to be and it gets tangled up in the development environment. You can unwind things, but it is unfortunately easier just to start over for our JsonReST app.
So, first thing is to make another Rest application like you did in the Rest Module we covered earlier. This time name it JsonReST. Go ahead and go back to the RestServices lecture for directions to get the Rest app built, but stop once you get the libraries populated. Actually, you can just copy the jar files from your ReST application from earlier, that will be step one.
Ah, but this time we need one more Jackson library that we didn't use in the ReST module, this is the jackson-module-jaxb-annotations jar file.
So, once again we go to the Maven repository and grab the latest version

We'll need to move this to the WEB-INF/lib directory as well. If you forget this, you will get a compile error later on.
Next step is to grave the Jackson/Faster XML jar files you put in the lib directory for the standalone JSON app. There will be three jar files, jackson-core, jackson-databind, and jackson-annotations.
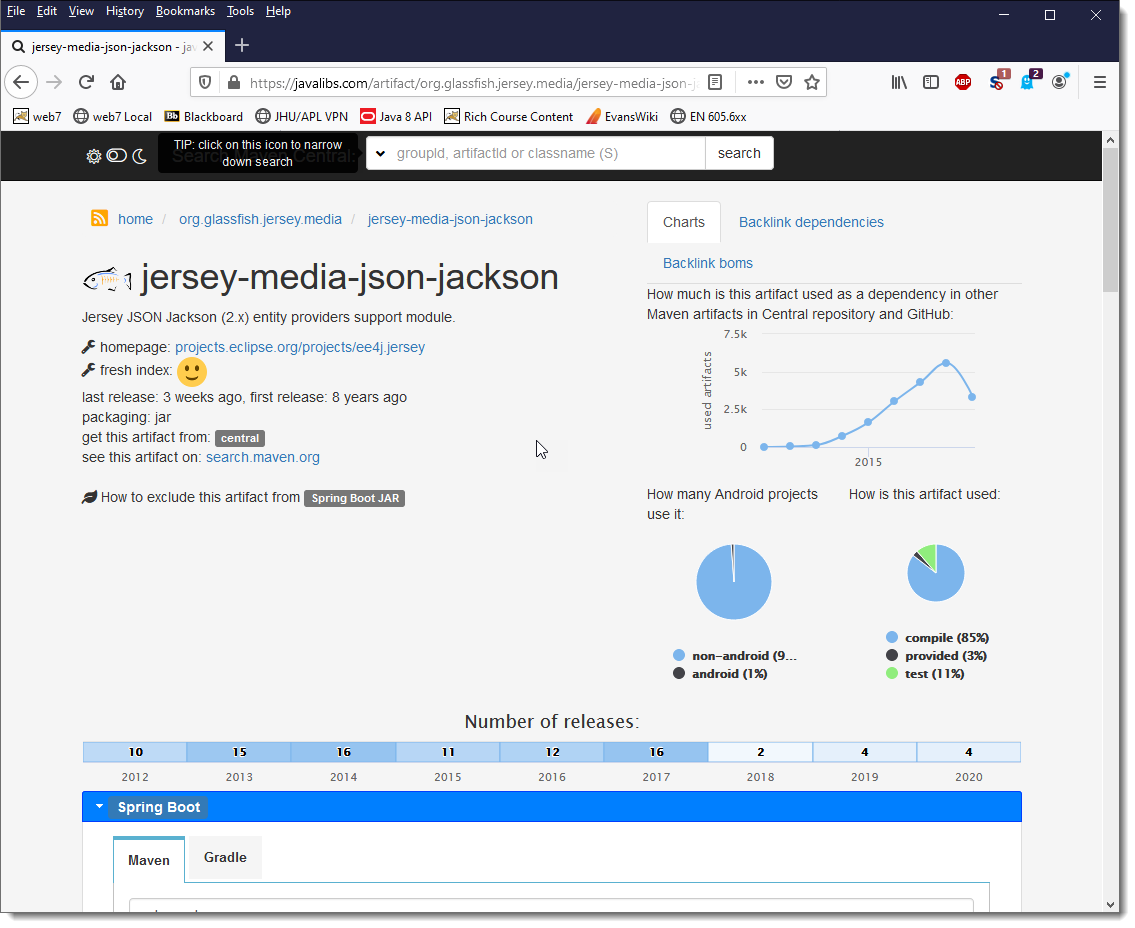
Now, because we are replacing the default Eclipse JAX-B implementation, we need to grab a few more files from for this final project. The first is something called "Jersey-Media-JSON-Jackson". This lets us link in our Jackson/Faster XML libraries with Eclipse. You can find this at https://javalibs.com/artifact/org.glassfish.jersey.media/jersey-media-json-jackson. At this point, grab the latest 2.x release.
Scroll down until you can download the latest release. Look for the Downloads tab to get the JAR file
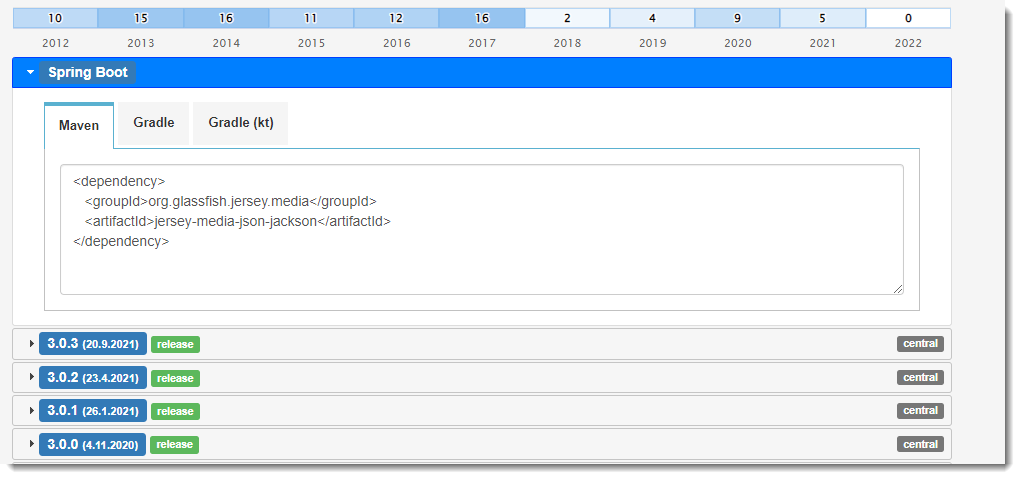
You now need to move this jersey-media-json-jackson-3.xx.jar file into the WEB-INF/lib directory in your project.
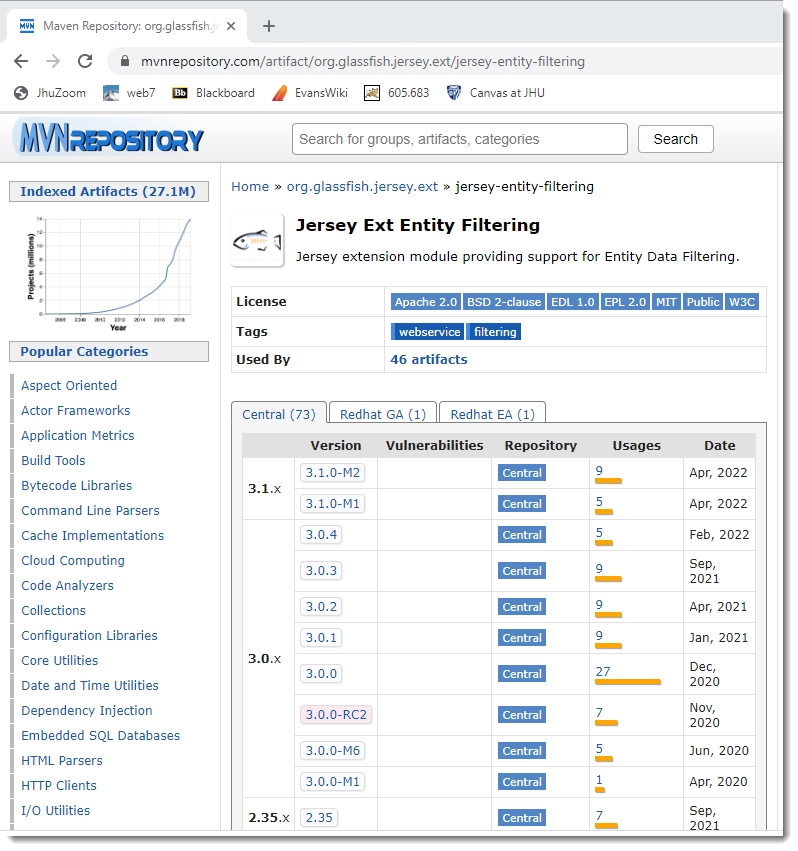
Okay, we have one last "magic" jar file to go! The last one is called We need jersey-entity-filtering-3.xx.jar file, which is the last piece needed to get our Jackson/Faster XML library working with the Jersey framework.
You will need to go to the general Maven repository to get this one: https://mvnrepository.com/artifact/org.glassfish.jersey.ext/jersey-entity-filtering
You should see something like this:
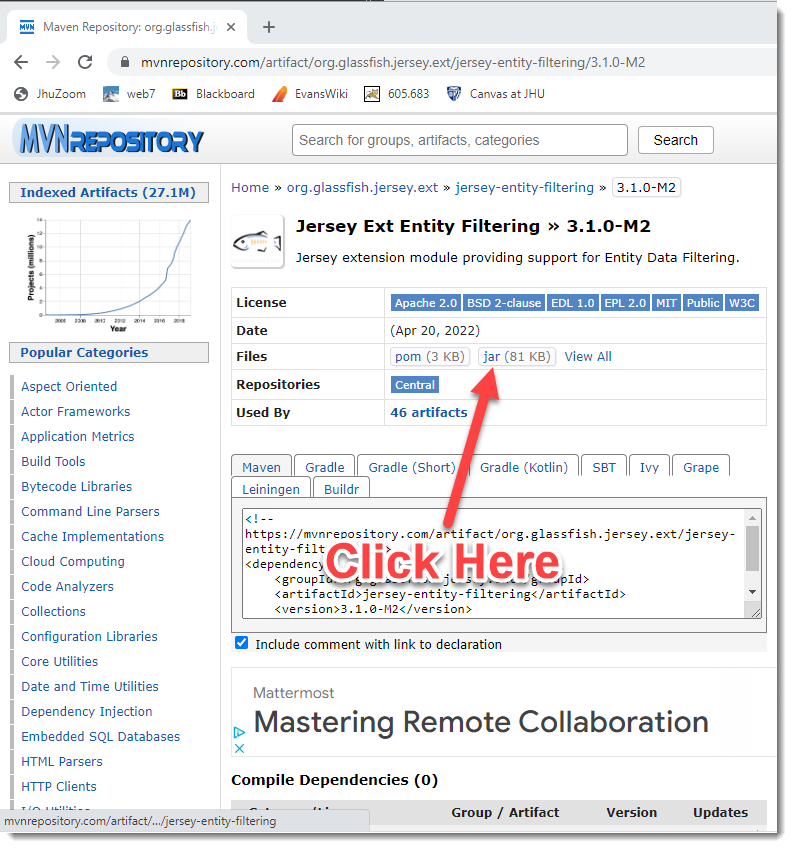
Click on the latest 3.xx release, in this case it is 3.1.0-M2
Then click on the jar file...
Okay, with this file in our lib directory, we should now have this!
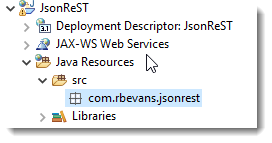
Believe it or not, we are ready to start building our Rest application with JSON! First step, make your package in the src folder of the project:
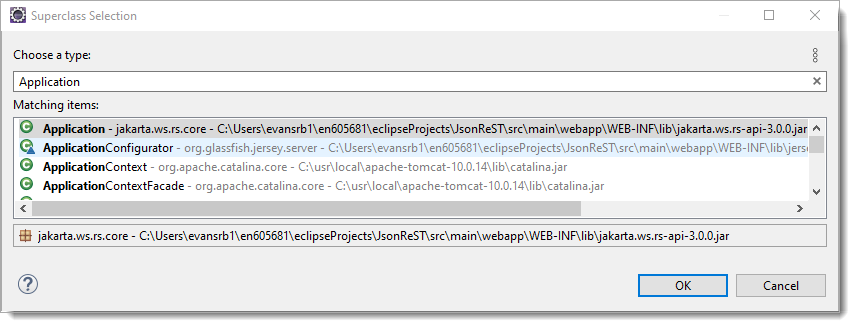
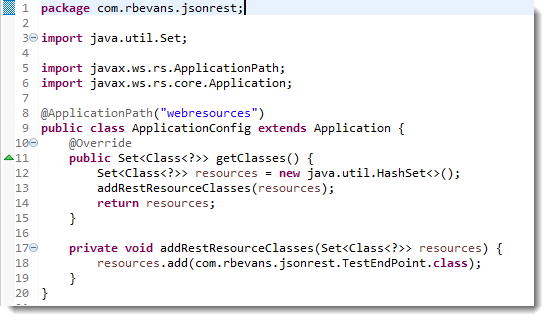
I'm using com.rbevans.jsonrest as my package name. Next is to build our ApplicationConfig class. Note that the superclass for this class is the Application class from javax.ws.rs.core package
Once we do this we can click Finish and we should have this new class:
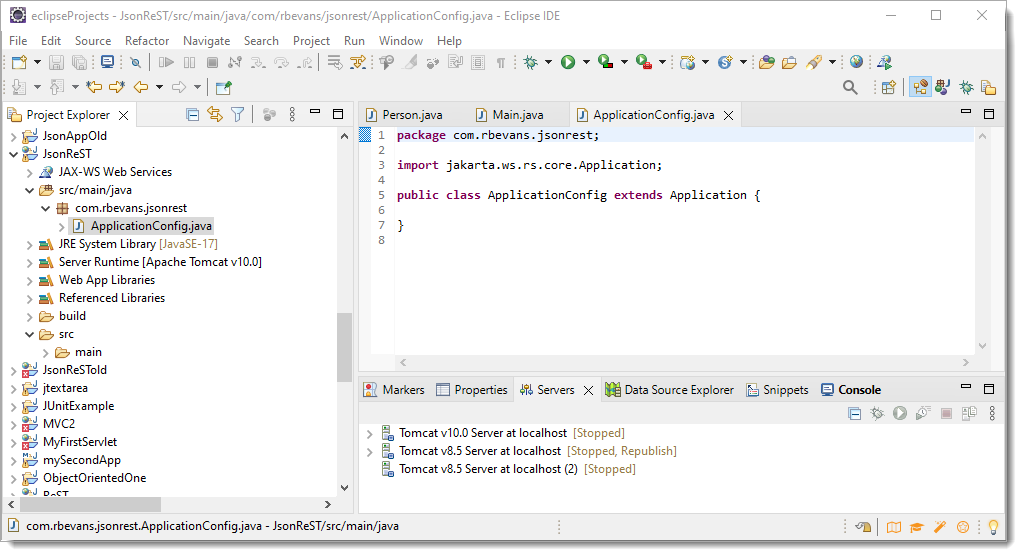
At this point, we want ApplicationConfig to have the same contents as we had back in the ReST module, so you can just copy the from that ApplicationConfig class, and the class should now look like this:
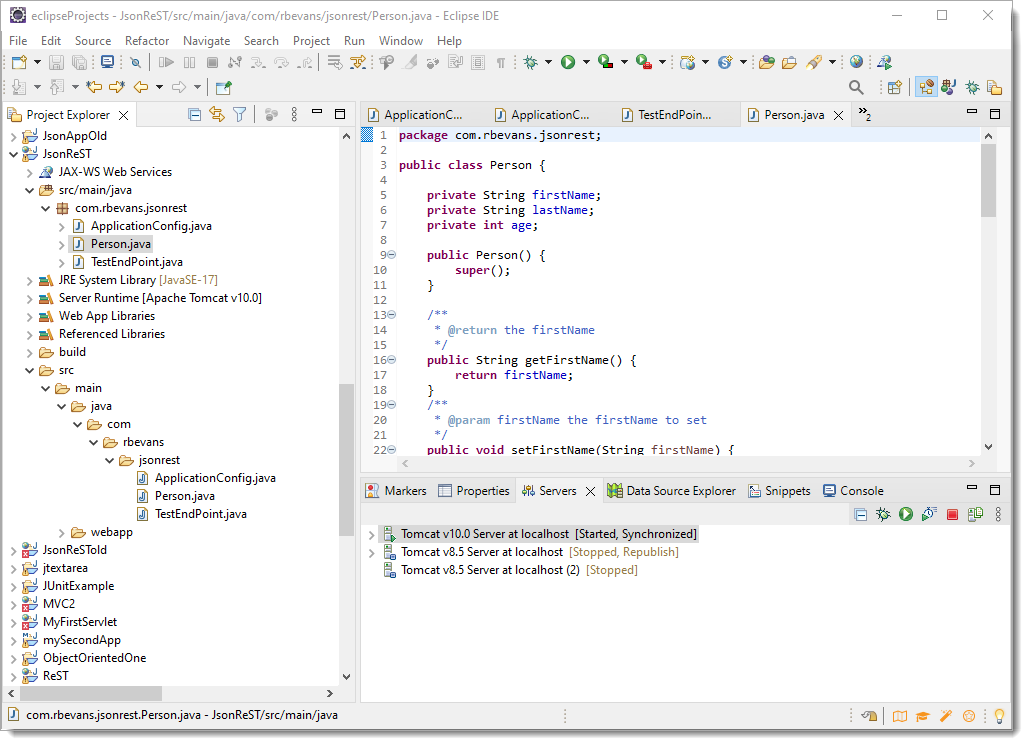
Next we need to create our TestEndPoint class. Now in this case, it will start out a bit simpler than the ReST examples earlier, we are going to create a very simple class that will just return a String. Remember, we are just setting up the ReST component of this project at this point, so you won't see any JSON yet.
At this point, let's make sure things work as expected so far, to add the project to the test Tomcat server, just right click on the server

And select Add and Remove... Select JsonReST and add it by clicking the Add> button.
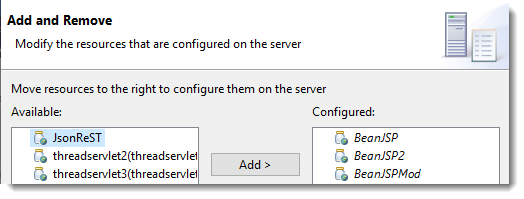
Then click Finish.
Start the server

And then go to the URL to access the ReST application
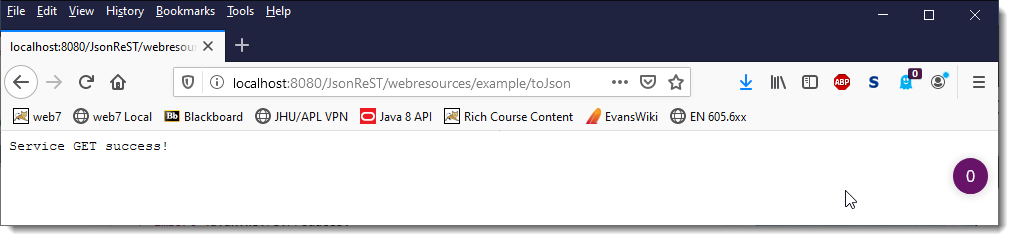 So far, so good! The ReST configuration works!
Now we need to move beyond returning a String from that ReST call and return a Java Object. Remember, we are dealing with HTTP requests, so typically we deal with Strings, and JSON is an Object in String form, so we'd like to move to that paradigm.
If you go back to the JSON section, we had an Object called Person that we used, let's first just copy that object into our current project.
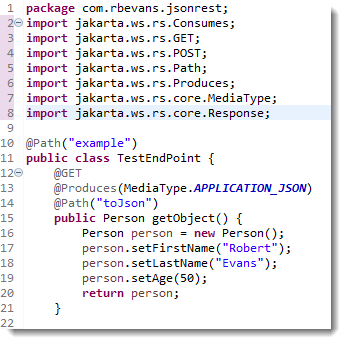
Now that we have an Object to use, we want to start modifying our TestEndPoint class to return more than a String. The first step is to modify our @Produces annotation to produce the type of APPLICATION_JSON.
@Produces(MediaType.APPLICATION_JSON)

We then need to add code in the getObject() method to create a Person Object, and return that instead of the simple String
Person person = new Person();
person.setFirstName("Robert");
person.setLastName("Evans");
person.setAge(50);
So our TestEndPoint class now has a getObject() call that looks like this:
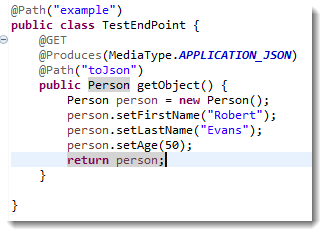
Notice we are no longer returning a String, now we are returning a Person Object.
The last step we need to do is go back to our ApplicationConfig class, and tell it we want to use the Faster XML/Jackson libraries rather than the default JSON libraries it would have used otherwise. This is accomplished by adding one more line of code in the addRestResourceClasses() method. We need to add the JacksonFeature.class resource, which basically tells the environment to use our Jackson libraries instead of the default.
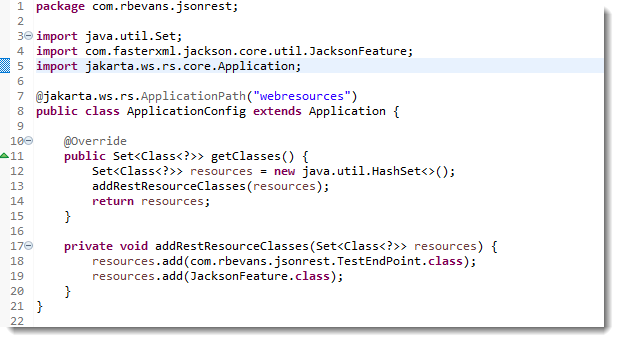
If you didn't add this resource, the application would partially work, but some of the nicer JSON annotations supplied by the Jackson libraries wouldn't work.
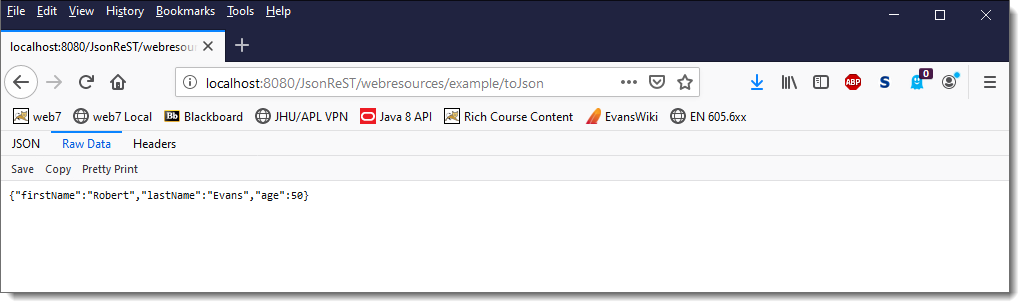
We can now go back to the browser and reload the toJson URL and we'll see the JSON returned from the application. Note that different browsers will show different JSON output, Firefox shows you this
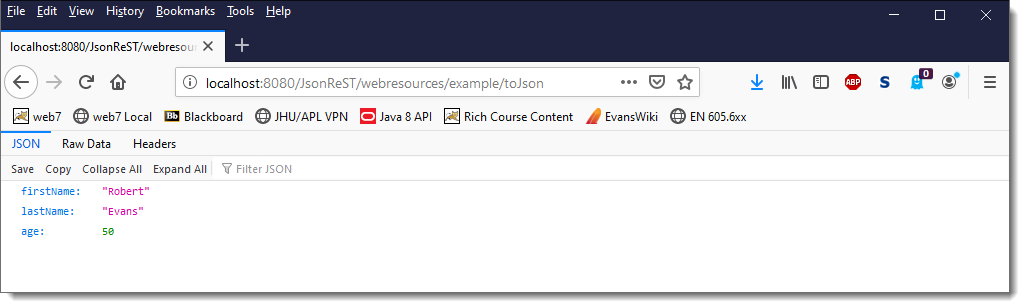
Now if you hit the "Raw Data" tab, you will see this output
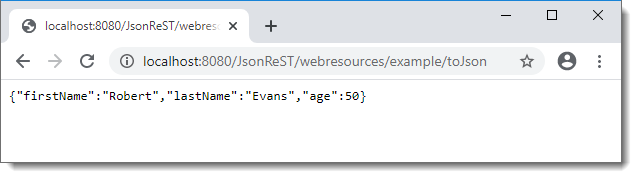
While Chrome shows you something a bit more like the Raw Data output of Firefox
Since we are using Jackson, we can no use all of the annotations that Jackson supplies, like remapping of attribute names and ignoring attributes. Feel free to review the Java and JSON chapter for more details on using Jackson annotations to assist in the publishing/reading of JSON objects. These annotations seem unnecessary for our work, but if you think about it, you may have a client written by somebody else and you want to map the objects from their JSON to your internal Java structures without having to write a lot of code.
Exporting JSON from a Java web app.
Now that we can send JSON objects out to clients, let's work it the other way, let's figure out how to ingest a JSON object into our web server from a sending client. In this case, we want to accept the incoming JSON, and then translate it into a POJO that can be used within our server.
Okay, if we looked back at our TestEndPoint class, we had an annotation that would generate the code for a GET call for our server. In this case, since we want to ingest data, we need to handle a POST call, that will in turn send data to our server.
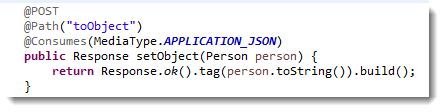
We start off with creating a new method that looks something like this
@POST
 @Path("toObject")
 @Consumes(MediaType.APPLICATION_JSON)
 public Response setObject(Person person) {
    <more to come>
 }
- We use the @POST annotation to indicate that this method handles POSTs to the server
- The @Path is once again the end of our URL path to get to this call
- We now use @Consumes vice @Produces, as we are now ingesting JSON rather than generating it.
- Note that the return type is a javax.ws.rs.core.Response object. The Response object is a means of encapsulating HTML within an Object that keeps track of HTML readers, return codes and content. It turns out that we can actually build an HTML response by building the elements using a Response object. Our GET method just used a default Response, but we are going to build something a little more useful here. This is because we want to give a tailored response with an encapsulated Object.
- Also notice that we are using the Object (Person) that we want to populate with the incoming JSON
Now, we are ready to fill in the setObject() method. If you look at the Response API, it has a lot of static methods that can be chained together to build an HTTP response to the POST.
The first thing it to generate an OK response (code 200) to the client. We just use
Response.ok()
Now if you notice, the ok() method returns a ResponseBuilder object, this lets us chain more data in the return response, before we finally call the static build() method that will finish packing up the response that will be sent to the client.
For this example, we are going to return the person.toString() output as an etag in the header of the response, to show that the JSON processing worked.
Response.ok().tag(person.toString())
Then we finally chain the build() method
Response.ok().tag(person.toString()).build()
Now our final POST handling method looks like this:
By using the annotations, this is all the code we need to ingest, and reflect the incoming JSON from a client.
At this point we could write some HTML, build the forms, and set up the submit method to POST to the server, but...here is a nice tool that lets you effectively help debug your server without having to write the client end of things. I think this is a great resource to use in the development process.
The utility is called postman (get it...POST man). This lets you generate almost any kind of HTTP request directly from your browser. I know it is available for Chrome and Firefox, but it may be called TabbedPostman or something similar (it looks like their might be postwoman utilities that look like they have similar functionality).
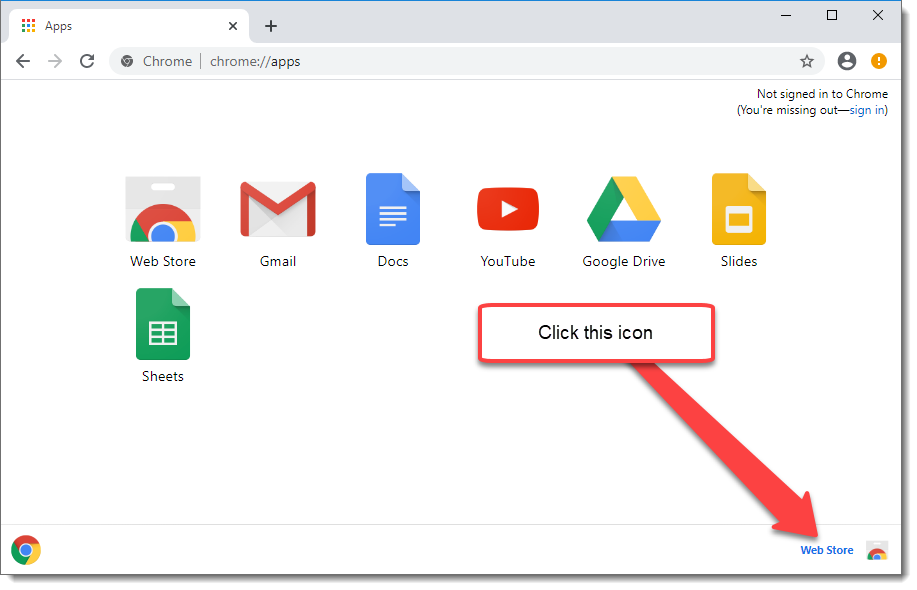
I'm actually going to use Chrome here, and show you how to install the add-on. First go to chrome://apps
Now we want to go to the "Web Store"
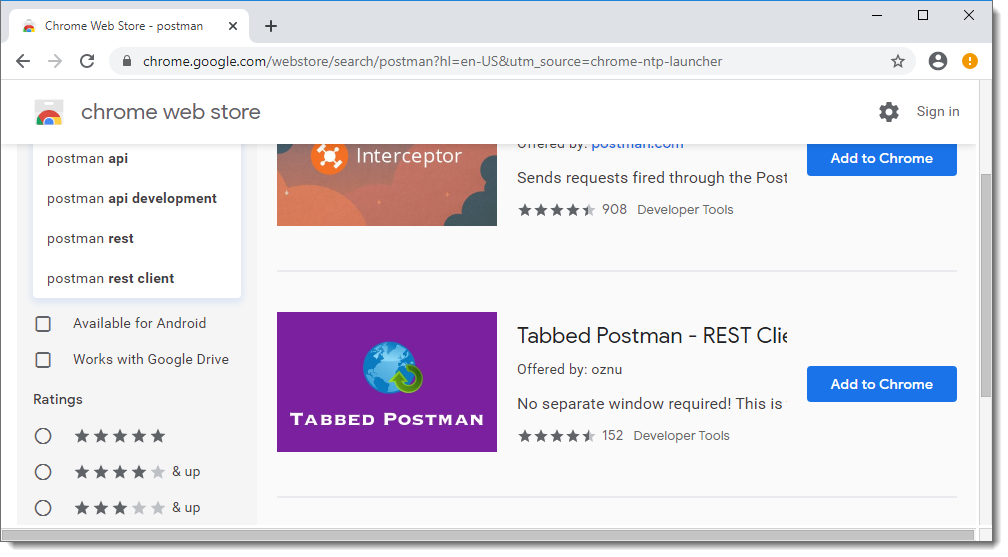
When in the Web Store, search for postman, we'll actually choose the "Tabbed Postman" offering and install it in chrome.
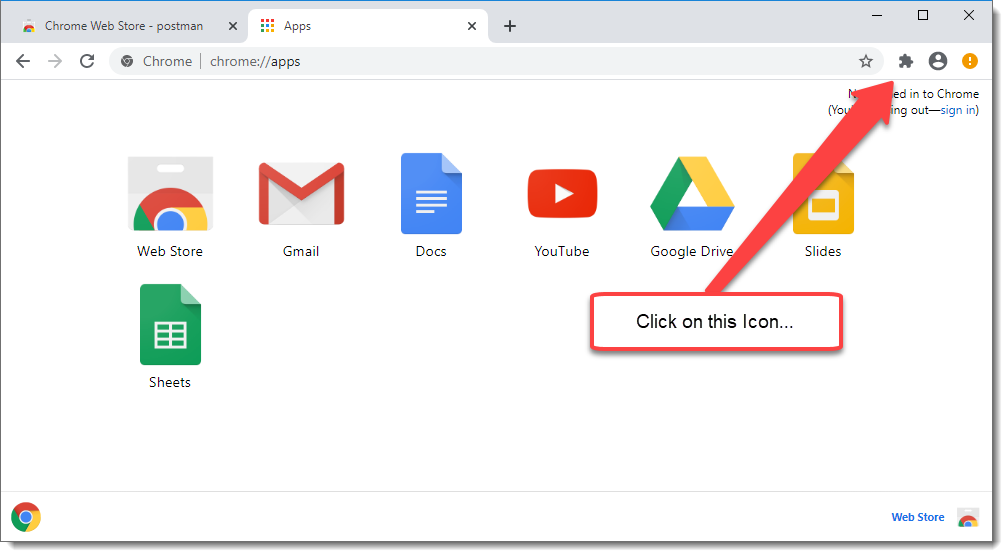
Once it is installed, you can go to the utility by clicking on the Extensions icon and selecting Postman
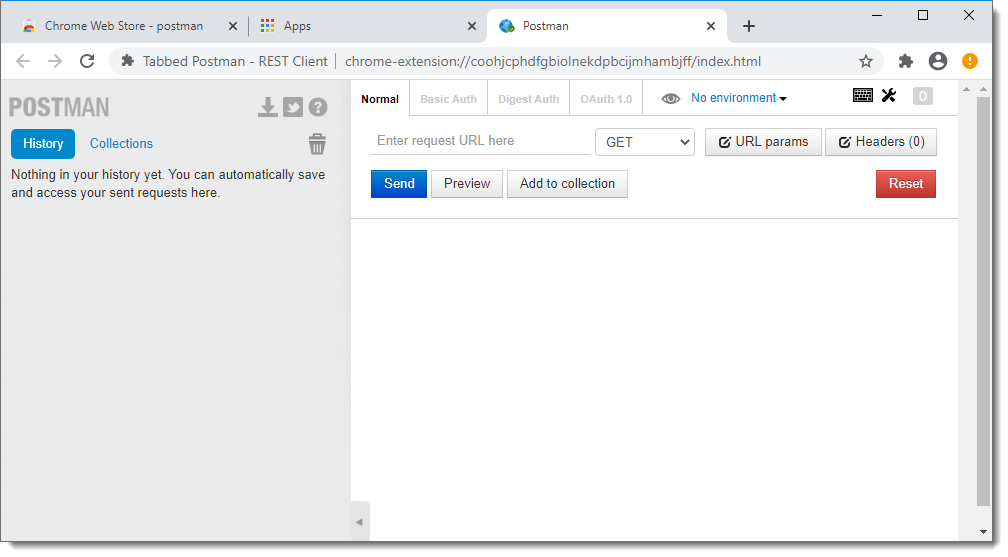
Woo hoo! We now have our tool!
Okay, it is now time to configure out query. Here is the final way the tool should look
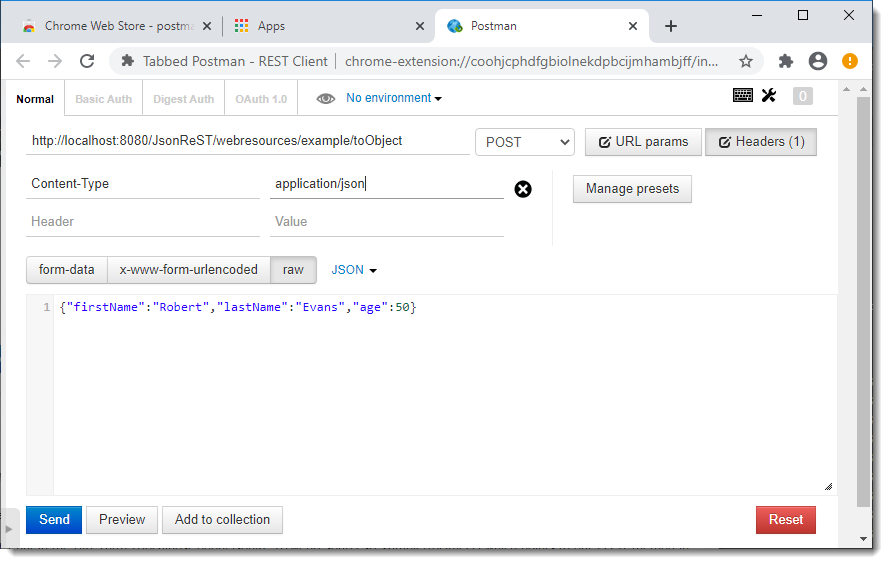
There are a couple of things that I have entered/selected
- First I put in the URL (https://localhost:8080/JsonReST/webresources/example/toObject) which points to our POST method in TestEndPoint
- Next, select "raw" data input in the three buttons (form-data/x-www-form-urlencoded/raw)
- Then select JSON data type in the combo box
- Click on the Headers button, and we specify the Content-Type we will be sending, in this case it is application/json
- Finally, put in a properly formatted JSON object
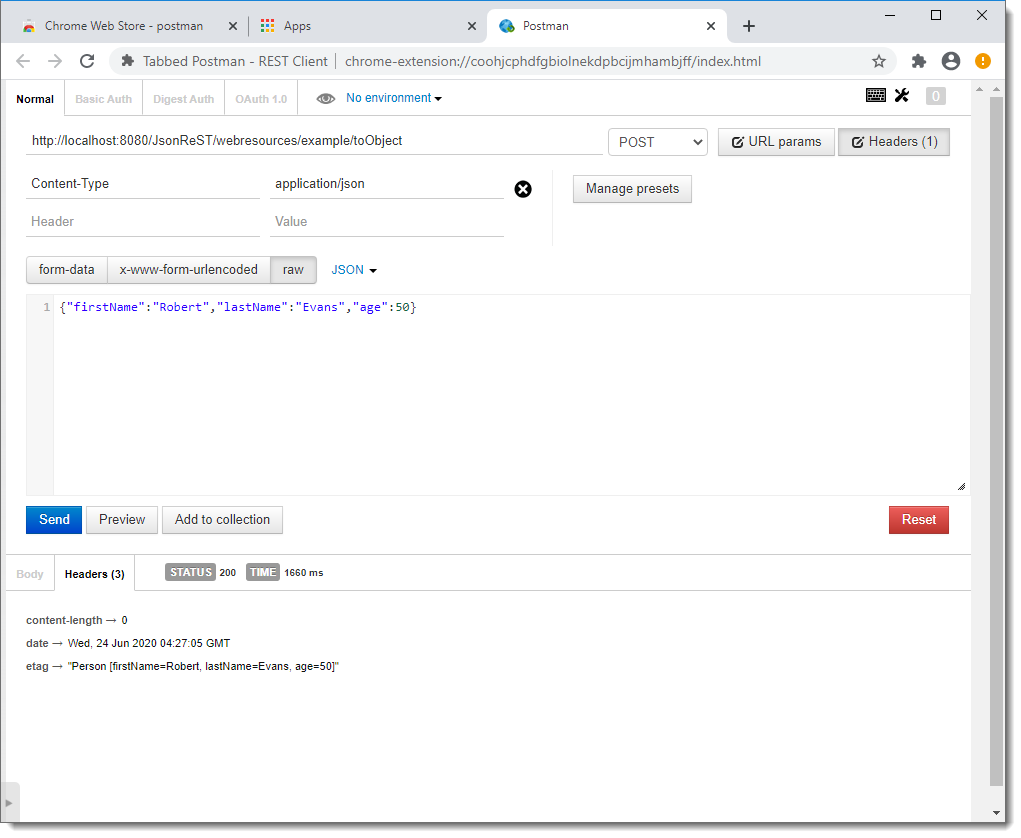
At this point, make sure you save out your changes and ensure the server has synced the new changes. If you press the Send button, you should see the following (make sure and select the Headers tab because that is where we put our response). You will see three items in the Headers, the Content-Length, the date, and the etag, which has our Person.toString() output!
Summary
Okay, a LOT of configuration in this section, but it does demonstrate how to pass Java data back and forth between the server and client. You can now create a standard HTM client that packs up data in a JSON object and then posts it to the server.