

Graphics
Required Reading
none
History
In many ways, it was Java's graphic features that caught everyone's eye in the beginning. By today's standards, the initial graphics libraries were crude and not that interesting, but back then it was a great ability, and even with its limitations, it was enough to spark people's imagination and get them to use Java.
The first Java graphics library was called the Abstract Window Toolkit (AWT). AWT objects, (found in the java.awt.* package in Java) were fairly primitive. Originally, Java could show any "look and feel (L&F)" on any operating system. This means that you could have your application "look and feel" like a windows application but be running on a Mac. Legal problems removed some of this ability, and now Windows L&F only can be used on Windows OS and Mac L&F can only be run on Apple computers.
Sun released JDK 1.0 in the first half of 1996, and a significant portion of the JDK was the AWT. At the time, one of the big selling points of Java was that it could bring moving text and animation to web pages! Some developers tried to develop real tools, but AWT had a reputation for being slow, and the L&Fs had some initial problems. In addition, AWT had the operating system render the individual components which had plusses and minuses, the most significant (at the time) being speed and flexibility.
It is possible to do some basic graphics in AWT, but for all extents and purposes, you should be using the more modern graphics library, Swing. Swing
In 1997, Netscape (remember them?), began work on a new graphic toolset that had a much more complete set of user controls. Sun liked it, and used it to create the Java Foundation Classes (Swing). The Java Foundation Classes consist of:
You may see some examples of AWT, but in most cases, they are leftover from earlier days of Java. Swing is the recommended graphics library.
Getting Started
After just having talked about AWT and Swing, we're going to start not with the high level graphics library, but the lower level graphics support in AWT and Swing. This is a good place to start because (1) it is good information to know, and (2) it builds on the basic Java you've seen so far without dealing with a lot of classes yet.
As a disclaimer, the sections on graphics are very high level. Learning Swing and all it can do is a class unto itself (I should know, I taught one). What I will try to do is introduce you to some of the things you can do with Swing, and let you learn more on your own.
It turns out that some of the simple, low-level graphics routines found in AWT can still be useful, and we'll preview them here for simplicity. You can learn more by looking at the Graphics class in the java.awt.* package.
Common Graphics Methods
Listed below are several "common" graphics methods that you can use within an application. Many have Swing "upgrades" because their functionality is somewhat limited. There are a few methods that are particular to JApplets, but since we will be doing our development as applications/Java Web Start, we'll skip over those.
Drawing Images
Drawing images has made major improvements over the original AWT days. What used to take several lines of code and some awkward structure can now be done with one or two lines of code due to new libraries in Java. One of this first things you need to realize when it comes to accessing files (of any type) is that the notion of opening a file takes on different meaning if you are running an application, applet, web start, or even an application out of a jar file. That is because when you want to open a file, where does it "live" in relation to the JVM your program is running on?
Because of this problem, Java provides a way to access the correct file location. On any Java class, there is a getClass() method that returns the class of the object. The returned object knows where it was loaded from, if it was from a JApplet, it knows where the server is, if it is an application, it knows the local file system. If you call getResource(String filename) on this object, it looks for the filename (with optional path) in relation from where it loaded the class from.
So, let's say you had the following directory structure under a project called Graphics1 in Netbeans. You have a Main class in the graphics package (which is also the directory Main is found in), and you have another directory under graphics called "images" where you are keeping an image called "duke.waving.gif".
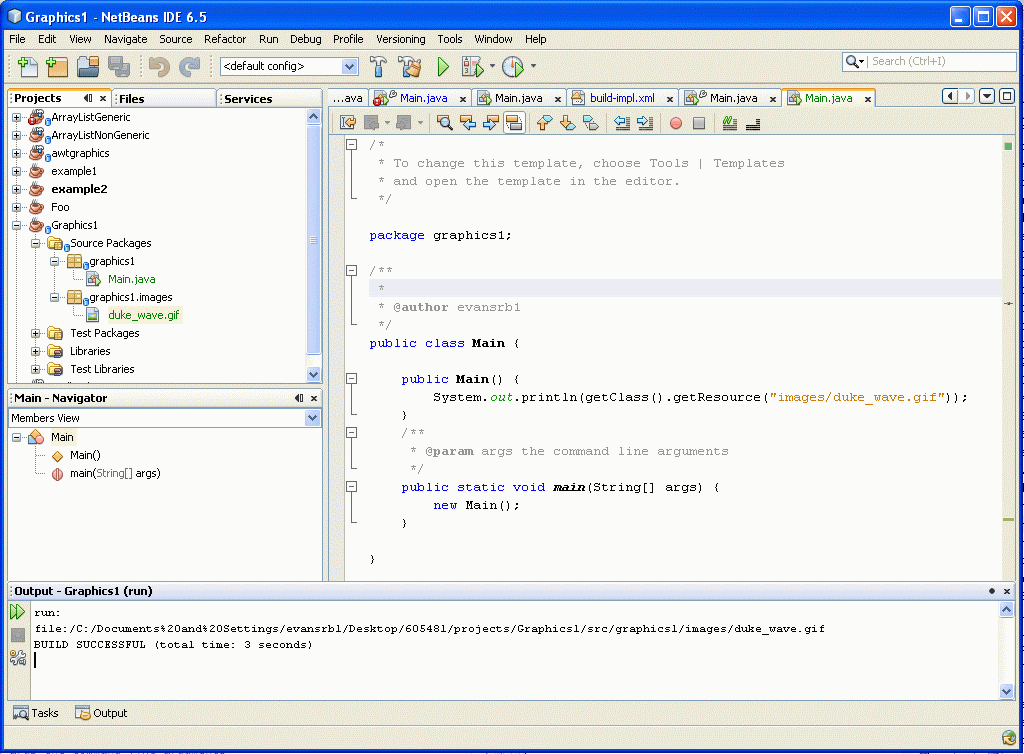
The above program shows how you would correctly reference the file URL in your application. Some examples often have you just open the filename, which won't work once you put the files in a jar file, or if they are part of a JApplet.
Unfortunately, without modifying the ANT script that netbeans uses, you need to manually copy the images directory from the src folder to the build folder of your environment. To do so, click on the Files tab of netbeans, and then copy the folder from the src directory to the build directory as shown below.
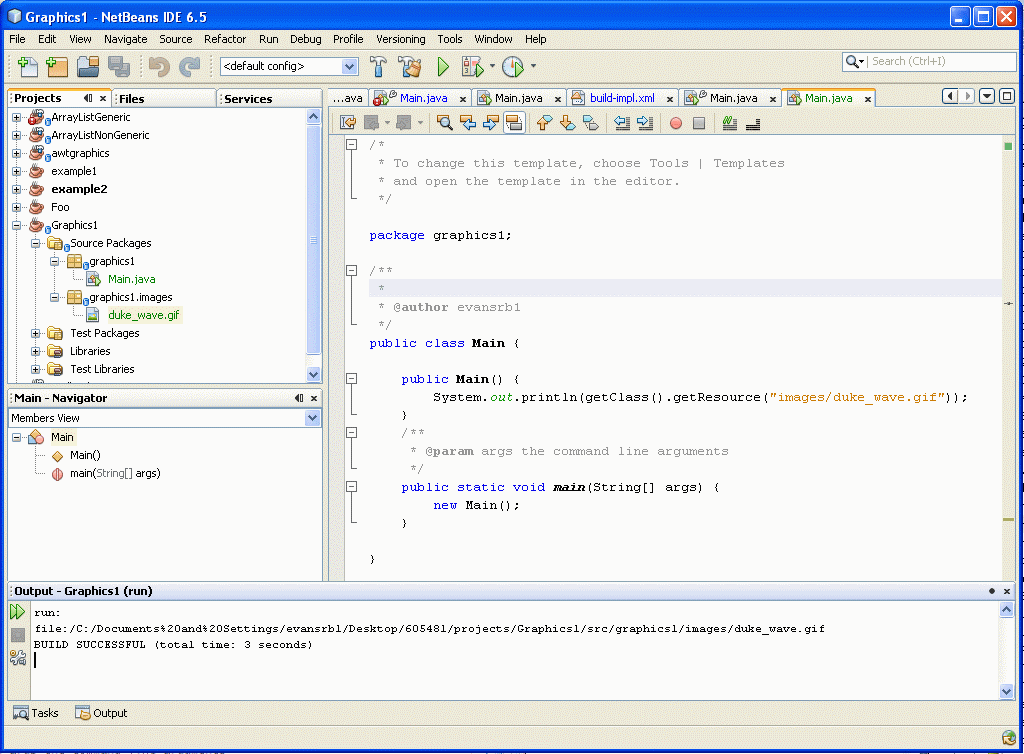
At this point you can right click on Main.java in the window above and select "Run File" which will print out the location of the images/duke.waving.gif resource. Look at the bottom panel in the IDE for the output.

You can now "build" this project, which will place the files in Graphics1.jar in the dist directory. To run the file from the command line, type java -jar <path to Graphics1>/Graphics1/dist/Graphics.jar. Note that the url value is now different than when it was run from the class files.

Drawing Graphics Practice
Now that we have seen the methods, and how to load in a graphic image, download the Netbeans project awtgraphics. This program will generate the following output:
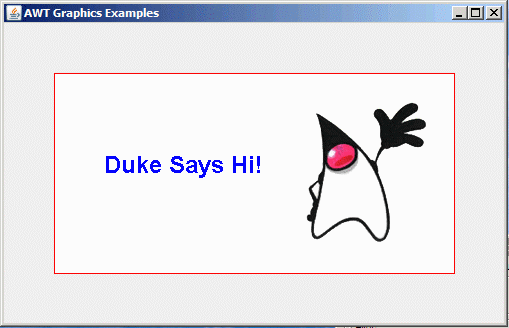
You will note that there are two classes in this project. Main and GraphicsPanel. Open the Main.java class notice that the Main class extends JFrame, and holds the GraphicsPanel where the graphics are really drawn.
Now open The GraphicsPanel.java class.
Let's take a look at the code. In the first section, I declare some attributes that will be used by the panel.
Graphics Panel attributes |
 |
You really should make sure that attributes like these should be outside of your paintComponent() method. That is because you don't need to create them every time your repaint your screen.
The font attribute is used to hold the font used. The url and bi attribute is just a convenience, it could be kept in the constructor.
The next chunk of code is the constructor:
GraphicsPanel Constructor Contents |
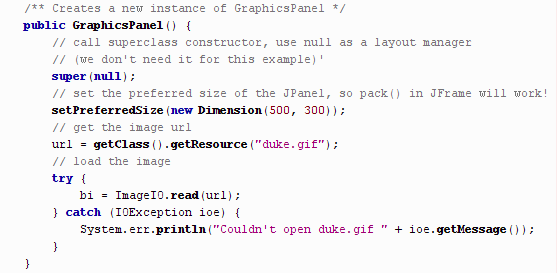 |
In the above code, we first set the "preferred" size of the panel. This lets the panel communicate with the enclosing JFrame to tell it what size it would like to be. That way, when the JFrame calls pack(), the JFrame will size itself to hold the panel.
We load the url value in the constructor, because we use the getClass().getResource() method of loading the duke.gif image. You can't use this method in the attribute definition because getClass() doesn't apply in the attributes.
Lastly, we use the ImageIO.read() method to load in the image into the BufferedImage reference. At this point we have all the pieces we need to start painting to the screen.
This last chunk of code is the actually paint routines.
GraphicsPanel paintComponent() method |
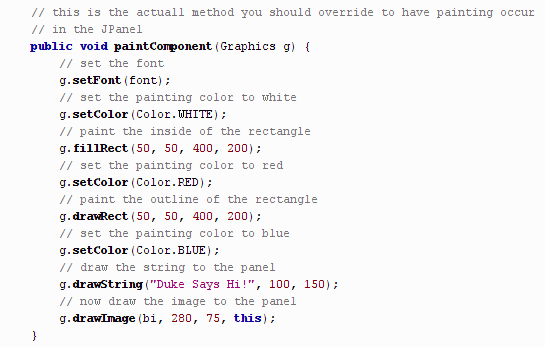 |
You can read the comments as to what items are done when. Notice in the above code that I use the pre-defined color attributes of the java.awt.Color object. You can easily specify your own colors by:
Color myColor = new Color(R, G, B);
where R, G, and B are integer values from 0-255 representing color intensity. 0 being none, and 255 being full intensity.
Summary
The routines we've seen so far are fairly basic, the next section will show some more powerful methods available.