
Servlets and JSPs
Recommended Reading
Chapter 11 - Design Patterns from "Servlets and Java Server Pages" by Falkner and Jones.
Combining Servlets and JSP Pages
Since JSPs are so much easer for web designers to create, why use Servlets at all? JSPs allow you to access Java classes and any of the Request headers from the Servlet. You can even write your own scriptlets to insert Java code into the JSP. Including Beans (and custom tags, which we haven't covered) lets you put even more complex behavior into JSP pages.
Well, as easy as JSPs are to show content, they can be difficult to capture complex processing or business logic. In addition, there is a fundamental assumption in JSPs is that a single page gives a single basic look.
At first, there were only Servlets in web applications, and this proved to be difficult to build and maintain. Even the addition of JSP pages had many applications existing as a jumble of HTML pages, JSP pages and Servlets without much order.
Eventually, people started to use the Model-View-Controller paradigm.
In web application, the three layers are defined as follows:
- Model
- Business process layer
- Models the data and behavior of the applications
- Responsible for interacting with
- Database
- Executing Business Logic
- Takes care of data and behavior that is independent of presentation
- View
- Shows the application to the user
- Not responsible for obtaining, managing data or modeling behavior
- Controller
- Allows user to interact with the application
- Responsible for selecting View
- Language
- Access Level/privileges
- Controller passes user interaction to model
This first try at MVC was very Page-centric, and often made heavy use of JSP pages and Java Beans to encapsulate the functionality desired in the web application. It worked, but control of the application was sometimes difficult using just JSP pages. In this model, JSP pages handled all aspects of the application presentation, control and business logic. These JSP pages had a log of JavaBeans, scriptlets and expressions within each page. Page selection was controlled by what URL link or submit button was clicked upon by the user. JavaBeans were used to maintain the Model in this MVC design pattern.
Eventually, people realized that Servlets worked best as a controller. It was easy to encode logic in the Servlet, and then have the Servlet decide which JSP the user should see next, it was no longer hard coded as HTML links in the application.
The use of a controlling servlet defines the MVC Model 2 approach:
The advantage of this system is that you can now show different JSP pages based on what the controller servlet determines the correct next step in your application should be. The Servlet partially processes the initial request, and then forwards the request to a JSP page to display the correct results.
JSP pages are used for presentation, the controller Servlet is used for the logic to decide which pages to show. It turns out that there are several web architectures that use this MVC Model 2 approach to establish the overall architecture of a web application (Struts, JSF, Spring). These use something called a Web Application Framework which is supposed to minimize the construction and maintenance of a web application
Beans, Beans, the magical fruit...
Java Beans aren't really anything special, the are simply Java Objects that have a common design pattern, which allows reflection, and all sorts of other tools to easily access these objects. It turns out that in MVC design, you use beans to move information from page to page.
A Java Bean class must follow the following conventions
- It must have a zero-argument (empty) constructior
- You can satisfy this requirement by either having no constructor defined (uses the default constructor), or explicitly defining a constructor for the class with no arguments.
- All instance variables (fields) should be private, or at worst protected.
- From an OO perspective private is always best, and should be followed
- public accessible instance variables are ALWAYS a bad idea in any Java object, unless they are final statics.
- Persistant values should be accessed with setXxx and getXxx methods that include the instance name (xxx).
Boolean properties use isXxx instead of getXxx
- So, if you have an instance variable named
- timeOfDay - you use getTimeOfDay and setTimeOfDay
- foo - you use getFoo and setFoo
- enabled (boolean) - you use isEnabled and setEnabled
- Note that you maintain the coding convention of using lowercase first letters for the first letter of an instance variable, and then when they are incorporated in the set/get methods, you then uppercase the first letter.
- So, if you have an instance variable named
Setting up a MVC Model 2 Application
Download and open the Netbeans application MVC2. You can look at the code provided as I walk through this example.
Step 1: Dispatching Requests - identify the controller Servlet.
First, you need establish a controlling servlet. This class is responsible for figuring out "what to do" with the incoming browser request. It needs to look at the request and any bound attributes (beans) that hold information that will let it know what to do next. In the example I provide, I want to implement a login screen to an application. I'm going to imaginatively call my controller Servlet "Controller". Note that in the example, there is a servlet mapping for the Controller suffix in the URL to map to the Controller servlet. Since this exists, the welcome page specification is effectively ignored if you type in the https://localhost/MVC2/Controller URL.
To keep track of whether I am logged in or not I have developed a very simple class called Login. This class will be used as a Java Bean by the application and keeps track of an entered userid and password, and whether the password is correct or not.
Step 2: A Model Bean
The Login Bean will have the following attributes
- userid
- password
- success
Note that you don't have to provide both setter and getter methods in a bean, you can have just a get or set method, it depends on what the functionality is of the class. When the password is set, it will check to see if it is the correct password (which always will be "foo" for any userid) and set the success attribute to true if the password is "foo".
Step 3: Start to fill out the controller Servlet.
Now that we have a bean to keep track of state/model information, we can put a little logic in the Controller class. The first thing to do is to get an HttpSession object that we can store our bean in. We'll place this code in the processRequest() method that the Netbeans template provides, but it could also go in the doGet/doPost methods if you are doing things by hand.
HttpSession session = request.getSession();
The next step is to see if a Login object is associated with the session yet. If it hasn't, this must be our first connection so we'll make one, place it in the HttpSession object, and then forward the HttpRequest to the initial login.jsp page which will display login information.
 Login login = (Login) session.getAttribute(LOGIN);

 if (login == null) {

    login = new Login();

    session.setAttribute(LOGIN, login);

    RequestDispatcher dispatcher = servletContext.getRequestDispatcher("/login.jsp");

    dispatcher.forward(request, response);
    ....
Remember the good old RequestDispatcher object back from the Servlet lecture? Well, here is a good example of how it can be used. This also finally shows why the "request" scope is available to Beans. You can chain objects processing a request together as much as you'd like, and it still counts as the single Request.
If the Login Bean is present, we know we've been to the Controller at least once. For this example, we can assume that we've come from the login.jsp page, so we get the parameters from the form and then call setName() and setPassword on the Login object. We then test to see if the password is good or not. If it is good, we forward the request to the welcome.jsp page. If the password is bad we go back to the login.jsp page.
 String name = request.getParameter(LOGIN).trim();

 String password = request.getParameter(PASSWORD).trim();

 login.setName(name);

 login.setPassword(password);

 if (login.getSuccess()) {

    RequestDispatcher dispatcher = servletContext.getRequestDispatcher("/welcome.jsp");

    dispatcher.forward(request, response);

 } else {

    RequestDispatcher dispatcher = servletContext.getRequestDispatcher("/login.jsp");

    dispatcher.forward(request, response);

 }
Note: It probably would be easier and cleaner to forward it to a re-login page with the error message already built in, but I wanted to play with the login.jsp page a little bit more to show some more scriptlet functionality.
Step 4: Create your JSP pages to show to the user.
The login.jsp page is very basic. I've included two text fields to get the userid and password. On submission, note that the Request is sent back to the Controller URL (which is mapped to the Controller Servlet in the web.xml file).
Of interest is the following code, used to provide the failed login message:
        <%
        if (login.getName() != null) {
        %>
        Incorrect password, please try again <br />
        <%
        }
        %>
This still mixes some Java code into the JSP page, instead of just using beans, but it is a nice example how to provide more complex functionality in a single page. The fact that we declared the <jsp:useBean id="login"...> code earlier means that we have a variable named login which I can call the getName() method.
I use the test to see if I have been to this login page before, if I have, I must be returning because of a bad password.
Note the use of the scriptlet code to embed the test of the login name and the HTML stating "Incorrect password, please try again".
Running the application
Below are the screens if you run the application.

When you type something in (with a bad password)

And you click on the Submit Query button...
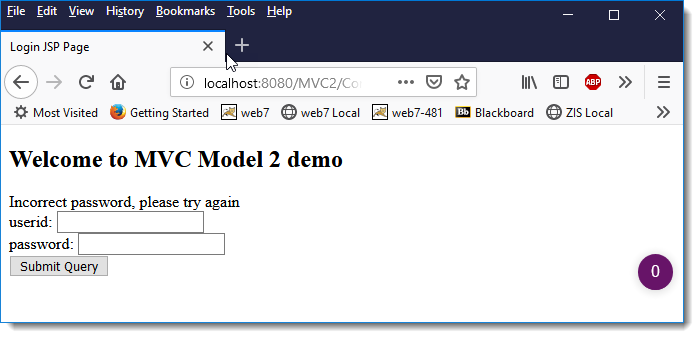
You are back to the login.jsp page with the error message. If you put in the correct password, you get this instead...

Now, everything looks good right? Not exactly. We've arrived at the correct functionality, but we have a problem...anybody know what it is. I'll give you a hint, it has to do with the URL that appears in the browser above.
How would we fix this? Actually, it is pretty simple. Remember how "GET" forms encode everything in the URL? What was the difference between GET and POST...oh yeah, POST didn't encode the form info in the URL, so in the case of sending passwords, you would use POST instead of GET!
Summary
So, we have a very simple MVC Model 2 example. You can imagine that for a large application, the complexity of the Controller Servlet can get quite large and potentially difficult to maintain. That is why Web Application Frameworks like Struts and JSF were created to try to simplify the creation and maintenance of the controller Servlet.