
Servlets
Installing and configuring Tomcat web server
Once, a few semesters ago, we used Netbeans and it bundled Tomcat, but now we have to do a bit more installation of software to play with Servlets and such.

Go to https://tomcat.apache.org/ to download the Tomcat server. The following is from the Tomcat web page:
The Apache Tomcat® software is an open source implementation of the Java Servlet, JavaServer Pages, Java Expression Language and Java WebSocket technologies. The Java Servlet, JavaServer Pages, Java Expression Language and Java WebSocket specifications are developed under the Java Community Process.
The Apache Tomcat software is developed in an open and participatory environment and released under the Apache License version 2. The Apache Tomcat project is intended to be a collaboration of the best-of-breed developers from around the world. We invite you to participate in this open development project.
Apache Tomcat software powers numerous large-scale, mission-critical web applications across a diverse range of industries and organizations. Some of these users and their stories are listed on the PoweredBy wiki page.
Apache Tomcat, Tomcat, Apache, the Apache feather, and the Apache Tomcat project logo are trademarks of the Apache Software Foundation.
While you will often see Tomcat paired with Apache, Tomcat has no problem running as a stand-alone web server all by itself, in fact, that is what powers the web7 and web1 web servers. The nice thing about Tomcat is that not only will it serve up HTML pages, but it is quite easy to upload web applications and have then run from Tomcat.
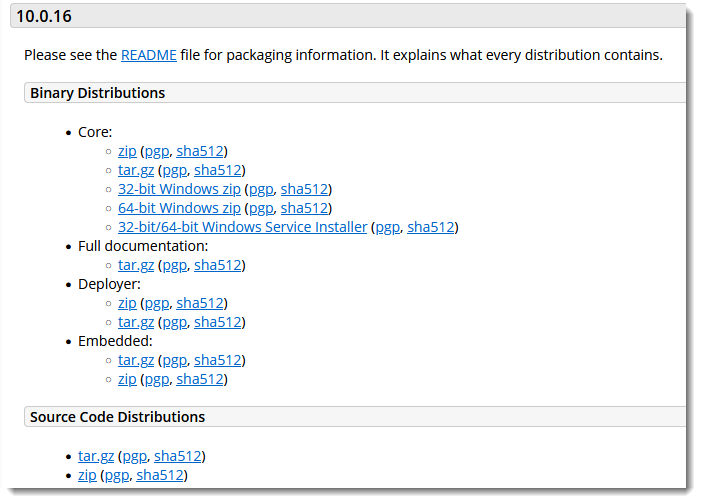
We will actually be using the 10.0.x release of Tomcat for this class. Click on the Download link and download the "Core" distribution for your Operating System. This will be the zip or tar.gz for Linux and Mac and the Windows zip for Windows platforms. It is your choice if you want to install this as a service, but considering this is just for the class, I'd stick with the non-Service options:
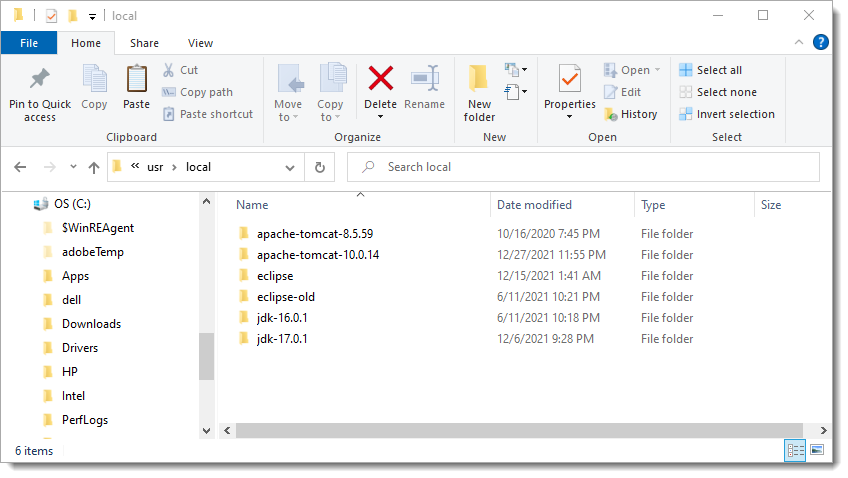
You can put the apache-tomcat release wherever you want, but once again, I placed it in good old "/usr/local"
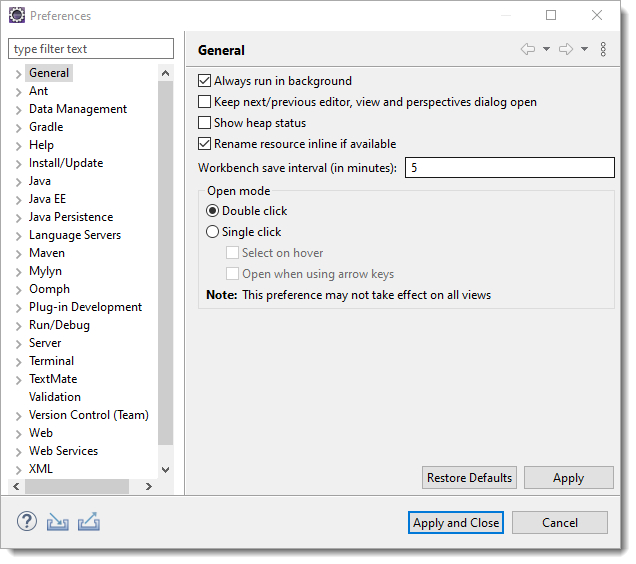
Now open up the Eclipse application, and then selecte the Window->Preferences menu item to bring up the Preferences window:
Next Click on Server->Runtime Environment
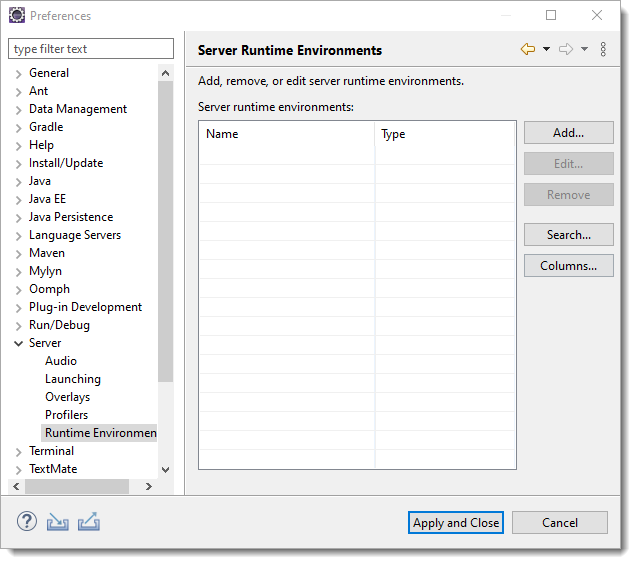
Click on the Add... button to bring up the New Server window
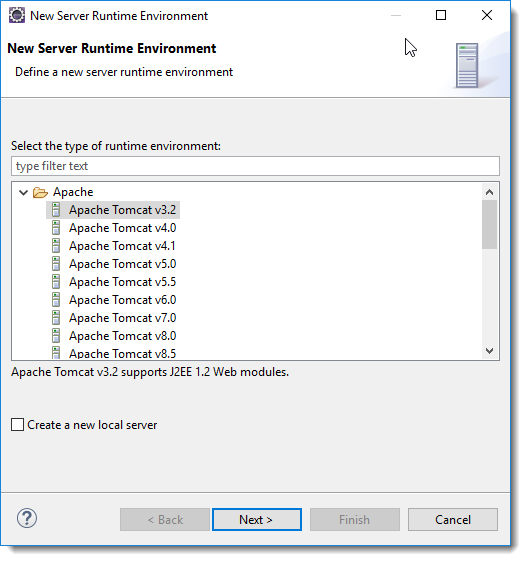
Click on Apache Tomcat v10.0 ...
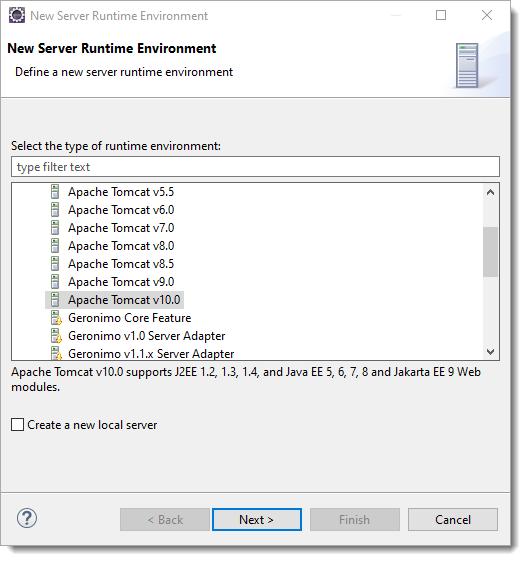
Then click on Next>
Select where you installed apache-tomcat. You can use the Workbench default JRE.
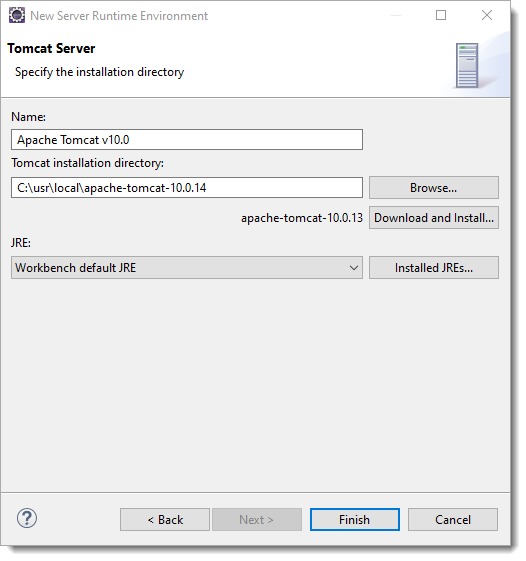
And click on Finish!
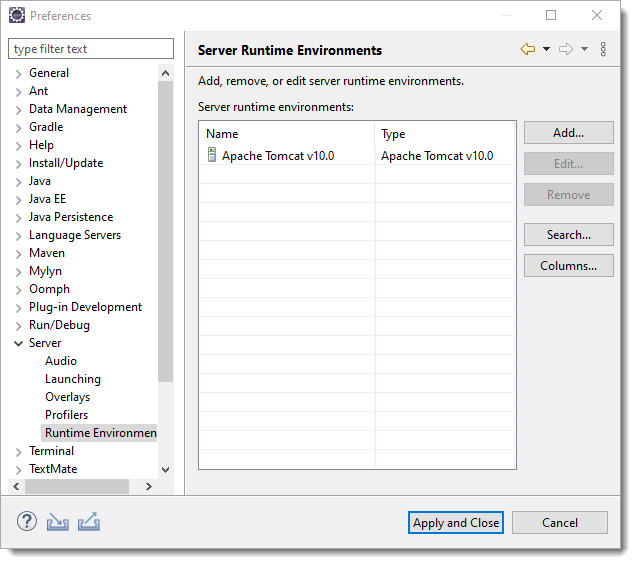
Click on Apply and Close and you are done.
Dynamic vs. Static pages
We've seen how to develop HTML pages with static content, that is, content that in no way changes based on user input. Static text, pictures, documents are all examples.
Early on, people wanted to have their web pages "react" to input from the users (other than just following more static links). Some clever people figured out how to use the forms we've just covered, coupled with programs running on the server to provide dynamic web pages. Now, when users entered data into a form, or the form received some type of update from an independent source, they received custom generated HTML pages based on their input (such as Google, Amazon, eBay, etc...).
In this case, the web page uses information from the user and then references a database or other server-side resource to create new "dynamic" HTML.
What do Servlets do?
Servlets were Java's first way of communicating with web pages. Until servlets arrived, the normal way of interacting with web pages and forms was to use CGI scripts. CGI was notoriously buggy and prone to being exploited with things like buffer overflow attacks that allowed malicious users to break into web servers. It is very rare to see CGI scripts used today.
Sun wanted to come up with a safe, efficient way to provide the same functionality that CGI scripts were providing, which was to:
- Read explicit data sent by a client
- form data
- request headers
- Generate some type of output based on the received input.
- HTML pages
- Status codes
- Response Headers
Servlets are just Java classes that run on the web server. They have access to all of the resources on the server and run within Servlet containers. The Servlet container is able to initialize Servlets as necessary and deliver requests to the Servlet as they arrive.
Servlets have a number of advantages over the initial CGI designs
- Efficient: They use threads instead of OS processes and may offer persistence.
- Convenient: Lots of high-level utilities
- Powerful: Sharing data, pooling persistence
- Portable: Run on virtually all operating systems and servers
- Secure: No shell escapes, no buffer overflows, uses built-in security
- Scalable: Component based
The fact that Servlet's operate within a single JVM and use threads, rather than spawning a new process each time it is called, is a tremendous performance improvement in both speed and memory usage.
What do you need to run Servlets?
As mentioned above, Servlets need to run in a Servlet container. There are many different web containers offered, some are free, others are not. As of 2019, some of the main players are:
- Free Servlet/JSP containers
- Free for personal use, pay for commercial
It turns out that for learning Servlets, Tomcat is actually one of the easiest stand-alone servers. Unfortunately, NONE of the servers are great "class" servers, in that they are production servers, not learning vehicles. We are going to use Tomcat for all of our projects, but feel free to play around with the Glassfish server if you want.
If you downloaded the software the first week of class, you are all set.
Where do Servlets Live?
It turns out, the Servlet Specification states that a web application should live in the following structure. Let's say that we have a WebApplication that we'll call MyFirstServlet. There should a directory called MyFirstServlet. Within this directory you should place HTML files, JSP files, Images, etc... All of these can be nested in directories if desired. There is one other directory that should be located under the MyFirstServlet directory and that is a WEB-INF directory (yes, it should be in all caps).
The WEB-INF directory is special. The servlet container does not let users ever directly access anything found in the WEB-INF directory. That is, they couldn't ever type
https://www.foo.com/MyFirstServlet/classes/<classname>
to reference the Servlet there.
In Java EE 6 & 7, WEB-INF, in turn, should contain at least two directories, a classes and lib directory. The classes holds java classes, and the lib holds jar library files.
/MyFirstServlet

  index.html
  foo.gif
  WEB-INF/
    classes/
    lib/
In Jave EE 6 and 7, the web.xml file is now optional in the WEB-INF directory. Typically, the IDE won't make one, but if you want one, you can use one.
If you wanted to manually build the Servlet file structure and compile it by hand, you need to include the Servlet API Jar file (servlet-api.jar) into your classpath. Since we installed the Java EE version of Eclipse, we have that in our classpath already.
You could also semi-automate the process using ant scripts, which are very powerful, but probably outside the scope of this particular class. Ant is a Java "makefile" like utility that can do amazing things, but can be somewhat challenging to learn.
Another option is to use a modern IDE to organize your files into the proper structure. You can then upload the resulting war file to the application server manually or with the IDE.
For this class, I've decided to use Eclipse because it seems to do an excellent job of organizing your files for you. It's true that you should understand the structure, but odds-are, you'll probably be using a tool like Netbeans or Eclipse for web development, so it seems somewhat sadistic to drag you through detailed Ant scripts at this point.
The Servlet Life-Cycle
The life cycle of a Servlet is controlled by the servlet-container in which the Servlet has been deployed. When a HTTP request is mapped to a Servlet, the container performs the following steps.
- If an instance of the Servlet does not exists, the Web container
- Loads the Servlet class
- Creates an instance of the servlet class
- Initializes the Servlet instance by calling the init() method on the Servlet
- Invokes the service() method, passing the HttpServletRequest and the HttpServletResponse objects as parameters.
- service calls doGet() or doPost()
- When a servlet instance is removed, the destroy() method is called()
The init() and destroy method are called only once when a servlet instance is created for the first time and finally destroyed. Normally things like establishing database connections or initializations that apply across all calls of a Servlet are performed in the init() and destroy() methods.
The service() method is called every time a new request is processed. The service() method then calls doGet() or doPost() methods for the incoming requests. A new thread is executed for each call of a servlet and it's service() method. Servlets are inherently multi-threaded!
Note that it is the web-container that is calling these servlet life cycle methods.
Before we begin...
Okay, you've heard me complain about how configuration issues are the bane of web development existence. Well, here we go...
Let me set things up first. In previous semesters, we had stuck with the tried-and-true Tomcat 8.5 release. Now this is still supported, and is stable, but is older and starts to choke on some new features, particularly those used with ReST, JSON, AJAX, etc.
So, I decided to finally jump in and upgrade everything to the latest version of Tomcat, which is version 10.0.x. Sounds like a good plan, right?
I had already updated the previous modules, everything looks great, I get to this module and I notice that the annotations used in modern web apps, which used to appear when creating classes in Tomcat 8.5, aren't showing up in Eclipse when I build with Tomcat 10.
Oh fiddlestix (or use a more appropriate curse).
Well, the servlets still work...hmmm....oh, I find out that for some reason annotations aren't being used, but the older style of encoding things in a web.xml file in the WEB-INF directory is being used instead. So I start troubleshooting (yes, everybody has to do this it seems), and I notice that Eclipse wants to use v5.0 of the Dynamic Web Module by default. Now this basically tells the IDE what version of the Servlet API to use when building a project. You can use an older version (supposedly), but the newer versions have more features.
So, I decide to try v4.0 of the Dynamic Web Module when creating the project. Success! I find that the annotations are appearing on the Servlet classes...but wait...I'm seeing error icons all over the code, and the first ones are in the imports. And then I notice that instead of using the jakarta.servlet packages that are created with v5.0, it is using the older, pre-Tomcat-10 javax.servlet package names on the imports. Now with all of the licensing mess that Oracle has introduced, and the fact that Apache now controls the Java EE standard, they changed the package names in the latest Servlet API that Tomcat 10 uses.
Which leads to the lesser of evils choice. Do I teach the rest of the course with v5.0 or v4.0 of the Dynamic web module? Each has it's own issues. If I use v5.0, I use web.xml, if I use v4.0, I use annotations, but package imports are incorrect....
I finally decided that the lesser of the evils is to use v4.0, which still has us use Annotations (very good), but makes us manually fix the package import statements, (a pain, but still a minor issue). Now if in the future, you try the v5.0 module, and it works, then great! Everything I have still applies and you don't have to fix the package imports.
So, all that being said, let's take a look at our Servlet.
Your first Servlet
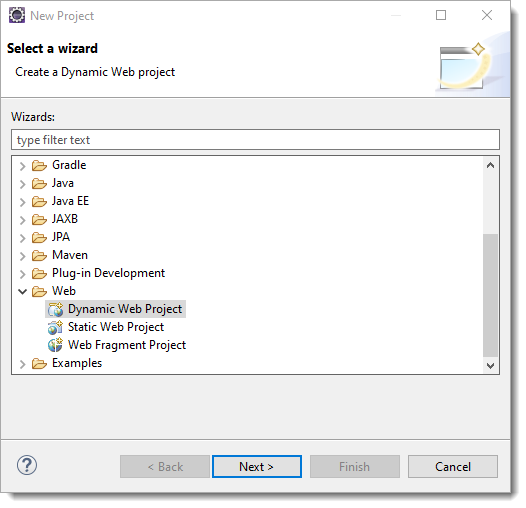
Open the Eclipse application, and click on "New->Project". This time, choose "Web" from the categories and then "Dynamic Web Project" from the Projects as shown blow. Click Next>
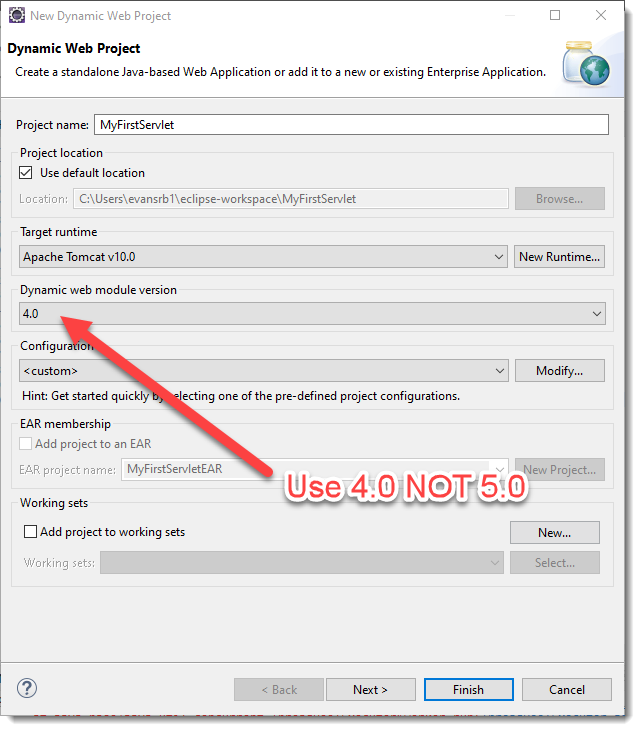
The following screen will appear. Type in your Project Name and then leave the other entries as the defaults. Please note that different versions of Tomcat support different versions of the Dynamic web module versions. It turns out that Tomcat 10 does not support version 5.0 of the Dynamic Web Module, so you MUST USE v4.0 for the Dynamic web module.
If you use v5.0, the web annotations will NOT be generated, and you will instead use the older web.xml format for defining the Servlets.
But, in the latest version of Eclipse and Tomcat, there is a Dynamic web module version of 6.0 which does indeed work, so the next screens apply for that buggy version.
Click Next>
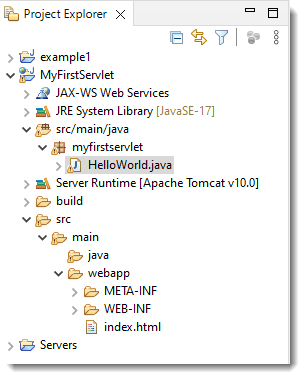
Click Finish. You should see the MyFirstServlet project appear in the Project Explorer Window. Go ahead and expand it so you can see the basic contents.
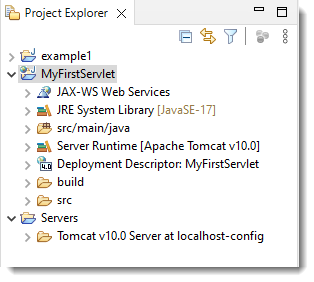
Note the the first line which states
Deployment Descriptor: MyFirstServlet
This defines the path where your servlet will be found on the web server by a client. We'll see how that works in a few more screens.
The Source Packages directory will contain the Java code for your applets (you'll see how in a moment). The other directories are there for holding test packages and other server resources.
If you open the Libraries package, you'll see that we are already using the JDK library and the Tomcat libraries.
Note, if you expand out the webapp directory, and the WEB-INF directory, you should only see a lib directory. If you see a web.xml file, you did not initialize the por

Okay, at this point we have a completely empty project. Let's make an initial web page as our first "Servlet" but it won't be really be dynamic yet.
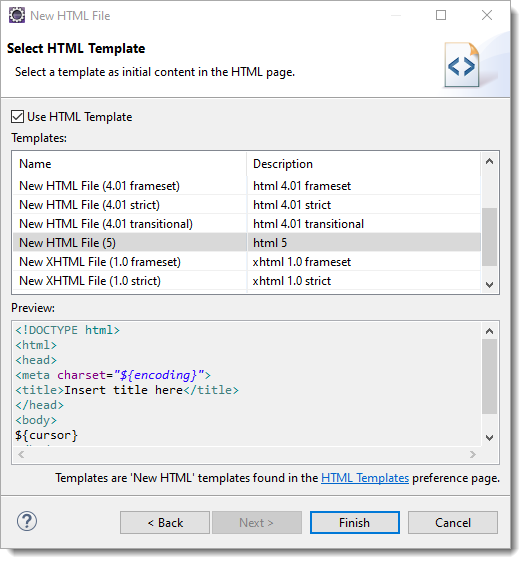
Right click on the project name, select New->HTML. You should see the following window appear

It turns out that if you click on Next>, you get the following window that shows you HTML selections. Use index.html for the file name (shown above). You should be able to use HTML 5, but it is possible to use older versions if you so wish.
Click on Finish to create the file.
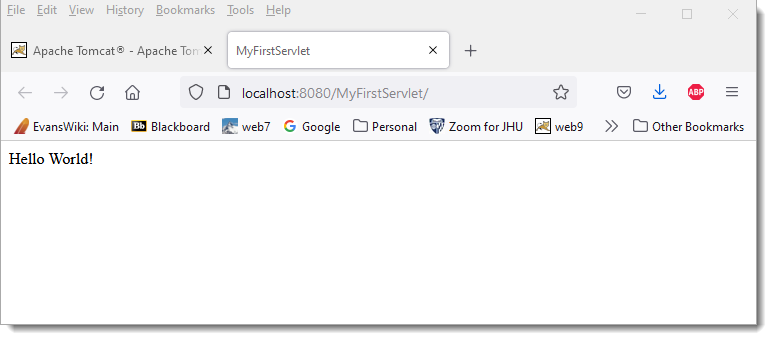
I've changed the <title> and added a quick Hello World! to the body
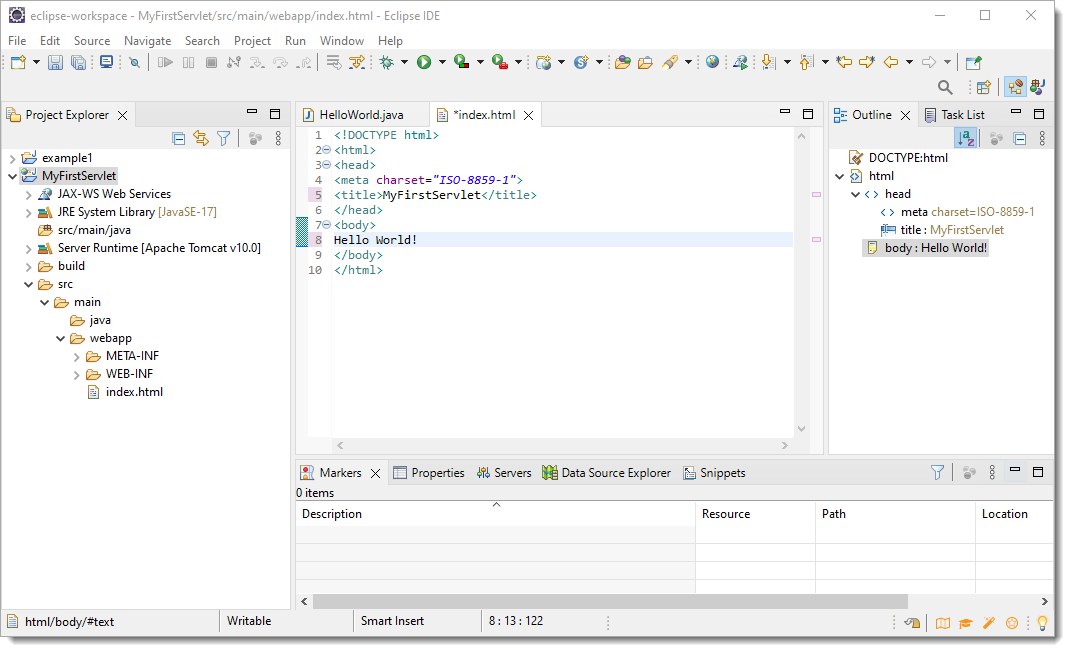
Again, we are using index.html as the file name, note that the webapp directory is selected for the location of this file (which is what we want)
Now, even though we've defined our Tomcat 10.x server, we need to still configure it in Eclipse. So, first go to the Server tab in the Eclipse project.

Now click on the "No serves are available. Click this link to create a new server..."
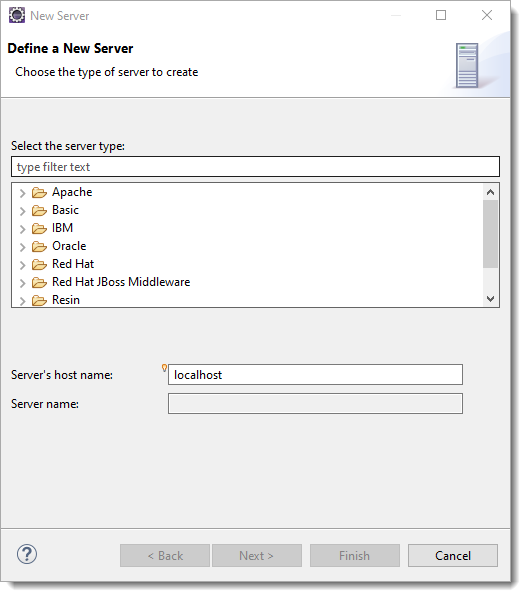
Select Apache->Tomcat v10.0 Server
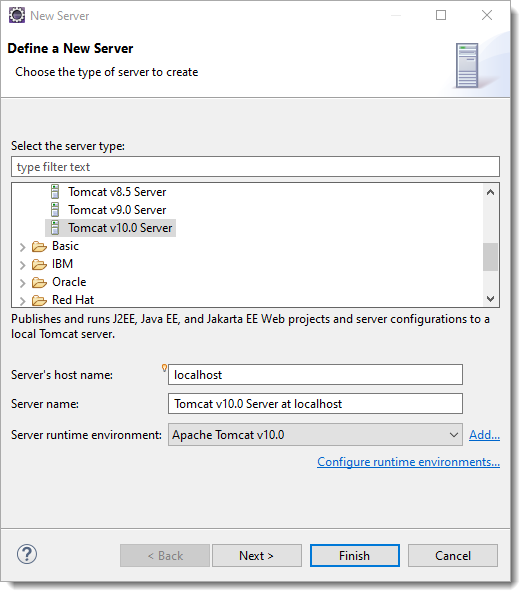
Click on Finish, you should now see the Tomcat server on localhost (your machine) in the server tab

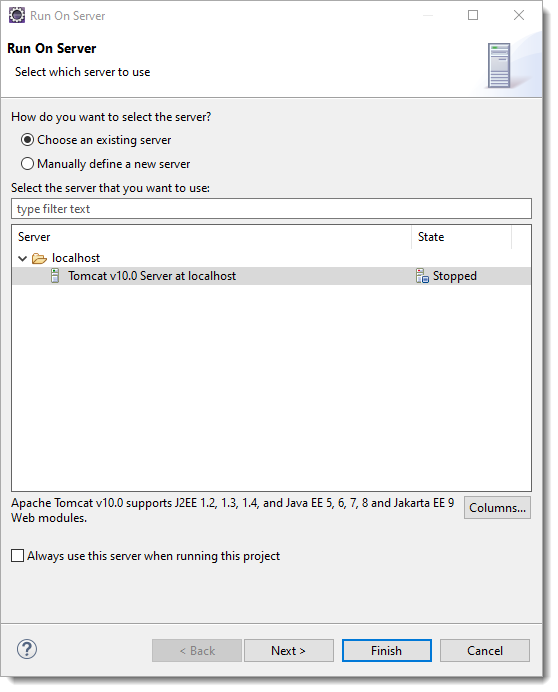
Just for grins, and to give you an idea what you environment is like, go to the upper left window and right-click on the MyFirstServlet project label, then select Run As->Run on Server from the menu.
Eclipse will:
- Compile your code
- Start the Tomcat server
- Deploy your code to the correct location on the server
- Start an internal web browser, pointing to your application that is now deployed on the server
It may ask you to select a server, just choose the Tomcat v10.0 server
On Windows, you may see a security prompt which you will have to authorize the JDK to access the machine network

At the end, you should see something like this in Pop up in your browser (it may also appear in Eclipse)

Note that it shows the title of the page in the tab, and the output in the main window.
The neat thing about this process, is that you don't have to run an Ant script in another window and configure the deployment to an external server.
A few notes about the advantages and disadvantages of using Eclipse
Advantages
- Easier than doing it "by hand"
- Let's you focus on your content
- Supports live debugging
- Minimizes bugs created by placing files in the wrong locations in the directory structure
Disadvantages
- Doesn't pound home the underlying process of
- File location
- Deployment to a server
- Debugging without an IDE
- Makes you "dependent" on an IDE instead of using VI/Emacs like real programmers use :-)
I made the decision that using Eclipse will let you focus more on the structure, and less on the mechanics of your first web applications.
You can stop the Servlet and Tomcat by looking at the bottom pane, clicking on the Console tab, and then clicking on the red square. That will shut things down.
That being said, let's go back to our "MyFirstServlet" application and make it more than just an HTML page...
Right click on the MyFirstServlet project label and then select New->Servlet. (NOT new Java Class!)
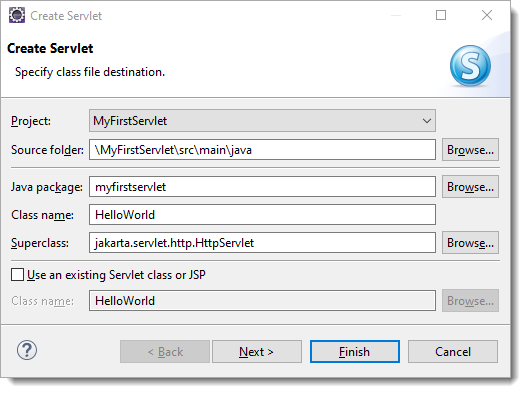
Type in HelloWorld for the class name and myfirstservlet for the package. Then click Next>.
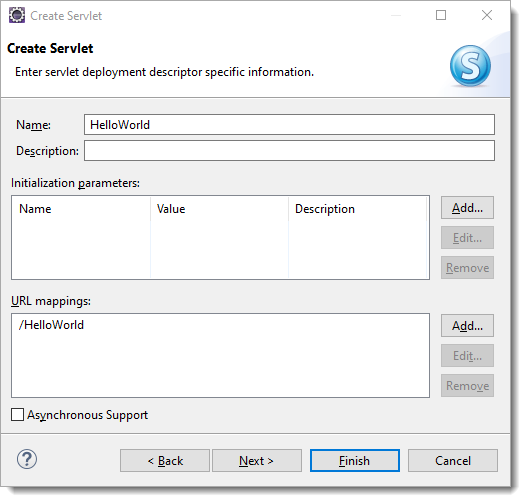
This window is used to configure web.xml in Java EE 5 configurations, or set annotations with Java EE 6/7. You can use the defaults, but pay attention to the values that are put in the fields. Note that you can select the checkbox that will build the optional web.xml file, but it is no longer required.
Now click on the Finish button.
Notice that Eclipse places the code in the Java Resources->src section of the project.
Location of new Java class file |
 |
At this point, Eclipse fills in a lot of the boilerplate code for your Servlet. You might consider just making a Java Class in the wizard instead of the Servlet, but it won't automatically link up the configuration pages you'll see in a few slides. One thing that should appear and if it doesn't you should add it is the @WebServlet annotation in front of the class name. The compiler will generate the necessary mapping to link the path you place in the @WebServlet annotation with the class you have defined.
Now, one thing to note, as of Tomcat 10, the Java EE classes are now in the jakarta.servlet package and this is a major change from earlier Tomcat versions. Now it would be great if your Servlet came up looking like what you see below, but it won't. Instead it will have some errors in it. Why? Because of a bug in Eclipse (which hopefully will be fixed soon). So, If you expand the "import" notes at the top of the file, you will see some javax.servlet packages that aren't found.
To fix things, (yes this is a bit of a pain), you need to change the javax.servlet to be jakarta.servlet (like you see below) and then everything will be good! If you don't see the @WeServlet annotation, you used v5.0 of the Dynamic Web Module Version in the first step. If you did, just delete this project and try again using v4.0 as shown above.
Unfortunately, until Eclipse gets this fixed in the next release, you will have to use 4.0 and make these changes to make your Dynamic Web Applications work. This applies to any future modules we cover.

When you use annotations like this, DO NOT use a web.xml file as it will only confuse the compiler!
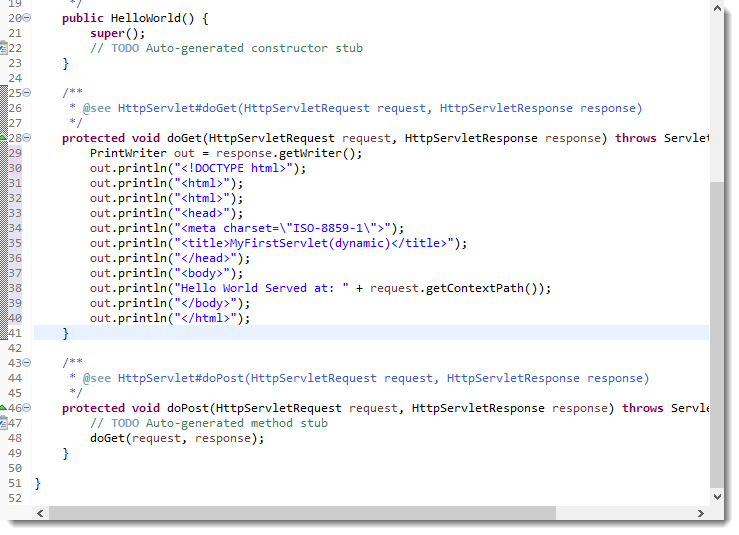
You'll also notice that Eclipse has the doPost() method just call the doGet() method. This is a routine design pattern, as both methods basically want to do the same thing, and it reduces duplicity in your code.
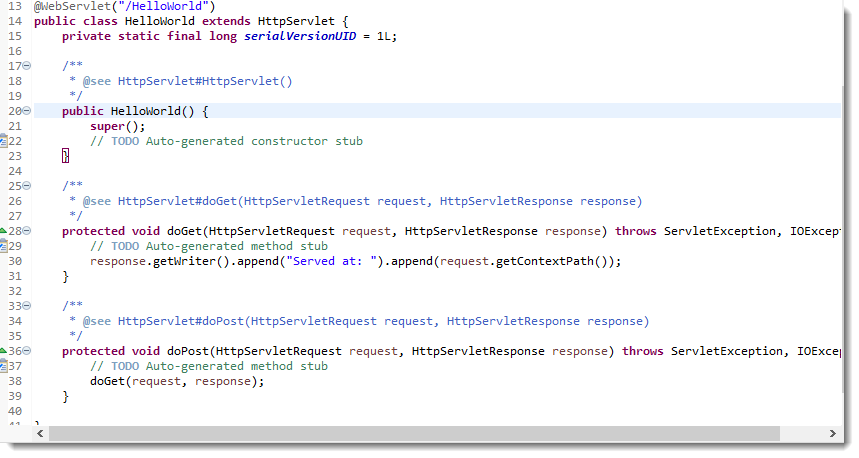
If you look at the small bit of code above, the "response.getWriter()" method gets an output stream than you can write to, which lets us output some dynamic HTML.
Okay, let's fire up Eclipse again, same thing, run the application on the server...you should see the same result, because it displays index.html by default
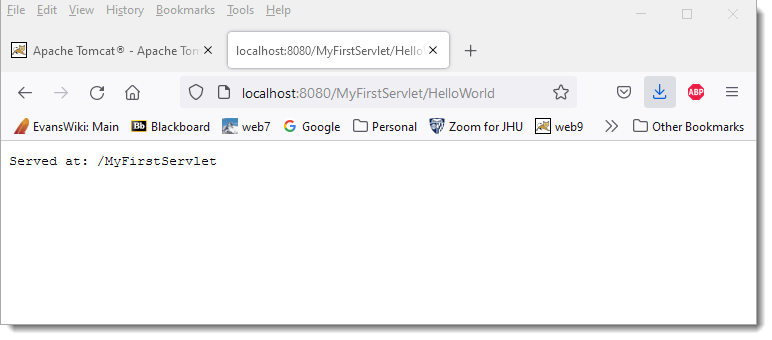
Ah, but this time, in the URL window, add the text HelloWorld (which is the context path for our Servlet) and then hit Enter.
Just to make things a bit more interesting, let's edit that HelloWorld.java file again to have it read like this.
Functional Servlet |
 |
If we run things again, and once again type the path HelloWorld at the end of the initial URL, we see the following:
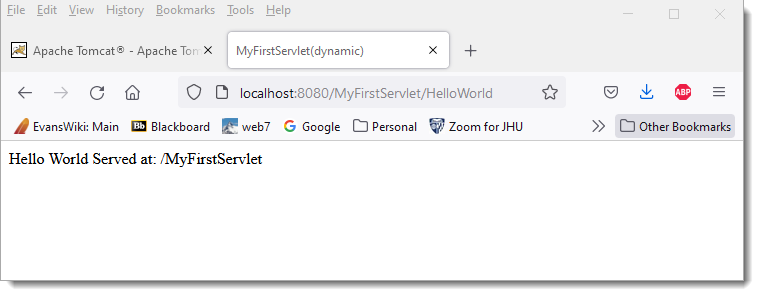
The HTML displayed is no longer from index.html, instead it is generated on the fly in the Servlet.
You can even right click in the main window and select View Source, which shows you the HTML that was sent to the browser:
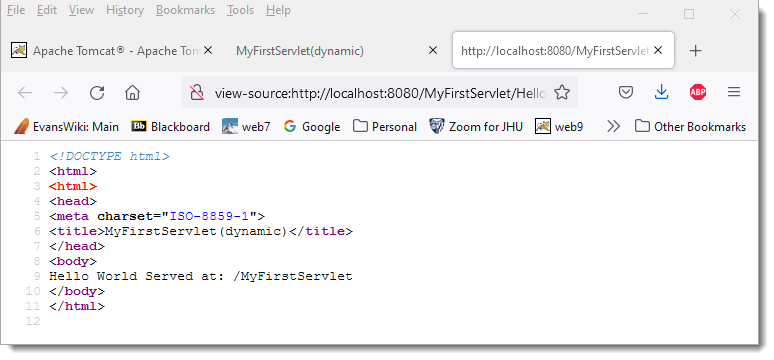
You may notice a slight delay when you first your Servlet, but not the second or third time. Any ideas why? Remember the Servlet life cycle? The first time it is loaded, the class had to be loaded and the init() method called. That is the extra delay that you see. In normal servers, this is inconsequential because a Servlet may be loaded once but executed hundreds of thousands of times.
To override or not to override...
An astute Object Oriented programmer might ask "Why do we override doGet? Why not override service() if it is always called first?" Actually, it is pretty simple. Service is called in a new thread by the server for each request. It in turn calls doGet() or doPost() and several other methods. If you overrode service(), you might no longer call the methods at the correct time, or at all....
The service() method also gives you automatic support for HEAD, OPTIONS and TRACE requests. A common technique is to have doPost() call doGet() so that however the information is sent to the browser, you will handle it the same.
public void doPost(HttpServletRequest request, HtpServletResponse response) {
    doGet(request, response);
}
Initializing Servlets
I mentioned earlier in the Servlet Life Cycle that when a Servlet class is first loaded, the init() method is called on the Servlet. It turns out that this is very commonly used in Servlets to initialize resources used by servlets, such as database connection pools.
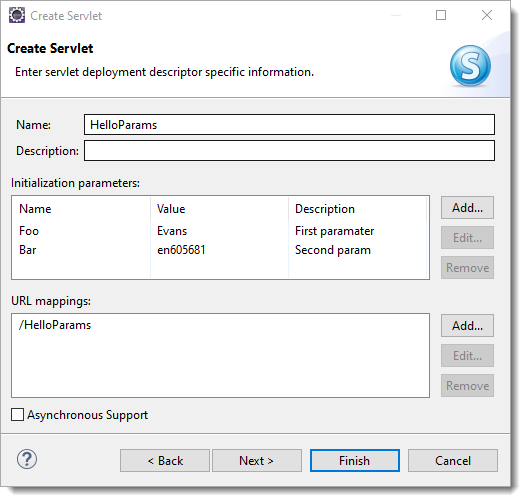
We've already shown how annotations are used to map Servlet names to URLs. It can do much more than that. One of the things possible is to set initialization parameters that the Servlet can use to build it's resources. Go ahead an make a new Servlet class in the MyFirstServlet project, we'll call this "HelloParams" In the window of making a new servlet if you click the Next-> Button, you get the following screen, you can add Initialization Parameters to a class directly. Notice I have added to parameters (Foo and Bar) to the HelloParams class below:
At this point, Eclipse will create the initialization parameters in the web.xml file. If you view the web.xml file you will see them there

Now this brings up an interesting design issue. It turns out if you place them here, you can change them in the servlet without having to recompile your classes, but it tends to disconnect them from the class they are being used with. Another option is to delete the init-params and use web annotations

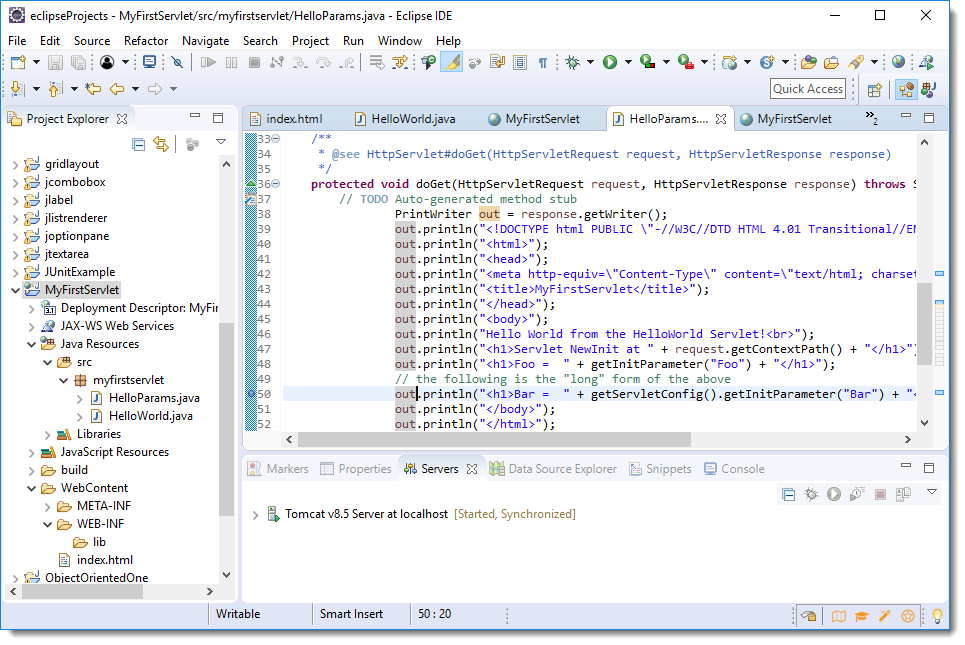
To access the initialization parameters, you use getInitParameter("Foo") to get the value of the init parameter in the doGet() method
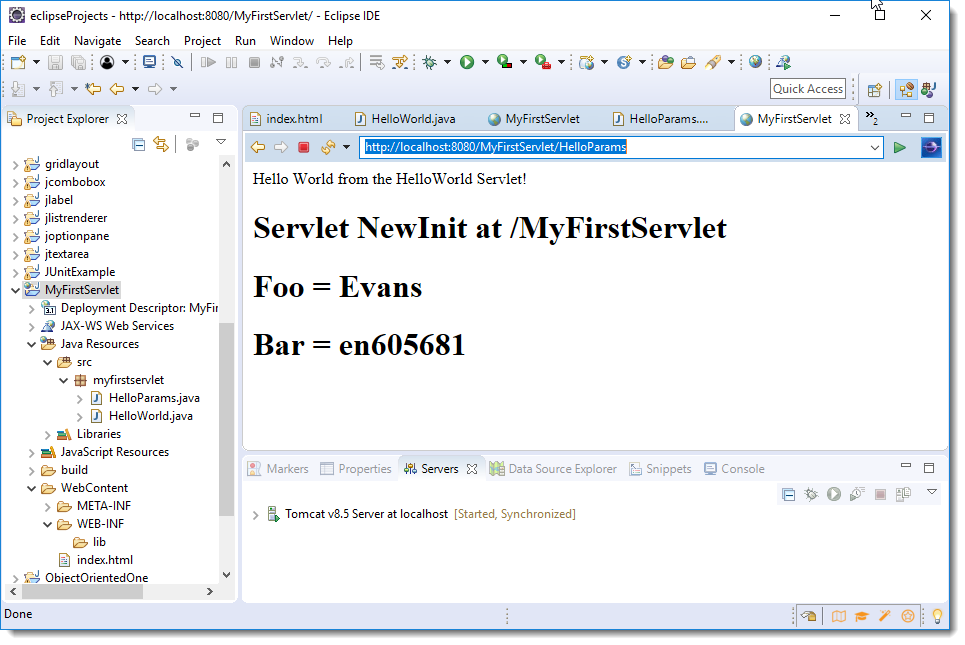
Run the application again, this time, add on HelloParams instead of HelloWorld to the URL, you should see the following.
Debugging Servlets
Unlike applications, Servlets run in the web container and can be a little harder to debug.
- If you are coding by hand, you can use print statements in the code and try to run the server on the desktop.
- Use a java.util.logging.Logger object
- Use an IDE that supports an integrated debugger
The first option really isn't very practical and can often take more time than it is worth. Since Servlets depend on things like contexts and requests, it's harder to have stand-alone applications to test.
If you wan to use a Logger the first thing to understand is that the default configuration of a Logger is to include a ConsoleHandler (which prints log messages to the console). This default logger will only print messages with a greater level than INFO. There are several "severities" of logging, that depending on your logger configuration may or may not be sent to the logger output.
The Java API on Logging states that "The Level class defines a set of standard logging levels that can be used to control logging output. The logging Level objects are ordered and are specified by ordered integers. Enabling logging at a given level also enables logging at all higher levels.
Clients should normally use the predefined Level constants such as Level.SEVERE.
The levels in descending order are:
- SEVERE (highest value)
- WARNING
- INFO
- CONFIG
- FINE
- FINER
- FINEST (lowest value)
To use a default logger, the following code can be used: First define a logger for a class. The <package.class name> is a label that should be set up to match the package and class name that the Logger is being used with:
private static Logger logger = Logger.getLogger(<package.class name>);
then later in your code, all you need to do is have:
logger.log(Level.WARNING, "This is your message");
or
logger.warning("This is your message");
And the message will be sent to the console.
You can reconfigure a logger to log to a file as well. Once the Logger object is created, you can make a FileHandler object that is added to the logger.
private static Logger logger = Logger.getLogger(<package.class name>);
private static FileHandler fileoutput = new FileHandler("logger.log");
then later in your code, before you use the logger, you can have
logger.addHandler(fileoutput);
logger.setLevel(Level.ALL); // or whatever level you want to log
And all output will be sent to the file specified in the FileHandler. Sending logging output to a file is particularly useful when dealing with running Servlets.
Debugging with Eclipse
Take a look back at our last servlet. One of the huge benefits that Eclipse (or Netbeans, or another quality IDE) provides is the ability to debug Servlet code just like it was a standalone application. With modern IDEs, you can set breakpoints in a class and run in debug mode. The application will stop at your breakpoint and you can inspect local variables and watch execution of your code in a step-by-step fashion.
Open the HelloMessage class and right click on the first line in the processRequest() method. Select "Toggle Breakpoint". Your screen should look something like this, with the breakpoint in shown with a small blue circle to the left of the line.
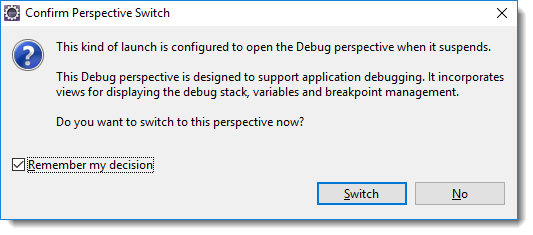
If you right click on the project name, you can select Debug As->Debug on Server instead of Run.
Now remember, you set the breakpoint in the HelloParams file, so you need to execute that Servlet, when you do, you should see
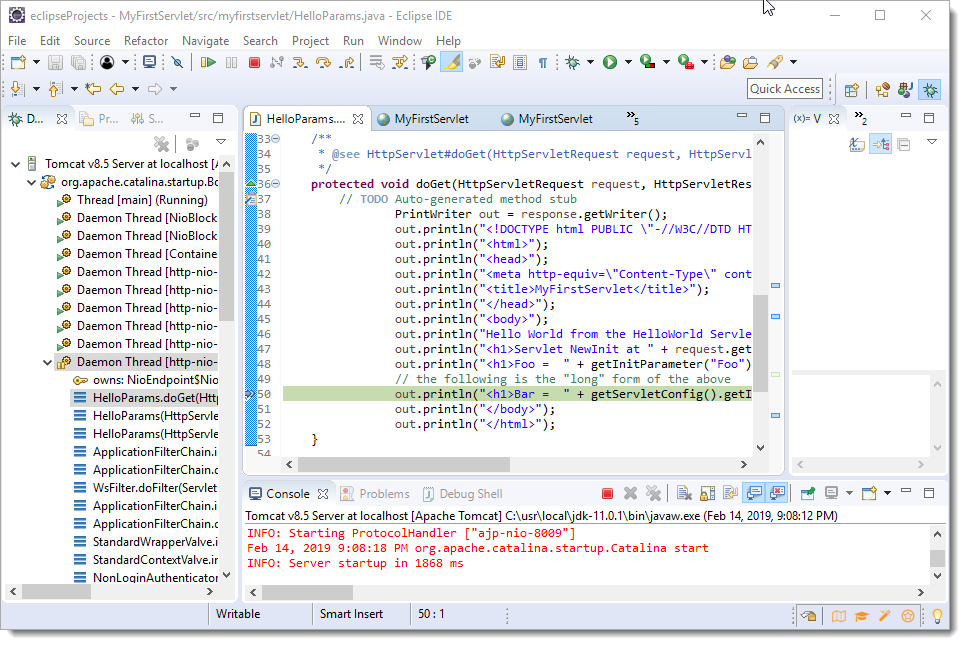
The Tomcat Server will shutdown and restart in Debug mode. Your servlet will load into the server, but then stop executing at the breakpoint. You may see the Hello World message from the index.jsp page, but enter the URL HelloParams added. If you look at Eclipse,you will notice that the line where the breakpoint is located is now highlighted in green, with a green arrow next to it. This indicates that execution of the Servlet has stopped and is at this point.
 l
l
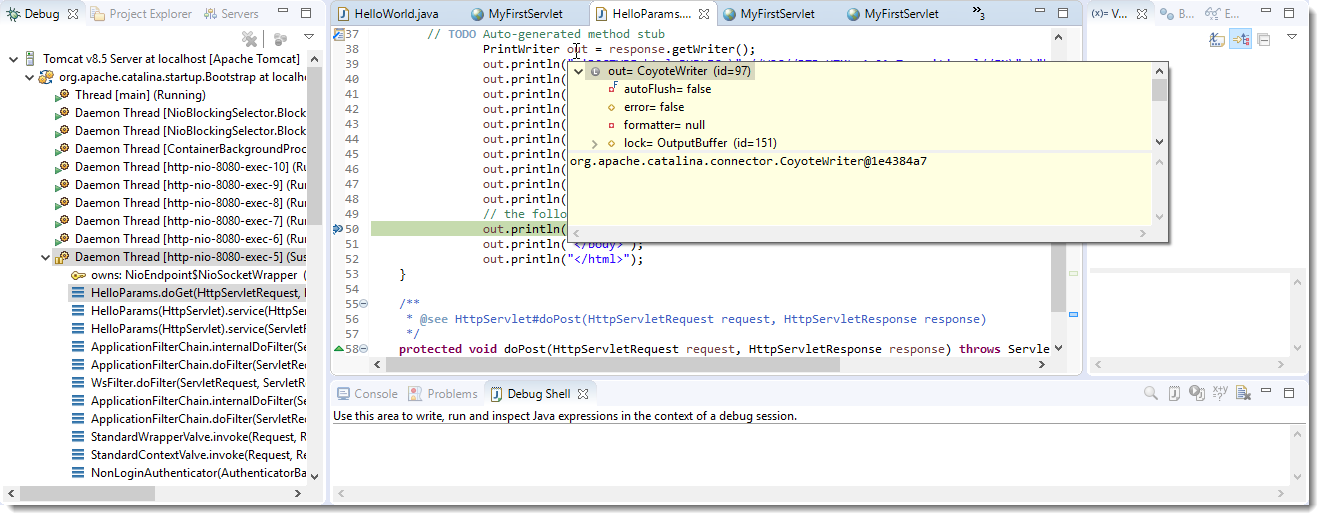
At this point you can use your mouse to hover over values to see their current contents. If we hover over "out":
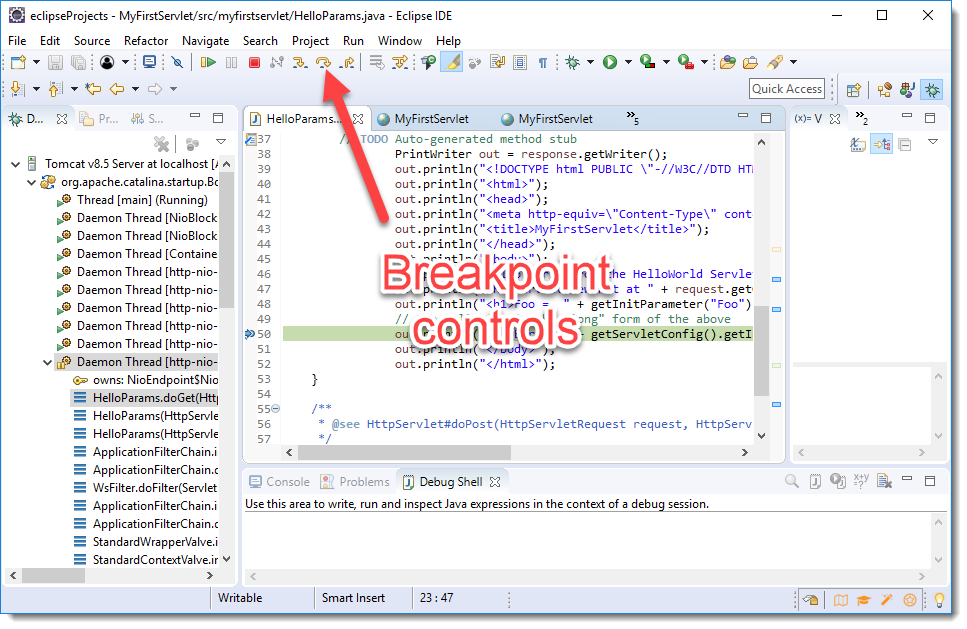
You can then step though code line by line, or control the flow with the breakpoint controls near the top of the Window
This ability to debug live Servlets is a great advantage over the Logging method, it is similar to the advantage of using System.out.println() calls in an application to using an integrated debugger in the application.