
Using Eclipse with Maven
Recommended Reading
- Apache Maven Project documentation
- Baeldung Apache Maven Tutorial
- Jenkov Maven Tutorial
- Technology Conversations - Java Build Tools: Ant vs Maven vs Gradle
- Using Maven within the Eclipse IDE - Tutorial
Using Eclipse with Maven
In newer versions of Eclipse, it looks like this may be pre-installed. But...Okay, we've seen a lot of CLI Maven interfaces...heck we even got to use Emacs to look at some of the source files, but what if you want to use Maven in Eclipse? Well turns out the M2Eclipse project gives us a nice Eclipse plugin to do so.
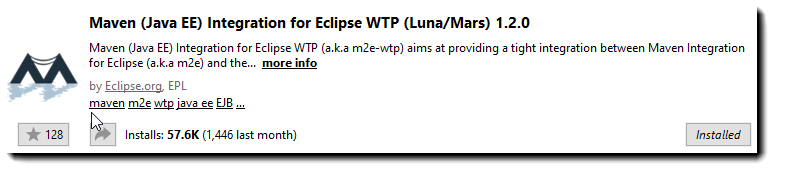
This plugin manages the plugin dependencies and manages the classpath settings within the IDE. Turns out, there is even a POM editor that you can use. Just go to the Eclipse Marketplace under the Help menu in eclipse and download the plugin:
Once you have this installed, you can create your first Maven project in Eclipse by going to the File->New->Maven
Choose Maven Project, then click Next>
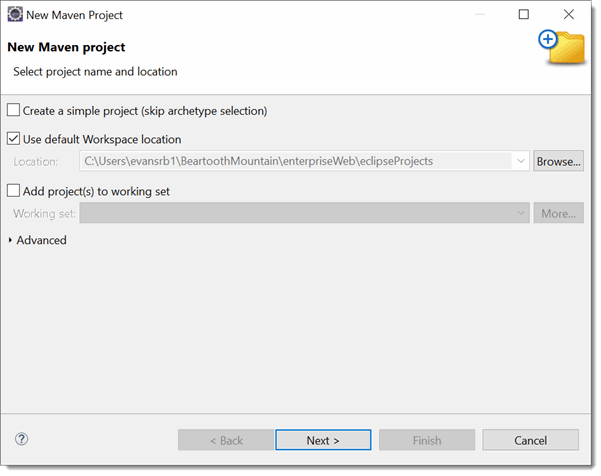
Do NOT select the "Create a simple project" option at this time. Click next and you get a window with some archetypes available. Look! there is the good old quickstart that we just used!
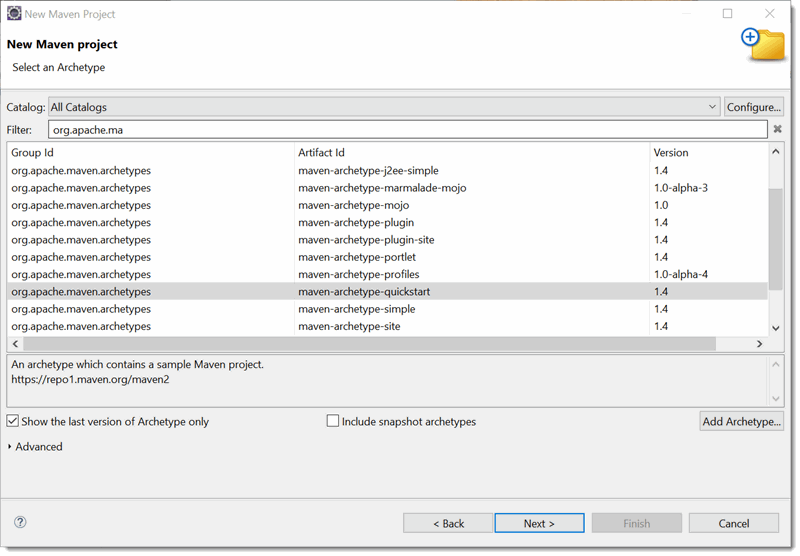
Select quickstart and then click on Next>
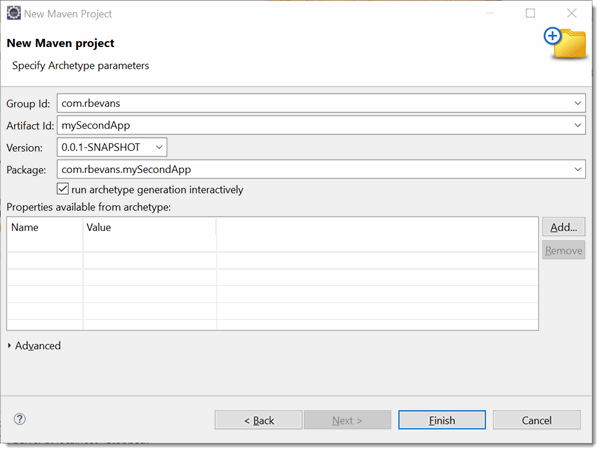
Okay, at this point, you should see a dialog with some familiar attributes. As you fill in the first two, the Package field will fill in with a correct package name
Clicking Finish builds the Eclipse project...NOTE! This initial build may seem to take a LONG time as the Maven libraries are downloaded. Take a look at the bottom right of your Eclipse window to check on progress, you won't see it anywhere else.
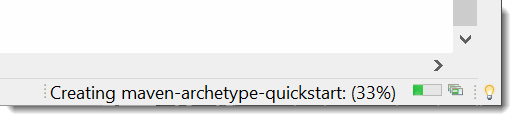
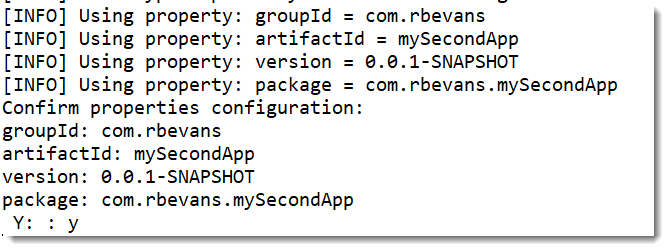
Ah ha! But if you see it stop at 33%, you have come across a "wonderful" feature. If you look in the Console Window at the bottom right, you will see some text that starts with "Confirm properties configuration", followed by several lines then a "Y : :"
This is actually a prompt to continue with the project creation, you need to type a "y" and then hit the Enter button to complete the creation of the project, otherwise it will just sit there!!!
Now lets take a look at the project
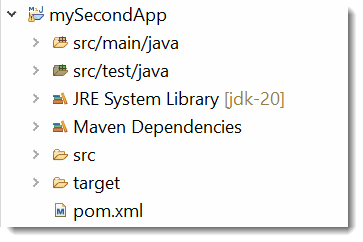
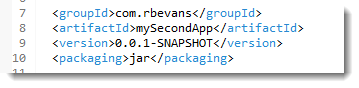
And if we take a look at the POM file created, we see one, but it is a bit more simple than the CLI version, but still has most of the CLI version.
One interesting thing that Eclipse offers, is that there is a tab that shows the "Effective POM", which we talked about earlier.
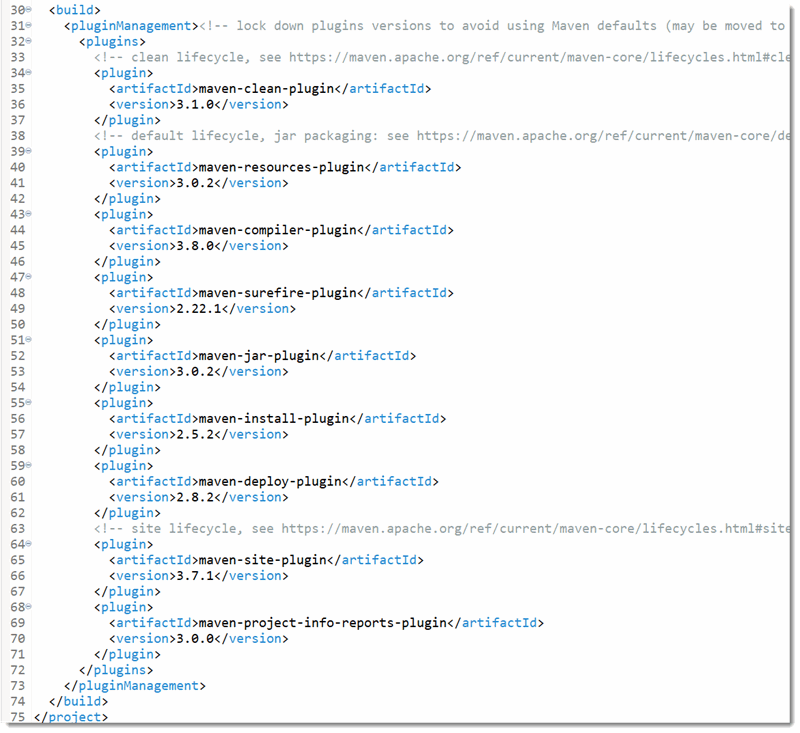
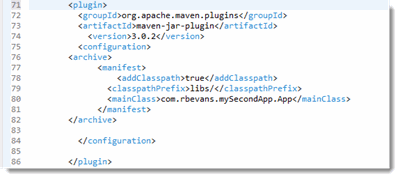
Okay, we have a working POM file at this point from myFirstApp, lets just grab the assembly plugin that built the runnable JAR and place it in the POM. I grabbed all of the <build> attributes, and inserted them into the file. You can see the maven assembly-plugin section, note that I had to rename the mainClass entry to match the packaging that Eclipse generated.
Okay. Final Step, lets build this thing! Turns out you can just go up to the Project menu and build it there, instead right click on the mySecondApp project, and then select Run As.
You should see this menu come up, click on the Maven Build choice

Now, here is how this plugin works, at this point you get a window that comes up where you can type what "goals" you want to accomplish with the "Maven build" command. Now you could just have chosen "Maven Clean", and the choose "Maven Install" which will clean and build your project. But we can just type in "clean install" in the Goals
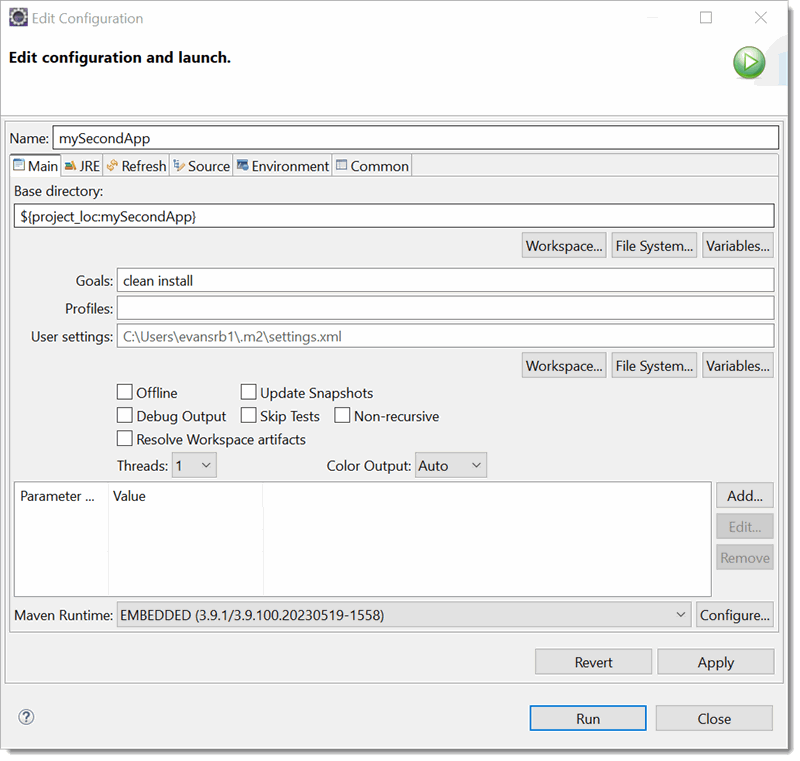
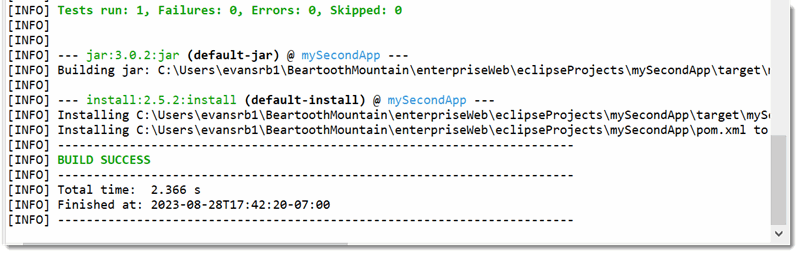
After you select the Maven build option, you should see the project being built in the lower Eclipse window. The first time you run it, you may see more repository "action" but it should end with something like this. Note, you may get an error about version 7 not being supported. If so, just change the maven.compiler.source/target values in the POM to 1.8
Now, you will need to modify the pom.xml file to put in the following two changes
AND
Now, for your last step, go to a command window and try running the JAR file.

So, on the plus side, you keep your IDE environment and can still use Maven, on the minus side, it is a plugin and may not be updated as quickly as the "raw" Maven CLI release. Maven is basically a CLI based tool, and it is up to you to determine how to integrate it with your development environment.