
Maven
Recommended Reading
- Apache Maven Project documentation
- Baeldung Apache Maven Tutorial
- Jenkov Maven Tutorial
- Technology Conversations - Java Build Tools: Ant vs Maven vs Gradle
Build Tools Overview
Simple desktop applications that consist of a few java source files can be manually assembled, compiled and executed with nothing more than a text editor and a few commands entered in a console. It is rare, however, that applications being developed will be so simple in structure and have a straightforward build process.
Consider, for example, even a simple Java Enterprise Web Application. It will be comprised of compiled java classes, other externally designed and acquired java libraries in the form of .jar files, client side files comprised of HTML, CSS, JavaScript as well as other resources (e.g., jpeg, gif, png images) and additional resources for both display and for configuration of the application (usually xml or json files). As we will learn later in the class, to deploy a Java web application (or a .war file) it must satisfy the following structure:
WebApplication
client side files (html, css, javascript)
/WEB_INF
web.xml
/classes
compiled java code (class files)
/lib
java libraries (jar files)
The process of development through deployment for an application like this will typically involve several steps including:
- Creating the web application structure (e.g., directories)
- Finding and acquiring any external libraries (jar files) that the project is dependent on
- Compiling all source code
- Copying the dependent libraries to the WEB_INF/lib directory
- Copying the compiled java files into the WEB_INF/classes directory
- Copying all the client web files (html, images, css, etc) into the application
- Editing and moving the configuration file (web.xml) to the WEB_INF directory
- Deploying the final structure to a web application server for execution
Repeating this process from build through deployment repeatedly during application development or trying to repeat it across several developers in a project is not only inefficient, but also prone to errors and inconsistencies.
Much of the process involved in building and deploying web applications can be automated through Integrated Development Environments like Eclipse, Intellij IDEA, Netbeans, etc. However, the reliance upon IDEs for building and deploying also brings the dependence on the IDEs for development. As a result the IDE becomes a part of the project that must be used by all developers despite personal preferences.
Build tools provide developers with a means of automating most of the steps necessary in the development through deployment process and establishing that automation through templates shared across development teams. Essentially, build tools allow all developers across projects the ability to run a command on the project shared template to construct, deploy, produce documentation and more with regard to the application. All without impacting each developer`s choice of IDE (or editor) used for the actual development of code and configuration.
In summary, most build tools accommodate some, if not all of the following tasks involved in building and deploying software:
-
- Automate the "daily drudge work" with software
- Handle simple individual tasks like creating directories, compiling code, etc.
-
- Manage dependencies
- Facilitate the identification and downloading of external dependencies (aka jar files) including specified versions.
-
- Provide local and remote repositories for software
- External libraries can be acquired from established remote repositories on the INTERNET and downloaded to local repositories for faster future access or access in network disconnected environments.
-
- Support Multi-module projects
- Provide a framework for projects to be segmented into build components that may or may not be dependent upon each other. Facilitates operations on a subset of modules in the project.
-
- Create and publish build "artifacts"
- Ability to generate executable components in many common Java and Enterprise Java forms (.jar, .war, .ear). Can deploy those artifacts for execution or publish them back to build repositories to make them available to other projects and developers.
-
- Expendable and configurable to provide "out of the box" capability
- Several build tools provide 3rd party plugins or permit developers to build their own to incorporate specialized build tasks not included in the original software
-
- A necessary precursor for project integration with other Continuous Integration (CI) Tools
- Build automation just one step in a CI environment which essentially is a framework that kicks off building and testing in response to specific times or actions (code merges).
A Brief History of Popular Build Tools and Java Development
The first build tool was released in 1977 on Unix systems. It was essentially a way to set up shell script templates that perform repeated operations like compilation, library linking, etc. It was designed to support repeated build operations for projects using C and assembly language code. Like most things Unix, it was extremely powerful, but not necessarily designed for a "novice" user. Initially, Make was only good for repeating the individual tasks necessary for building software and creating executable artifacts. For many years it was the only choice for build tools and is still in use in many places today.
When Java was introduced in 1996, it was initially used for desktop applications or web based applets that had simple structure and were easily assembled and executed with command line arguments. However with the introduction of Java in the Enterprise a few years later (1999) the build process became more complex and cumbersome. As a result of that evolution, and the need for something more than Make a new tool called Ant was introduced in 2000. Ant uses xml templates to provide automation for basic operations like directory creation, file copying, java compiling, etc. It does not support dependency management or incorporate overall build lifecycle management like some of the tools that will follow. It is, however, a bit easier to master than other more complex and recent tools and is often a first choice for "newbies" getting acquainted with Java build tools. IN 2004 a dependency management tool called Ivy was first introduced to complement Ant and provide a more complete build capability.
One of today's most popular and powerful Java build tools, Maven, was first introduced in 2002. As will we detail later in this lecture, it was intended to be a "complete" build tool incorporating every build tool capability discussed earlier including library repositories, dependency management, extensibility, multi-module projects, etc. Like Ant, Maven is based on xml templates called Project Object Modules (POM files). Unlike Ant, Maven is not task oriented. Maven is build on predefined "lifecycles" that perform typical build tasks without a user having to define them (though they may configure them). The operations that Maven executes are based on the selection of lifecycle phases and goals to execute within each phase. There are also many preexisting templates (archetypes) available for developers to generate projects specific to their needs (aka, web application projects, enterprise application projects). Maven is also extensible through available 3rd party plugins that modify and extend the lifecycle steps. Much more detail will be provided about Maven in the remaining sections of the lecture.
In 2012 an alternative to Maven was released for complex Java builds. It is called Gradle. Instead of using XML as its build language, it has its own based on the syntax of the Groovy Programming Language. Like Maven, it utilizes plugins for executing build tasks, but unlike Maven does not provide much basic functionality without the use of plugins. Additionally, while Maven uses lifecycles for phases and goals, Gradle uses acyclic graphs to determine what tasks to run based on the input and output requirements of each. Gradle also provides dependency management, but in a more straightforward way than Maven.
Of the three primary Java build tools, Gradle is currently the most exciting in terms of potential as it has a much smaller learning curve than Maven and offers more opportunity for extended capability through its plugin framework. Despite that potential and the "buzz" that surrounds it, Maven currently has the highest market share of Java developers and projects at roughly 45 percent; and trending upward. Given that popularity, it makes sense to use that as our entre to educate about Java build tools.
Maven Overview
As stated in the introduction, Maven was released in 2002. Though written in Java, it can manage projects using a variety of languages and tools including C#, Ruby, Scala, JavaScript. Maven can be used on its own through the command line, however it is nicely coupled with most major IDEs (Eclipse, IntelliJ IDEA, Netbeans and more). Maven utilizes built in life cycles comprise of phases and goals (or tasks) that are individual activities that occur within each phase of a lifecycle.
Common phases in a many Maven build lifecycles include:
- validate the correctness of the projects
- check dependencies needed by project and acquire from local or remote repositories
- compile the project source code into binary artifacts (aka Java class files)
- test the code by executing included unit tests
- package the compiled code, libraries and resources into an archive file (Java .jar, .war, .ear)
- verify that the packaged project is valid
- integration-test end-to-end activities on the packaged application
- install the built project into its deployment environment (web container, etc)
- deploy any project artifact to a remote server or repository for sharing with other projects
As the default Maven capabilities are typically insufficient for more complex projects, 3rd party plugins are publicly available for enhancing or adding goals to the lifecycle phases. Executing a Maven build involves execution with a specified phase of the lifecycle. Maven will then execute all phases in the lifecycle through the requested one. So the command "
mvn package
will run through the validate, dependency checking, compilation, unit test and package phases to generate a project artifact.
Download and Install Maven
Okay, as we wander through Maven, we are going to actually look through two paths, the first will be a Command Line Interface or CLI solution, and the second will be Eclipse. It turns out that in many of the follow on courses, the CLI solution is used, so I'll present it here first, then move to the Eclipse plugin.
It turns out, a lot of the CLI install will look familiar, as it is how you need to install the latest version of Java...you need to modify Environment variables and modify the system path.
Prerequisites:
- Java installed
- JAVA_HOME is set
These should already be done when you installed Java earlier in the class.
The next step is to go to the Apache website and download Maven.
This is the main site, and installation instructions can be found there.
So, first go to the "Download" menu at the right. Look for the appropriate file to use (.zip or .tar.gz) and download the file. As with other installs, this does not have an "installer", instead you just place it where you want it and then set any necessary Environmental variables or paths to let you system know where to find it.
Now go back to the menu at the left of the web page above and select "Use". This will expand like this
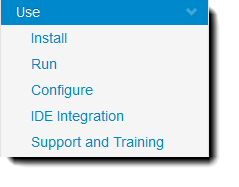
If you click on Install, you can see the install instructions. Basically, you just need to set the PATH variable to include the bin directory in your installed Maven library.
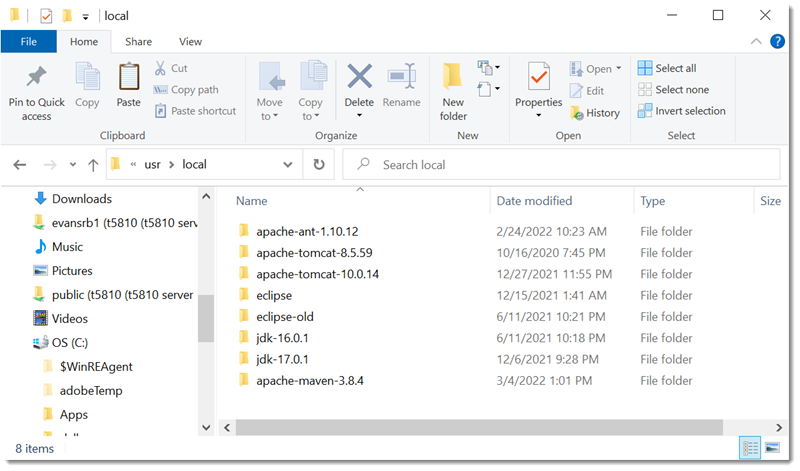
I expanded my download into my \usr\local directory
Next step is to once again set your Environmental variables and Path setting (see the Java Getting Started section for a refresher on this).
So, adding the Maven path to the Environmental Variables and System Path...


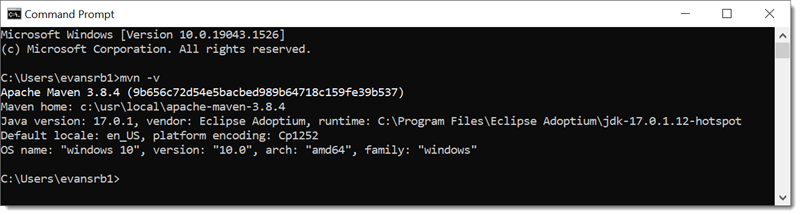
Once done, you can check your creating a new command window and typing "mvn -v" at the command prompt.
Maven on the MAC
Okay, I can't take credit for this one, as I don't have a MAC, but one of my students, BOYUE XU, did post this the first time we covered this module, so for you MAC users, hopefully this will help.
Here is a guide that I find for Mac OS, you could use Homebrew which is a open source package manager to install Maven. I attach those down below.
Install Maven with Homebrew
Perhaps the easiest way to install Maven on your Mac OS machine is to use Homebrew. Homebrew is a free and open-source software package management system that simplifies the installation of software on Apple’s macOS operating system and Linux.
If for some reason you do not have Homebrew installed on your Mac machine, you can quickly install Homebrew by running the following command:
/usr/bin/ruby -e "$(curl -fsSL https://raw.githubusercontent.com/Homebrew/install/master/install)"To install Maven with Homebrew, open terminal window on your Mac OS and type the following command: brew install maven
If all is good you should maven downloading to your computer:
== > Downloading https ://www.apache.org/dyn/closer.cgi?path=maven/maven-3/3.3.9/binaries/apache-maven-3.3.9-bin.tar.gz
== > Best Mirror http ://apache.mirror.globo.tech/maven/maven-3/3.3.9/binaries/apache-maven-3.3.9-bin.tar.gz
######################################################################## 100.0%
/usr/local/Cellar/maven/ 3 . 3.9 : 94 files, 9.6 M, built in 7 seconds
Once the download is complete, verify the installation by running the following command:
mvn -vThis will print the current version of maven install on your computer, together with some additional details.
Maven pom.xml
A Maven Project Object Model (POM) file is an XML file that describes the resources of your project. These are top level elements for project description as well as properties/dependencies/build sections
The POM file describes WHAT to build NOT HOW to build it. You describe how to build it in the Maven maven phases and goals though you can insert custom goals into build phase if needed. A POM file basically describes a project, and is oh so surprisingly named pom.xml. It is associated with your project by being in the root directory of your project, so it defines you project not by its file name, but by its location and contents.
It is possible to also define sub-projects, each with its own pom.xml file. If you use sub-projects, you can build each sub-project independently, or you can use the top level project to build everything all at once. This at least gives you the flexibility to decide what you want to build.
Let's start with the most basic of POM files, and work from there.
<project xmlns="https://maven.apache.org/POM/4.0.0"
         xmlns:xsi="https://www.w3.org/2001/XMLSchema-instance"
         xsi:schemaLocation="https://maven.apache.org/POM/4.0.0
              https://maven.apache.org/xsd/maven-4.0.0.xsd">
   <modelVersion>4.0.0</modelVersion>
   <groupId>com.rbevans</groupId>
   <artifactId>my-first-maven</artifactId>
   <version>1.0.0</version>
</project>
Okay,next step is to take a look at each line above and figure out what is going on.
- The <project> line references the XML namespace definitions used in this document. Key to note is the first entry, which ends with POM/4.0.0, which defines version 4.0.0 of Maven which corresponds to Maven version 2 and 3.
- The <modelVersion> line should match the xmlns POM version, in this case 4.0.o
- The <groupId> line allows you to define a unique ID for an organization (sort of like a Java package name). In fact, you typically use the root package of your Java code as a groupId, so in this case I use the com.rbevans package root name. The groupId doesn't need to be a Java package, but if it is, the project will be located in the Maven repository under the same directory structure. For example, com.rbevans will be located in <directory path of Maven repository>/com/rbevans.
- <artificatId> is the name of the project. This is used as a subdirectory of the groupId used in the Maven Project defined above. This will also be used as part of the name of the resulting JAR or WAR file that is created when building your project.
- The <versionId> line contains the version number of the project.
So, given the pom.xml file above, if I were to create a JAR file, the resulting JAR would be placed in the following file
<directory path of Maven repository>/com/rbevans/my-first-maven/1.0.0/my-first-maven-1.0.0.jar
If your project uses default Maven directory structure, and you have no external dependencies, then this file should be enough to build your project.
Standard Maven Directory Structure
The standard Maven directory structure is as follows
/src
  /main
    /java
    /resources
    /webapp
  /test
    /java
    /resources
/target
So, "src" above is somewhat self explanatory, this is where the source code for your project lives. The "main" directory contains the functional code, while the "test" directory contains test source code. The "java" directory contains your basic java source code, while the "resources" directory contains other resources your app needs to be built (like external jar files)
The "webapp" directory contains code for a Java Web Application. This turns out to be the root directory of the web application you build, so you would find things like WEB-INF here.
The "target" directory is created by Maven, and contains
- Compiled Java Classes
- JAR or WAR Files produced by Maven
Dependencies
Typically, you will not be writing stand-alone apps, so you will have dependencies (typically bundled in their own JAR files or libraries). These files need to be in a Java CLASSPATH in order to compile the project. One issue (with advantages and disadvantages) is that once you decide to use an external library/JAR, under most tools it isn't updated when a new release comes out. What this means is that a large project may contain several old, non-updated libraries, which may contain bugs or worse, security issues. The larger the project, the more that this is an issue. Another issue is that the JAR you need may also depend on more JARS, which need to be manually included in the project.
Turns out the people that built Maven decided to come up with a solution for this. Maven has a build-in dependency management. This lets you specify in your POM which libraries your project needs, and which version. If any of these libraries need other libraries, Maven will also download them and put them in your local Maven repository. Maven will not automatically update your library version, as that is specified in the POM file.
So, if we want to add a dependency section to the POM file, you include it after the "version" line.
<project xmlns="https://maven.apache.org/POM/4.0.0"
         xmlns:xsi="https://www.w3.org/2001/XMLSchema-instance"
         xsi:schemaLocation="https://maven.apache.org/POM/4.0.0
              https://maven.apache.org/xsd/maven-4.0.0.xsd">
   <modelVersion>4.0.0</modelVersion>
   <groupId>com.rbevans</groupId>
   <artifactId>my-first-maven</artifactId>
   <version>1.0.0</version>

   <dependencies>
     <dependency>
       <groupID>junit</groupId>
       <artifactId>junit</artifactId>
       <version>5.6.0</version>
       <scope>test</scope>
     </dependency>

     <dependency>
       <groupID>com.jhuep.someJar</groupId>
       <artifactId>someJar</artifactId>
       <version>1.2.3</version>
     </dependency>
   </dependencies>

     <build>
     </build>
</project>
So, each "dependency" element in the "dependencies" section describes an external dependency. Each element has descriptors similar in function to the original POM descriptors.
What is important is where Maven gets these dependencies. It doesn't get them from anywhere, it downloads them from a central Maven repository and then they are cached in you local Maven repository. Once they have been cached locally, future builds will just use the local copies. It turns out that not *everything* is available in the central Maven repository, so you always have the option to download the library yourself and put it into your local Maven repository. The key here is to use the same directory structure that was shown with the initial example...use the groupId, artificatId, and version to build the appropriate path. So, for the second entry "someJar", we would load the jar file into
<directory path of Maven repository>/com/jhuep/somejar/1.2.3
External Dependencies
An external dependency is something that is not located in your local Maven repository, but somewhere else on your hard disk (like in the lib directory of a webapp). "External" means that it is not in a Maven Repository. You define an external dependency by adding a "systemPath" attribute.
<project xmlns="https://maven.apache.org/POM/4.0.0"
         xmlns:xsi="https://www.w3.org/2001/XMLSchema-instance"
         xsi:schemaLocation="https://maven.apache.org/POM/4.0.0
              https://maven.apache.org/xsd/maven-4.0.0.xsd">
   <modelVersion>4.0.0</modelVersion>
   <groupId>com.rbevans</groupId>
   <artifactId>my-first-maven</artifactId>
   <version>1.0.0</version>

   <dependencies>
     <dependency>
       <groupID>junit</groupId>
       <artifactId>junit</artifactId>
       <version>5.6.0</version>
       <scope>test</scope>
     </dependency>

     <dependency>
       <groupID>com.jhuep.someJar</groupId>
       <artifactId>someJar</artifactId>
       <version>1.2.3</version>
     </dependency>

     <dependency>
       <groupID>externalDep</groupId>
       <artifactId>externalDep</artifactId>
       <version>3.1</version>
       <systemPath>${project.basedir}\war\WEB-INF\lib\mydependency.jar</systemPath>
     </dependency>
   </dependencies>

     <build>
     </build>
</project>
The ${project.basedir} expression points to the directory where the POM is located.
Snapshot Dependencies
Shanpshot dependencies are libraries that are under development. Instead of constantly updating version numbers, you can "depend" on a SNAPSHOT version of the project. These are always downloaded (or kept) in your local repository or project space. They are always updated even if a cached copy exists in the Local Repository ensuring you have the latest copy.
You label your project as a SNAPSHOT version by simpling appending -SNAPSHOT to the version number when configuring dependencies.
<dependency>
   <groupId>com.rbevans</groupId>
   <artifactId>snapshot-example</artifactId>
   <version>1.0-SNAPSHOT</version>
 </dependency>
Maven Repositories
There are three types of Maven repositories
Local Repository - This is the current set of dependencies that your project uses. They may have been downloaded from the following two repository types, or you may have manually inserted your own entry. This repository is actually used by all of your projects, so there is no duplication of data. Since your own project lives in this repository, it can be used as a dependency for other projects you may create. Maven will put the local repository in your "user" home directory unless you tell it otherwise.
You can specify a different location for your local repository by making an entry in your home directory, by going to the .m2 directory (remember, in *nix this will be hidden) and editing a settings.xml file. Here is an example of specifying a different location
<settings>
  <localRepository>
    c:\Users\Public\mavenRepo
  </localRepository>
</settings>
Central Repository - This is a repository provided by the Maven community. This is the default location for any dependencies listed in your project. Everyone has access to this repository and no special permissions are needed.
Remote Repository - This is a repository hosted by a web server at another location. This is often used by a company to host standard project for company-wide access. Like a Central Repository, any dependencies found in a Remote Repository are downloaded to your Local Repository. You define Remote Repositories in your POM file by adding them after the "dependencies" section: Here is an example of specifying a different location
<project xmlns="https://maven.apache.org/POM/4.0.0"
         xmlns:xsi="https://www.w3.org/2001/XMLSchema-instance"
         xsi:schemaLocation="https://maven.apache.org/POM/4.0.0
              https://maven.apache.org/xsd/maven-4.0.0.xsd">
   <modelVersion>4.0.0</modelVersion>
   <groupId>com.rbevans</groupId>
   <artifactId>my-first-maven</artifactId>
   <version>1.0.0</version>

   <dependencies>
     <dependency>
       <groupID>junit</groupId>
       <artifactId>junit</artifactId>
       <version>5.6.0</version>
       <scope>test</scope>
     </dependency>

     <dependency>
       <groupID>com.jhuep.someJar</groupId>
       <artifactId>someJar</artifactId>
       <version>1.2.3</version>
     </dependency>

     <dependency>
       <groupID>externalDep</groupId>
       <artifactId>externalDep</artifactId>
       <version>3.1</version>
       <systemPath>${basedir}\war\WEB-INF\lib\mydependency.jar</systemPath>
     </dependency>
   </dependencies>

   <repositories>
     <repository>
       <id>com.rbevans</id>
       <url>https://maven.rbevans.com/maven2/lib</url>
     </repository>
   </repositories>

     <build>
     </build>
</project>
Properties
Value placeholders that are accessible from anywhere in pom.xml or poms of sub-modules. This allows a single point of change, changing a dependency version in one place vice throughout project poms
To define property:
<properties>
    <spring.version>4.3.5.REL:EASE</spring.version>
</properties>
To access the property within a POM file, just wrap the property name in ${...}:
<dependency>
    <groupId>org.springframework</groupId>
    <artifactId>spring-core</artifactId>
    <version>${spring.version}</version>
</dependency>
Maven already has several defined properties, we've already seen the ${project.basedir} property. You can look at the Apache documentation to see the other properties available.
Building a Project
You probably have noticed the "build" elements in some of the above examples. Build is where specific plugins (build functionality) is incorporated along with specific build meta information:
Maven uses a life cycle when building projects. So, the build cycle is actually composed of several build phases, and each phase contains build goals.
Maven already has three build-in build cycles, these are
- default
- clean
- site
Each of these handles a different set of actions when building a project, and each is independent of the others. The "default" build cycle handles the normal routines of compiling and packaging a Maven project. For those of your familiar with "make", the clean build cycle accomplishes the same task, removing temporary files created during the default build cycle. The "site" build cycle is used to create documentation for your project, up to creating a complete website that uses your project.
Every maven build follows a specified lifecycle where steps in the lifecycle are called phases. Important phases include:
- validate - checks the correctness of the projects check dependencies needed by project and acquire them
- compile - compiles the provided source code into binary artifacts
- test - executes unit tests
- package - packages compiled code into an archive file (jar, war)
- integration-test - executes additional tests, which require the packaging
- verify - checks if the package is valid
- install - installs the package file into the local Maven repository
- deploy -deploys the package file to a remote server or repository for sharing with other projects
To execute a specific phase of the build, pass its name to the "mvn" command
    mvn <phase-name> (e.g. maven package)

    mvn phase1 phase2 . . . . . to run multiple phases

    mvn phase:goal to run a specific goal within a phase
If a build phase is requested, all build phases prior to it in the pre-defined sequence of phases are executed as well.
<build>
  <defaultGoal>install</defaultGoal>
  <directory>${basedir}/target</directory>
  <finalName>${artifactId}-${version}</finalName>
  <filters>
    <filter>filters/filter1.properties</filter>
  </filters>
  //...
</build>
Super POMs
In addition to these individual POM files, there is the notion of inheritance within a project hierarchy. Maven POM files inherit from a Super POM file, or if no Super POM is defined, from the base project POM. You can specify which POM a POM inherits from, that way a change in a higher level POM will propagate downwards through the projects.
You define a Super POM by using the 'parent' attribute as follows in your POM file
<project xmlns="https://maven.apache.org/POM/4.0.0"
         xmlns:xsi="https://www.w3.org/2001/XMLSchema-instance"
         xsi:schemaLocation="https://maven.apache.org/POM/4.0.0
              https://maven.apache.org/xsd/maven-4.0.0.xsd">
   <modelVersion>4.0.0</modelVersion>
   <parent>
       <groupId>com.beartooth</groupId>
       <artifactId>parentDef</artifactId>
       <version>1.0</version>
       <relativePath>../parent-path</relativePath>
    </parent>
    <artifactId>my-first-maven</artifactId>
    <version>1.0.0</version>
</project>
The sub-project POMs will use this definition, unless the choose to override a specific attribute.
It turns out you can view what the "Effective POM" is, which is the resulting POM after all inheritance is done. You can see that by typing the command
mvn help:effective-pom
Which will write out the actual POM that the project will use.
Maven Build Plugins
So, we've already seen some plugins (the lifecycle options). According to Apache, Maven is basically a plugin execution framework. So there are a lot of tasks already built in to Maven that you can use.
In this case, I'm not going to copy over the large table of plugins, but you can view it at https://maven.apache.org/plugins
Build uses maven plugins which are also available in specified repositories (and can be downloaded to the local repo). The remote repos are distinct from others that contain general libraries.
Every Plugin is a collection of one or more goals (A goal is a unit of work in Maven) goals are attached to a life cycle phase
Plugin functionality is broken into goals which are executed in specific phases of the build. So each phase becomes a sequence of goals executed from designated plugins (plugins add "extra" goals into a build phase beyond standard Maven build phases and goals)
Maven plugins enable you to add your own actions to the build process, just specify the goal and what lifecycle it should run in:
<plugin>
  <groupId>com.rbevans.foo</groupId>
  <artifactId>rbevans-plugin</artifactId>
  <version>1.0</version>
 <executions>
   <execution>
     <phase>verify</phase>
     <goals>
       <goal>checklinks</goal>
     </goals>
   </execution>
 </executions>
</plugin>
Creating Maven Projects
There are actually two ways to create Maven Projects. The first is to use something called "Maven Archetypes", which are basically templates that help you quickly define the correct directory and POM structure for a project. It turns out there are a LOT of archetypes available (~1300), so it is rare that you need to create a project manually.
For example, some common Archetypes would be:
| Archetype ArtifactIds | Description |
|---|---|
| maven-archetype-archetype | Create sample project |
| maven-archetype-quickstart | Java App |
| maven-archetype-j2ee-simple | Simplified sample J2EE app |
| maven-archetype-webapp | Sample Maven Webapp project |
So, we will use the "maven-archetype-quickstart" archetype to create a project that will support the classic "Hello World" java application. The archetypeArtifactId is basically a template with directories and files already populated, you give the version of this template with the archetypeVersion value, the the "quickstart" version 1.4 below will create an App.java class that prints out HelloWorld. This lets a company define templates, and versions of those templates that help developers standardize their architecture.
You can do so by executing the following command:
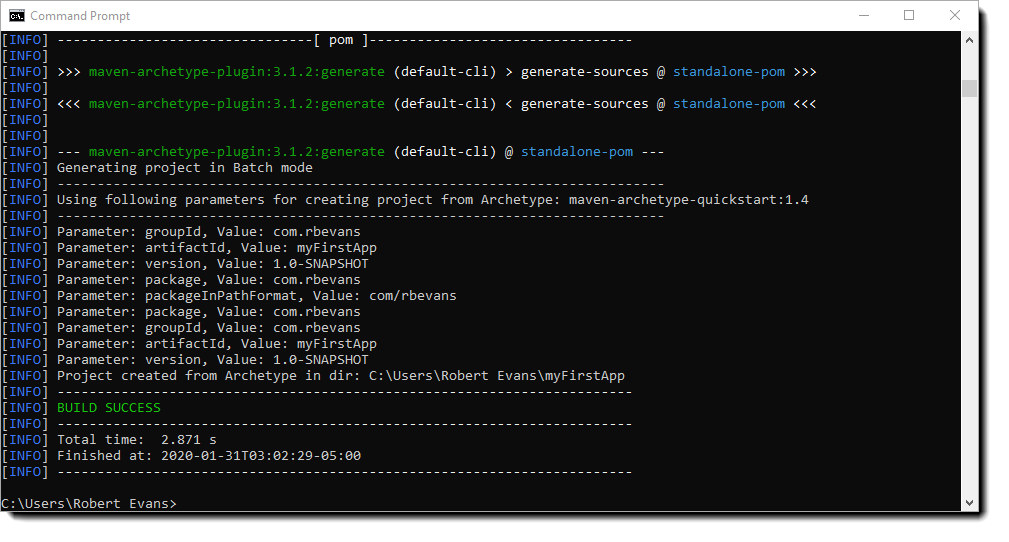
mvn archetype:generate -DgroupId=com.rbevans -DartifactId=myFirstApp -DarchetypeArtifactId=maven-archetype-quickstart -DarchetypeVersion=1.4 -DinteractiveMode=false
Apache notes that if this is the first time you have run Maven, it may take a while for this to complete, that is because Maven is creating your local repository and downloading the most recent artifacts.
So, if you run the command in a command window (Windows) or shell (Mac/*nix), you should see something like this:
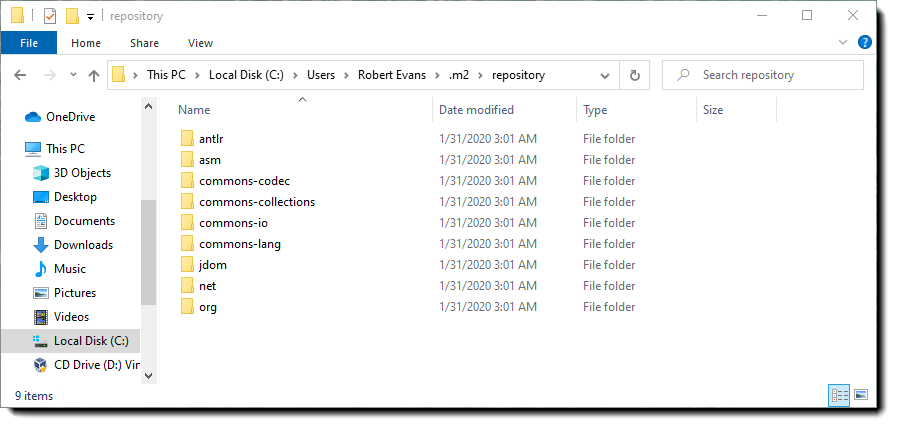
Let's look at what running this command has created. First, we now have our local repository in the expected .m2 directory in our home directory!
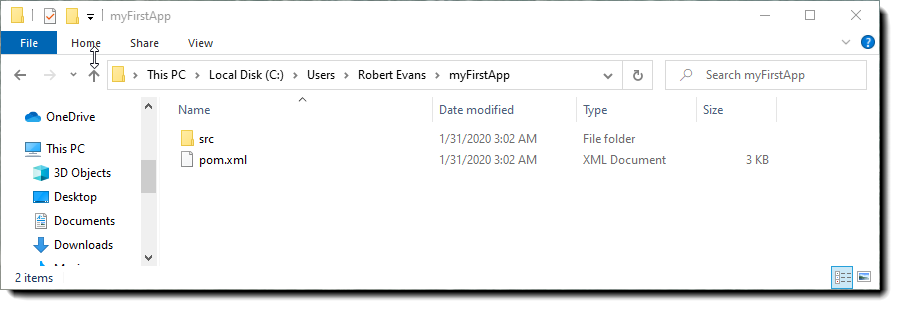
We also have our application in our home directory as well
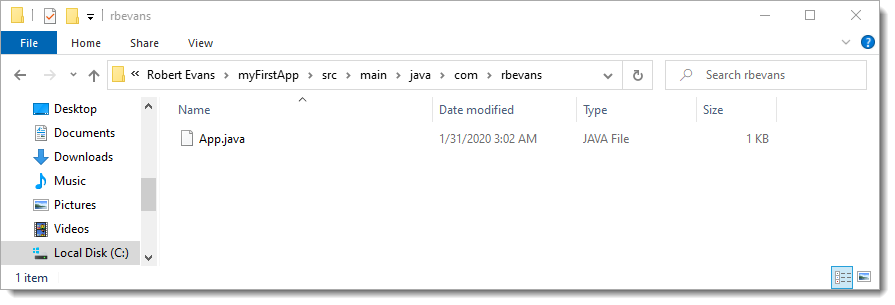
This archetype creates a standard App.java file to serve as a starting point for your app.
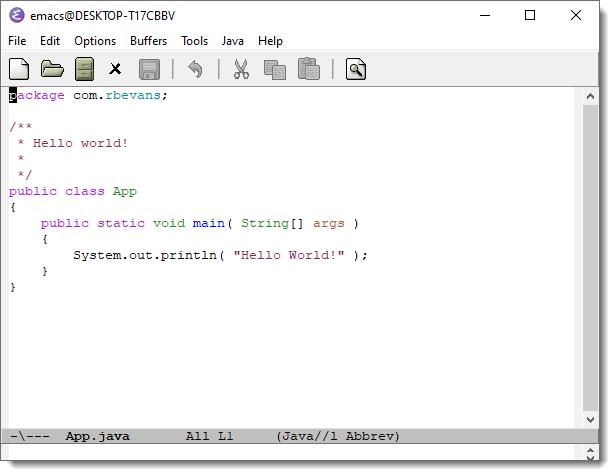
And, luck is with us!!! If we open App.java in an editor, we see that it has by default created that sought after Hello World application!
Now, you might think that running the "mvn package" command, which states that it produces a distributable format, such as a JAR would give you a JAR you could run.
Unfortunately, it doesn't include a manifest in the resulting JAR, so it isn't runnable.
To get it into runnable format, you have several options. One of the easiest is to use is the Apache Maven Assembly Plugin. The allows you to aggregate the project output along with all of its modules, dependencies, documentation into a single runnable JAR file.
There is only one goal in the assembly plugin, and that is the "single" goal. All former goals have been deprecated. Lets look at the pom.xml file that was generated by our archetype command, with two small additions (look for the "added to take us from the quickstart" comments). Configuring the maven-assembly-plugin defines the Manifest data required to make the JAR runnable.
<?xml version="1.0" encoding="UTF-8"?>
<project xmlns="https://maven.apache.org/POM/4.0.0" xmlns:xsi="https://www.w3.org/2001/XMLSchema-instance"
      xsi:schemaLocation="https://maven.apache.org/POM/4.0.0 https://maven.apache.org/xsd/maven-4.0.0.xsd">
  <modelVersion>4.0.0</modelVersion>
  <groupId>com.rbevans</groupId>
  <artifactId>myFirstApp</artifactId>
  <version>1.0-SNAPSHOT</version>

  <!-- added to take us from the quickstart configuration to a runnable jar -->
  <packaging>jar</packaging>
  <!-- End of mod -->
  <name>myFirstApp</name>
  <!-- FIXME change it to the project's website -->
  <url>https://www.example.com</url>
  <properties>
    <project.build.sourceEncoding>UTF-8</project.build.sourceEncoding>
    <maven.compiler.source>1.7</maven.compiler.source>
    <maven.compiler.target>1.7</maven.compiler.target>
  </properties>
<dependencies>
  <dependency>
    <groupId>junit</groupId>
    <artifactId>junit</artifactId>
    <version>4.11</version>
    <scope>test</scope>
  </dependency>
</dependencies>
<build>
  <pluginManagement><!-- lock down plugins versions to avoid using Maven defaults (may be moved to parent pom) -->
  <plugins>
  <!-- clean lifecycle, see https://maven.apache.org/ref/current/maven-core/lifecycles.html#clean_Lifecycle -->
    <plugin>
      <artifactId>maven-clean-plugin</artifactId>
      <version>3.1.0</version>
    </plugin>
    <!-- default lifecycle, jar packaging: see https://maven.apache.org/ref/current/maven-core/default-bindings.html#Plugin_bindings_for_jar_packaging -->
   <plugin>
      <artifactId>maven-resources-plugin</artifactId>
      <version>3.0.2</version>
    </plugin>
    <plugin>
      <artifactId>maven-compiler-plugin</artifactId>
      <version>3.8.0</version>
    </plugin>
    <plugin>
      <artifactId>maven-surefire-plugin</artifactId>
      <version>2.22.1</version>
    </plugin>
    <plugin>
      <artifactId>maven-jar-plugin</artifactId>
      <version>3.0.2</version>
    </plugin>
    <plugin>
      <artifactId>maven-install-plugin</artifactId>
      <version>2.5.2</version>
    </plugin>
    <plugin>
      <artifactId>maven-deploy-plugin</artifactId>
      <version>2.8.2</version>
    </plugin>
    <!-- site lifecycle, see https://maven.apache.org/ref/current/maven-core/lifecycles.html#site_Lifecycle -->
    <plugin>
      <artifactId>maven-site-plugin</artifactId>
      <version>3.7.1</version>
    </plugin>
    <plugin>
      <artifactId>maven-project-info-reports-plugin</artifactId>
      <version>3.0.0</version>
    </plugin>

    <!-- added to take us from the quickstart configuration to a runnable jar -->
    <plugin>
      <groupId>org.apache.maven.plugins</groupId>
      <artifactId>maven-assembly-plugin</artifactId>
      <configuration>
        <archive>
          <manifest>
            <mainClass>com.rbevans.App</mainClass>
          </manifest>
        </archive>
        <descriptorRefs>
          <descriptorRef>jar-with-dependencies</descriptorRef>
        </descriptorRefs>
      </configuration>
      <executions>
        <execution>
          <phase>package</phase>
          <goals>
            <goal>single</goal>
          </goals>
        </execution>
      </executions>
  </plugin>
  <!-- End of mod -->

  </plugins>
</pluginManagement>
</build>
</project>
At this point, if we run this POM we first tell Maven to compile the code, then to run the assembly phase with the "single" goal. The first time you do this, you will see a lot more output as more dependencies are loaded from the Central Repository, but this is what you should get
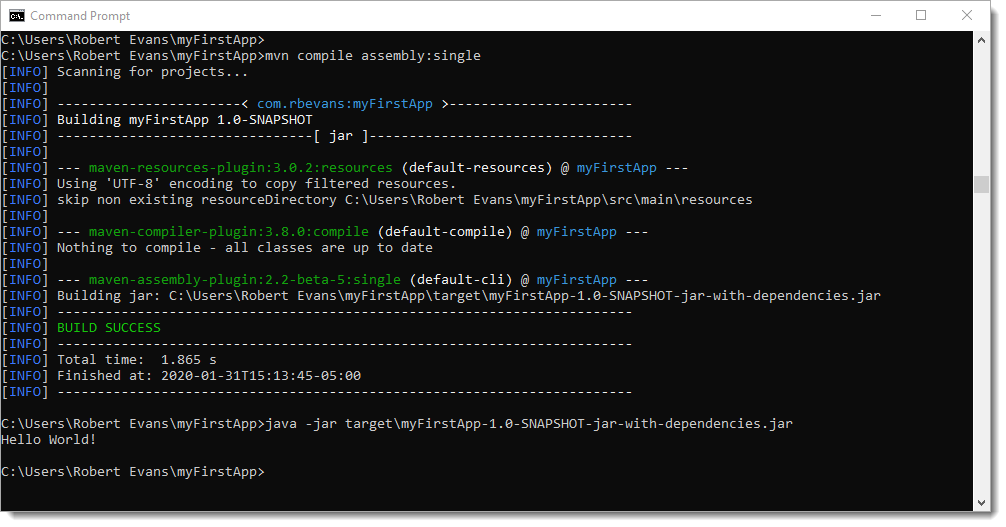
Note that once built, I can run the jar file from the command line!
Now, the other issue is that if you look in that pom.xml file, it specifies that it will use the 1.7 version of Java, not the latest! To update the Java version just modify the following:
  <maven.compiler.source>17>maven.compiler.source>
  <maven.compiler.target>17</maven.compiler.target>
Which updates the Java version to 17!
Multi-module projects
In a multi-module project, there is a parent project/pom and sub-projects/modules that have poms that inherit from parent. The idea of a multi-module project is to have one POM that controls all life cycles, and then modules (sub-projects) that actually build a JAR/WAR. In many ways this is what "make" used to do for C projects.
You can easily create a "parent" POM by
mvn archetype:generate -DgroupId=com.rbevans DartifactId=parent-project
Next update Pom to contain <packaging>pom</packaging> to indicate its a parent module
...more...
   <groupId>com.rbevans.multi</groupId>
   <artifactId>simple-parent</artifactId>
   <packaging>pom</packaging>
   <version>1.0</version>
   <name>Multi Chapter Simple Parent Project</name>
   <modules>
     <module>core</module>
     <module>service</module>
     <module>webapp</module>
   </modules>
...more...
You will note that there is also a "modules" attribute, that defines the multiple modules you wish to control. For this example, they are named core, service and webapp. You then create the other module projects:
    cd parent-project
    mvn archetype:generate -DgroupId=com.rbevans  -DartifactId=core
    mvn archetype:generate -DgroupId=com.rbevans  -DartifactId=service
    mvn archetype:generate -DgroupId=com.rbevans  -DartifactId=webapp
This will result in the following projects
      core
      service
      webapp
inside each submodule the POM for each will have a parent section:
 <parent>
  <groupId>com.rbevans</groupId>
  <artifactId>simple-parent</artifactId>
  <version>1.0</version>
</parent>
For dependency Management in Multi-module project, you put dependency info in parent pom
      <dependencyManagement>
          <dependencies>
              <dependency>
                  <groupId>org.springframework</groupId>
                  <artifactId>spring-core</artifactId>
                  <version>4.3.5.RELEASE</version>
              </dependency>
              //...
          </dependencies>
      </dependencyManagement>
Reference dependency in submodule poms using only groupId and artifactId
      <dependencies>
          <dependency>
              <groupId>org.springframework</groupId>
              <artifactId>spring-core</artifactId>
          </dependency>
          //...
      </dependencies>
You can override version (if a submodule needs different version) just by adding version info in submodule dependency
Maven compatiblity issue with some versions of Tomcat
I found that many who used FormParams in their service without adding a Consumes(MediaType.APPLICATION_FORM_URLENCODED) resulted in an HTTP error 415 for unsupported media type on some Tomcat installs. If you get this error, add the Consumes statement to your code.