SQL
Required Reading
Disclaimer
Remember, this course is not a database course. I will merely cover some of the most essential basics of SQL so you can play with JDBC in the next section. Properly designing databases for efficient use is a course (or courses) unto itself. This section will not make you an expert, but you'll be able to do some simple queries, which will let you exercise your JDBC skill next.
What is a Database?
Before we can even begin to talk about how Java works with databases, we should really review what a database even is. Technically it is some type of computerized record keeping system, comprised of
- Data
- The Hardware to store data
- The Software to manage the data
- Users to access the data
As far as you are concerned, a database is a structure that organizes records in some fashion that allows you to make queries and return all or a subset of the data.
There are four types of models used in database systems. The first, a flat (or table model) consists of a single two dimensional array of data where every row completely defines the entire relationship described by the table. These tables tend to be large and difficult to search.
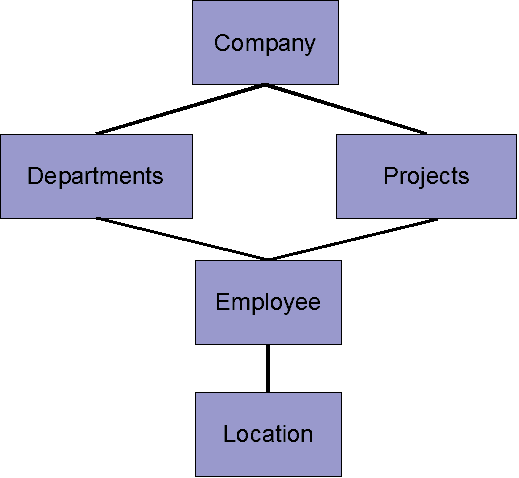
The second type is a Network model, which stores records with pointers or links to other records. These databases can be very complex to maintain.
Network Model Structure |
 |
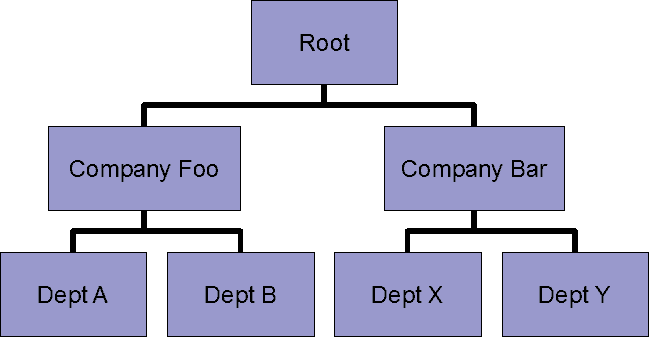
The third type is a Hierarchical model. You may have heard of LDAP servers, which store passwords and account information used by computer systems. LDAP is also a kind of database, but it is hierarchical in design, which allows for rapid lookup based on the type of queries normally made a about the information contained in the LDAP database.
Hierarchical Data Structure |
 |
The type of database most often used today is a relational database. A relational database is a collection of tables, that can be linked, compared and sorted with other tables. The general idea in databases is to make each table as small and independent as possible so that each table contains unique, non-duplicated information that can be combined with other tables to create meaningful results.
Relational databases are typically used for changing information of arbitrary relationships. They are easily searched, and often have one-to-many relationships that help efficiently describe the data set
The core concept is that of a table or relation between data. In this models, each rows is a record or tuple, and each column is a field. These databases are referenced by name only. Typically, relational databases contain meta-data which is data about the data (Access rights, field names, etc...).
Table 1
ID |
FirstName |
LastName |
Office |
Phone |
Department_number | Project_Number |
| 01 | Ranma | Saotome | 01 | 3333 | 01 | 01 |
| 02 | Kasumi | Tendo | 01 | 1991 | 01 | 02 |
| 03 | Rei | Ayanami | 02 | 4654 | 02 | 03 |
Table 2
Department_number |
Name |
Director |
| 01 | Comedy | Rumiko Takahashi |
| 02 | Sci-Fi | Yohiyuki Sadamoto |
Table 3
Project Number |
Title |
Leader |
Budget |
| 01 | Mahem and Madness | Saotome | YTTBXX |
| 02 | Peace and Tranquility | Saotome | CCSYYY |
| 03 | End of the world | Aynami | AAA123 |
The tables above show data and relationships between the data. Each table has a primary key (in this case the first column) and data that that key describes. The first table has secondary keys that link to other tables. This allows us to query data in all the tables and join them together if necessary.
Database Software
Clearly, this course is not about designing, use, or the selection of which databases to use. Vendors or groups such as Oracle, MySQL, Postgres or Derby produce commercial or free databases for people to use. Each has different design and to some extent different features, but what is common is that they all support a Structured Query Language (SQL).
SQL is the de facto language of databases today. It is the core language for communicating with most database systems. The SQL language abstracts away internal workings of the database from the user.
SQL allows you to execute queries against a database, and retrieve the results of those queries. You can also modify, delete, or insert new records from the database using SQL commands.
Even though SQL is the core of most database implementations, each vendor usually has proprietary extensions that provide "added value" to their particular implementation of a database.
Basic SQL Commands
Again, this section will not teach you all the ins and outs of database usage. The examples below will show you how to get basic information out of a database.
SQL Data Manipulation Language (DML) is a syntax for executing queries. The general commands are:
| SQL Statement | Function |
| SELECT | extracts data from a database table |
| UPDATE | updates data in a database table |
| DELETE | deletes data from a database table |
| INSERT INTO | Inserts new data into a database table |
Of Course to get data out of a table, you need to create the table somehow. SQL Data Definition Language (DDL) defines SQL commands that permit database tables to be created, deleted or modified. It also lets you define keys, specify links between tables and other configuration options
SQL Statement |
Function |
| CREATE TABLE | creates a new database table |
| ALTER TABLE | alters a database table |
| DROP TABLE | deletes a database table |
| CREATE INDEX | creates a search key |
| DROP INDEX | deletes a search key |
Most SQL databases require semicolons ";" at the end of each command.
Installing MySQL
You can get the server from the MySQL web site (https://www.mysql.com). We want to use the community edition server (non-enterprise) which can be found at https://dev.mysql.com/downloads/mysql. You will want the MySQL Community Server download. Note that you will unfortunately have to make a "free" account at Oracle in order to download the community edition.
Note: Having MySQL installed is optional. It can help you understand how to do SQL queries easier, but technically is NOT needed for this week homework. The tables shown in this module will NOT be used for your homework, do not get them confused. This being said, the ability to use the MySQL workbench to develop and test your SQL statements should not be overlooked. When you are trying to create the appropriate SQL code, the best way is to use workbench to get queries that work, then incorporate them into your server code.
To work on homework modules, you don't *need* to be "creating" local copies of the database, use the database on the class servers, and don't get things confused. web7 is where the database lives, and where you need to connect to, the server that you upload code to does not have a database. I go through the installation of MySQL so you could have the ability to explore your own database if you wanted, but remember, for the homework, you need to use the database on web7.
If you are using Windows, make sure and get the Windows Installer vesion
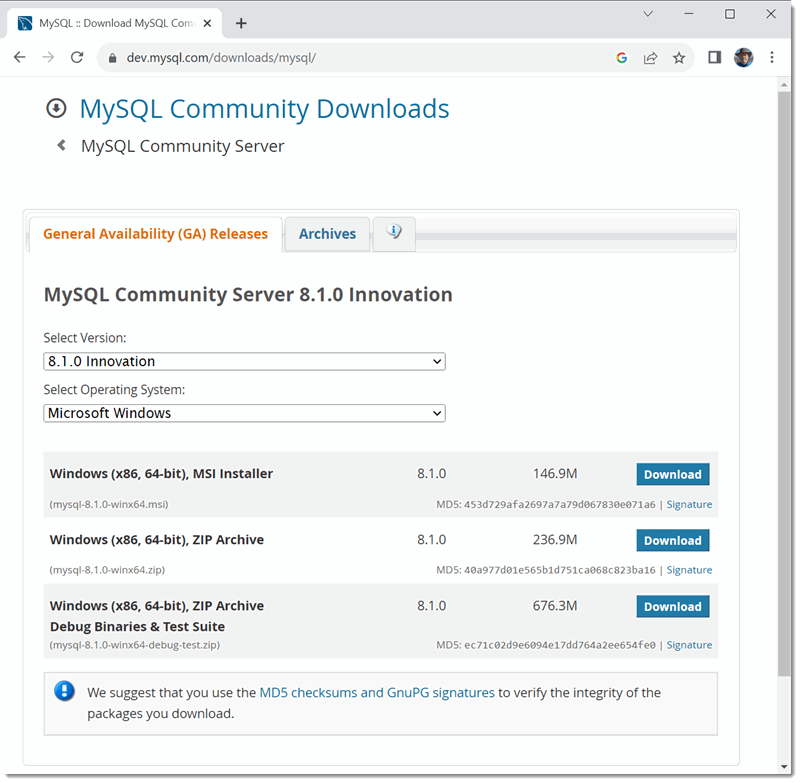
Once you have downloaded the server, start the install.
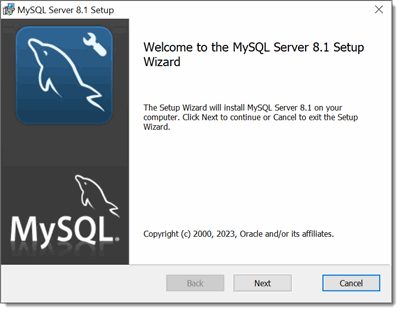
Accept the license terms and click Next>
At the next screen, you select what you want to install. I'd suggest just doing the Typical.
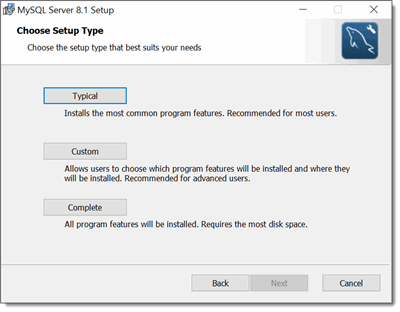
Click Typical>, then Click Install
Once installed, you should see this:
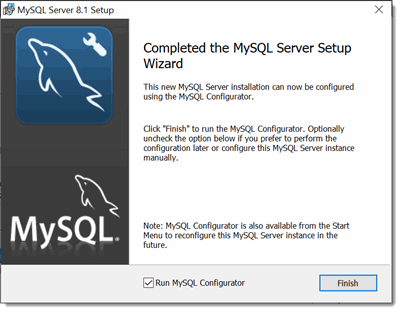
Make sure the Run MySQL Configurator checkbox is checked and click on Finish.
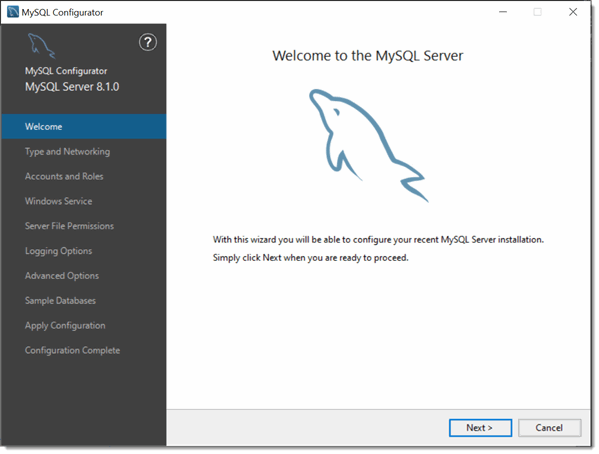
Now click Next>
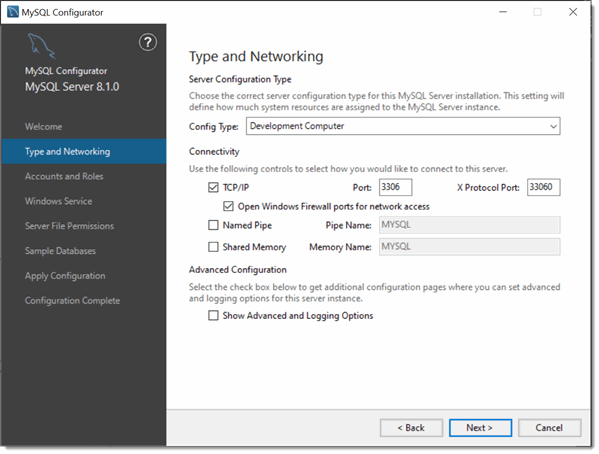
Defaults are okay here, click Next>
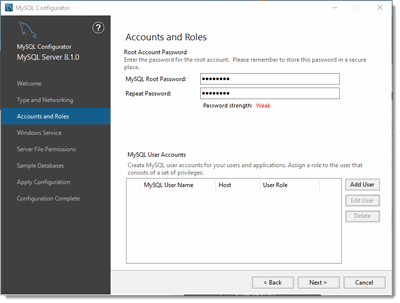
Okay, next screen requires you to create accounts. I'd do one for yourself in addition to the root account. For our purposes, I don't worry about a fancy password, as I'm just using this on a local machine to develop code. If you were in a production environment, choose a strong password. Click Next>
At this point, if you are on Windows, you need to determine if you want to run the server as a service. I've found that unfortunately, if you don't run it as a service, it seems hard to start manually.
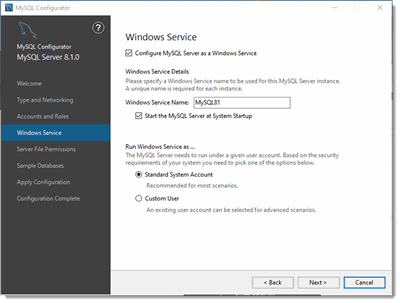
And click Next>
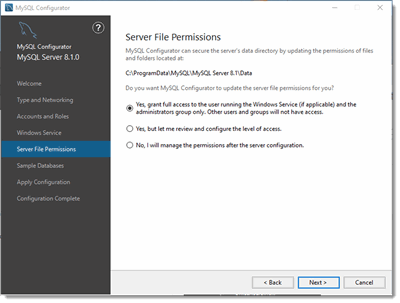
Again, if this is your development machine, the following make things easier, if you were setting this up on a real server, you need to be more concerned about the appropriate permissions.
Your next choice is whether to install some sample databases. This is your call, I'm not loading them at this time, but they may be useful to play with on your system.
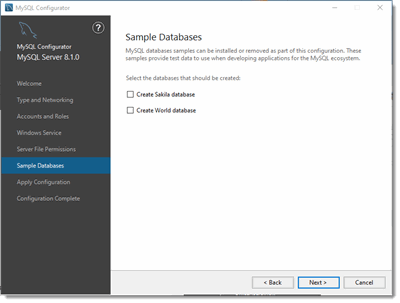
Hit the Next> button. You now need to write these config settings to your system, so you'll see the following screen
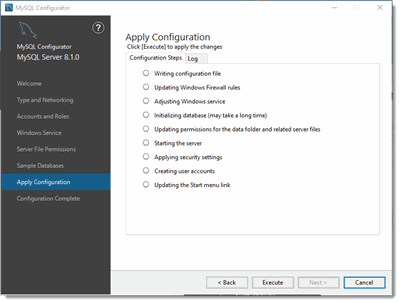
Hit the Execute Button...
You should see that everything installed, and you are done with the installation!
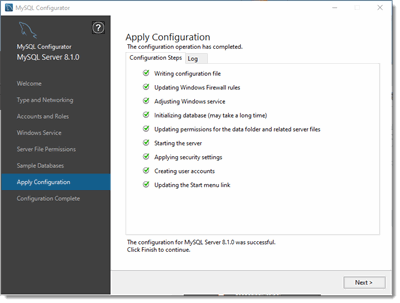
Click next> and Finish on the remaining screens, the actual last screen will start MySQL automatically.
Ah, but you want to SEE the database, don't you. That is what Workbench is for! In fact, you can use it on your local installation if you want, but more importantly, you can connect to the course database server and practics SQL queries with it before incorporating those queries into your code!
So, go back to the download section of the MySQL site and look for MySQL workbench. You need to install that next to really be able to play with the database and try out your queries.
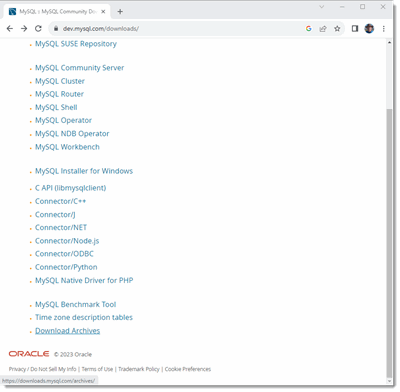
If you select Workbench, you should see this:
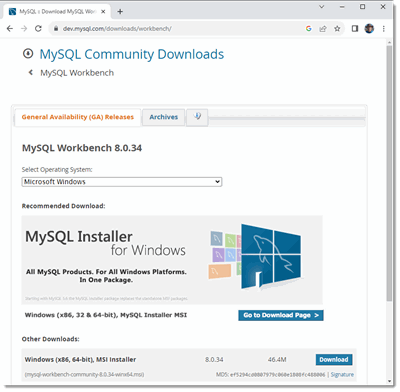
If you install workbench:
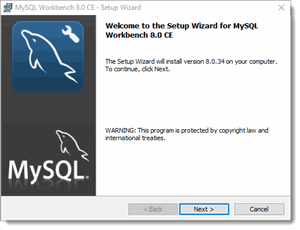
Now, if you noticed, this tutorial install MySQL 8.1, but the Workbench is still at 8.0, and will complain that the MySQL server may not be completely compatible, for what we are doing, don't worry, go ahead and set things up.
Look a little beyond mid-way down to the left for the MySQL Connections text, and click on the "+" sign with the circle around it, this will create a new connection:
For this first time, we will go in as admin, you can pretty much use the defaults (A Tcp/IP connection is fine for a local connection, ssh connections should be used for external machines)
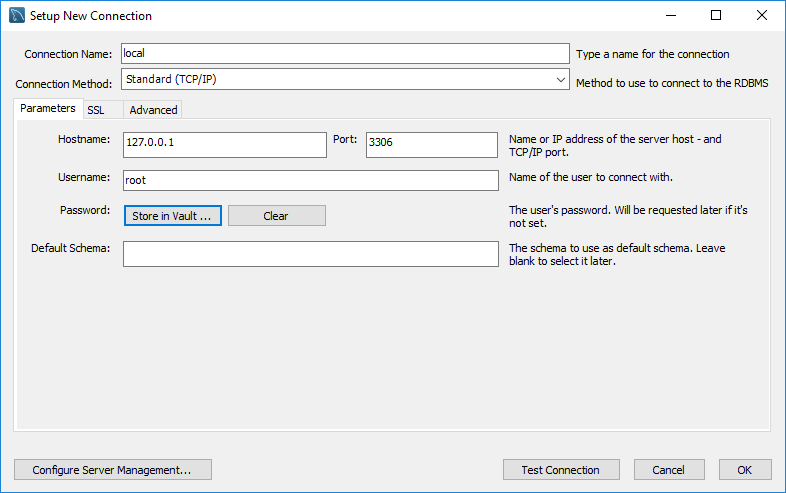
You can click on Test Connection to make sure everthying will work.
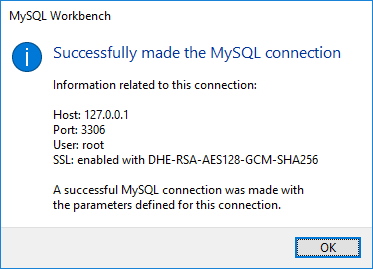
Remember to use the password you used when you installed MySQL!
At this point, you save this connection, and it will appear on your opening Workbench screen
Note the connection parameters are in the gray window. If you double clik on the gray area, you will start a connection with the Database. When you connect, you should see the following:
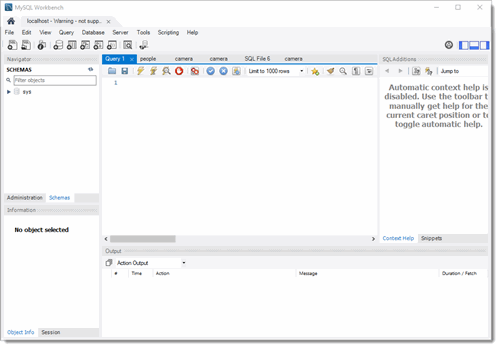
Remember, if you didn't install MySQL as a service, you need to use the Workbench to manually stop and start the MySQL server.
OK, I have a database, now what?
Well, you have MySQL, but to most people, a database is a collection of data tables, and in MySQL that is referred to as a "Scehma".
Remember, SQL and Databases aren't Java, and they don't necessarily share data types.
Basically, the creation, viewing and maitenance of tables is done either with the command line or with my preference, the Workbench tool. Common Data types in SQL are (but not limited to)
Data Type |
Use |
| character(n) | Fixed length String (must be filled completely) |
| varchar(n) | Variable length String of max size n |
| binary(n) | Fixed length binary string |
| integer | Integer |
| decimal(p, s) | exact numerical, precision p, scale s |
| float(p) | Approximate numerical, mantissa precision p |
| real | float with precision of 7 |
| float | float with precision of 16 |
| double | float with precision of 16 |
| date, time, timestamp | integer fields which describe a date |
Oh...can you tell what is missing in MySQL?
Take a good look...
If you noticed there is no boolean type, you are absolutely correct! One of the quirks of MySQL is that it has no boolean data type. You use an int (well actually tinyint) and use 1 for true and 0 for false.
So when you create a table, you specify names of columns and which data types are associated with those columns.
Creating a table.
First step, create the Schema (what many of use would mean when we say database).
Bring up Workbench
Go up to the menu bar and click on the Schema Creation button
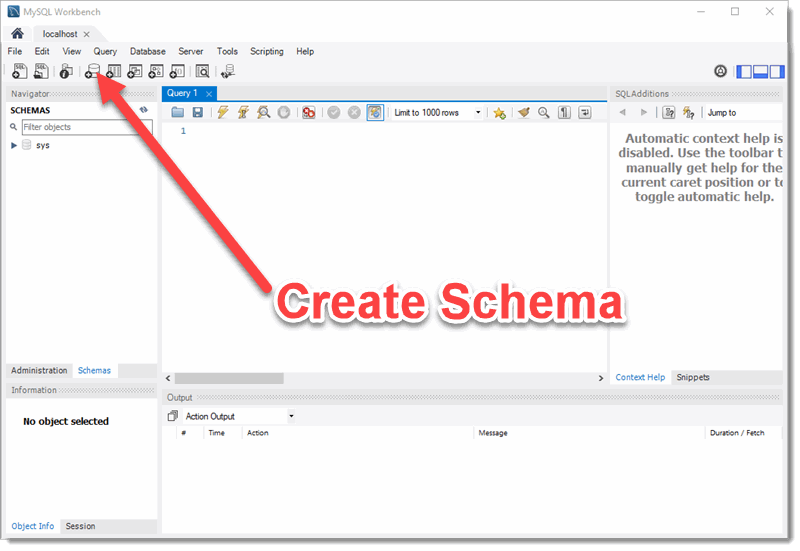
Use "mySchema" for the schema name and use the defaults for everything else, and then click Apply
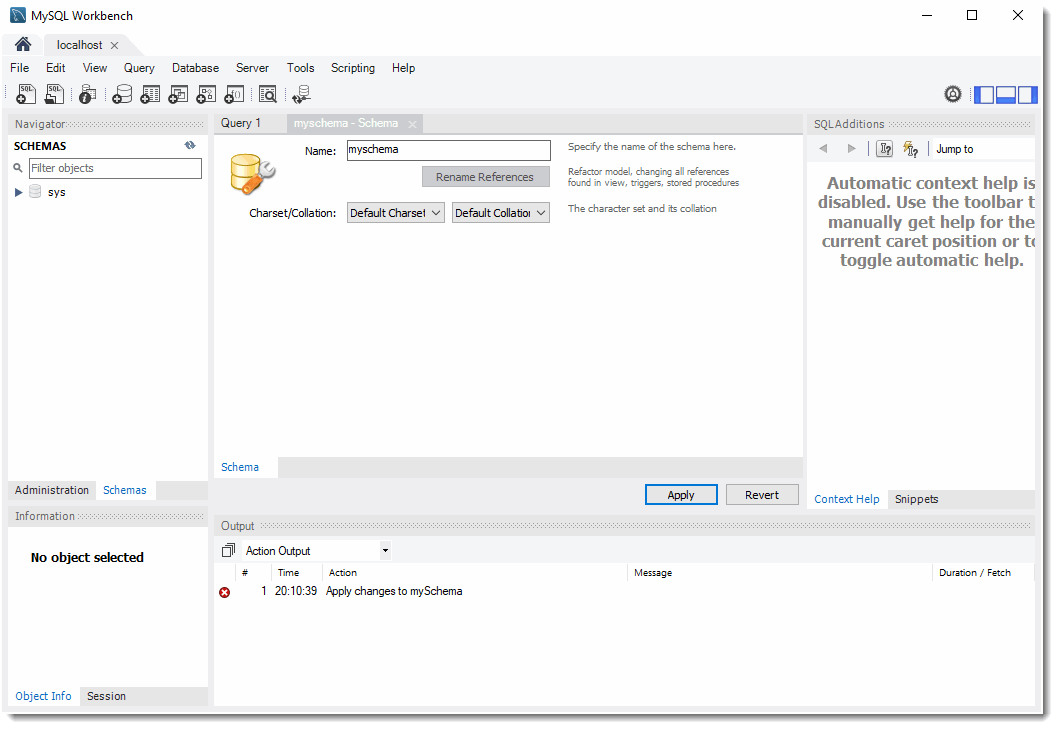
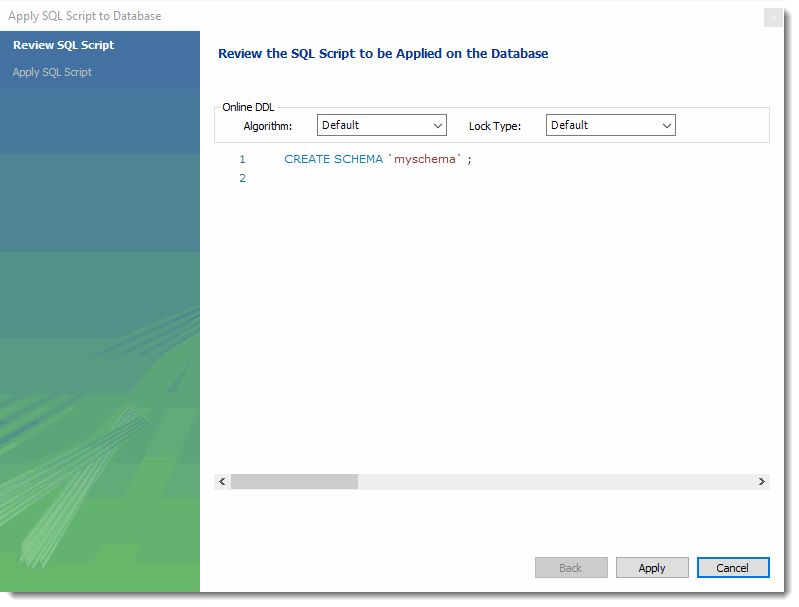
One thing to get used to with Workbench, it always brings up a Window showing the SQL code you want to execute, to confirm, click on Apply again
To view your schema, hit the Schema tab to the left of the window.
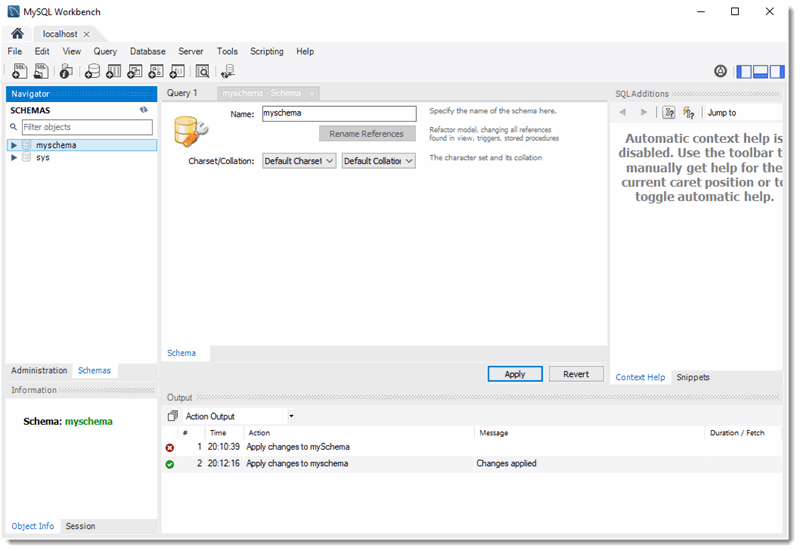
Note that the myschema Schema is now listed, with views of Tables, Views, Stored Procedures and Functions.
Go ahead an right click on the myschema schema name, and select "Set as Default Schema"
Okay, *now* we can make our first table! Right click on the "Tables" view and select Create Table. You then get the following window:
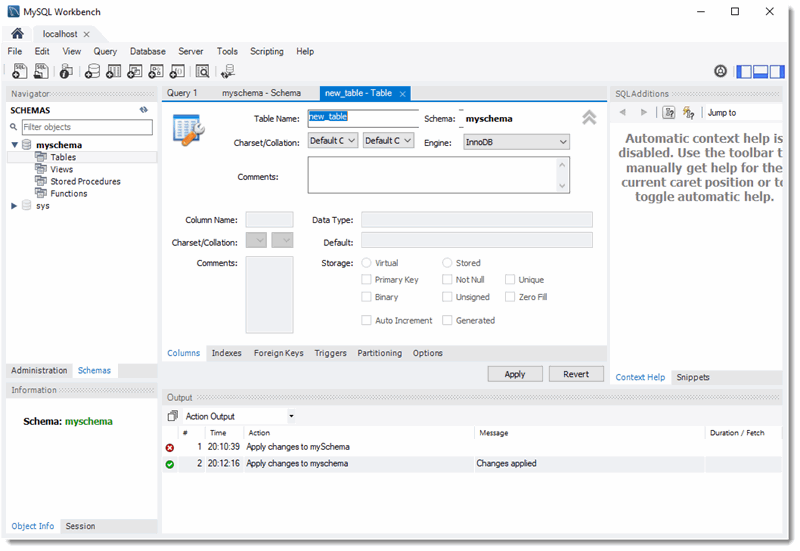
Okay, at this point I'm going to make a "people" table, and create the data columns required.
For our homeworks, you pretty much need to know only 4 data types, varchar, int, double and date.
Also you will notice a lot of checkboxes! These let you tell MySQL more about the data in the columns.
- PK = primary key
- NN = not null (must not be empty)
- UQ = unique
- B = Bit type
- UN = unsigned (int)
- ZF = zero fill (will add leading zeroes)
- AI = Auto Increment
- G = Generated by other fields
The only fields I have ever used are PK, NN, UQ, UN and AI.
Note that the person column is the primary key for the table.
Remember varchar is basically a String, so the number in the parenthesis is how many characters it can contain. While we don't address it here, database design means you need to figure out how much data each field needs to hold, and set the Datatype accordingly, to both the correct type AND the size, as for a large database, you don't wan't to reserve space you will never use.
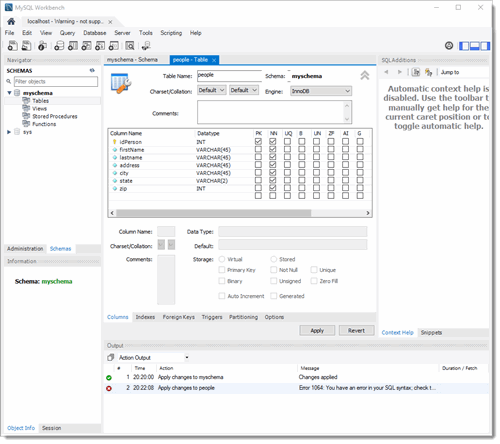
After clicking Apply/Apply, you should see the people table appear
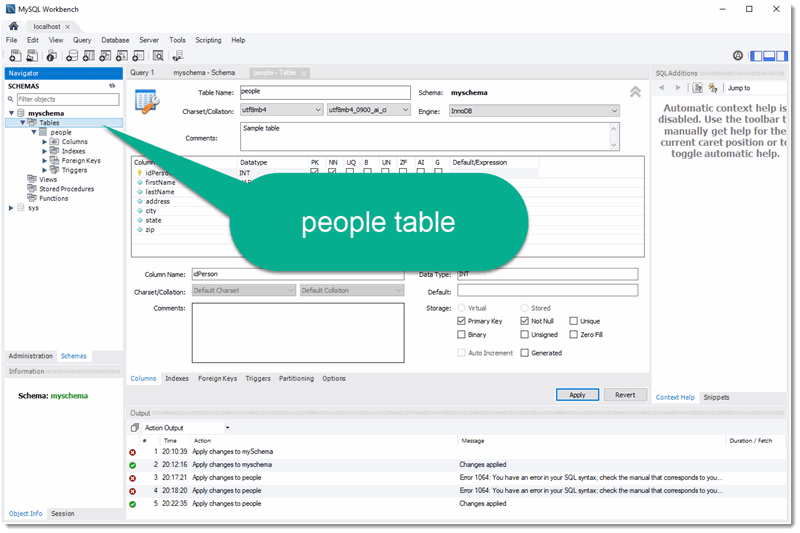
Now, we have the table, how to get data into it. MySQL supports importing of table data, but for our example, I'm just going to type stuff in and hit Apply.
To do so, first you right click on the people table and select "Select Rows" You should see the following
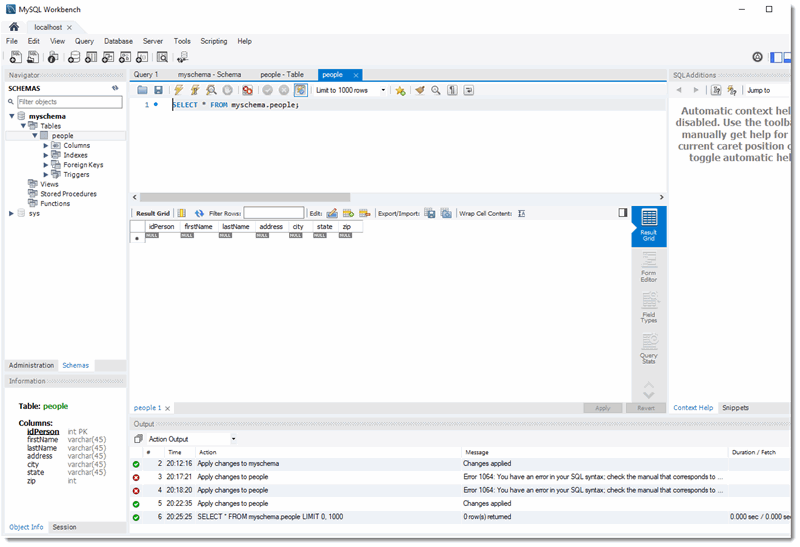
So, just type in data to each field, as you complete one row another appears
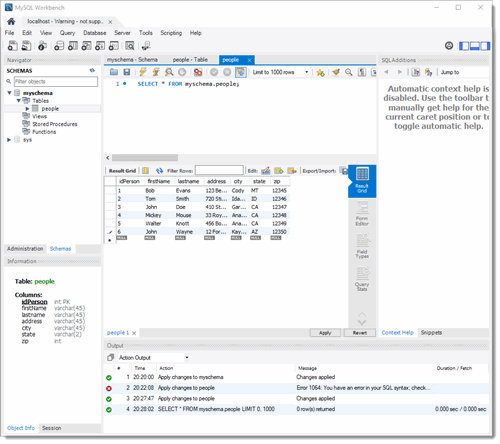
Hit Apply/Apply and the re-select the table to see the new data!
Now create and populate a Camera table as well
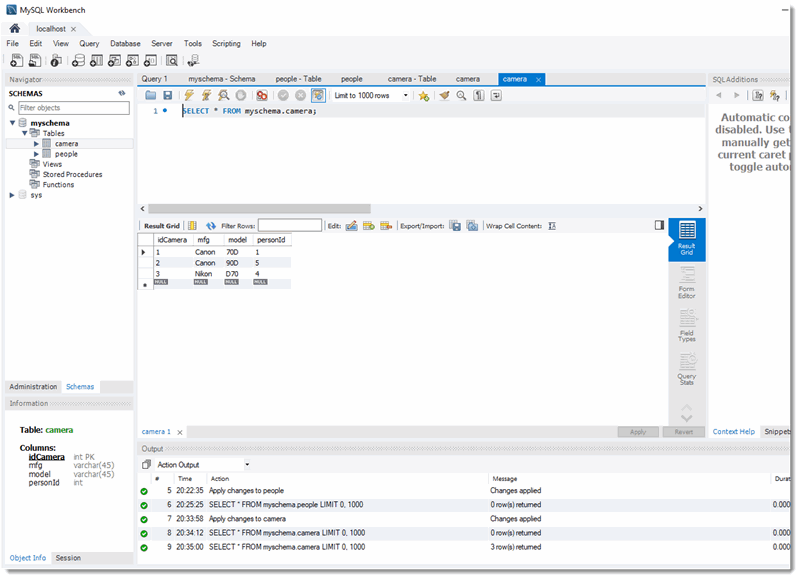
Now what if you wanted to enter data into the table from the command line (or from a program)?
You use an INSERT statement to insert new records into a table.
INSERT INTO `myschema`.`people`
(`idPerson`,
`firstName`,
`lastName`,
`address`,
`city`,
`state`,
`zip`)
VALUES
(6,
"Doug",
"Piranha",
"123 Yorkshire Way",
"Boston",
"MA",
54321);
You basically provide a list of column names first, followed by the values you want for those column names.
Getting data from tables
Once you've placed the data into the table, you can view the data by either right clicking on the table name, or by running a SELECT statement. SELECT statements are the way you query database tables.
SELECT col_name1, col_name2...col_nameN FROM table_name
Selects the only the column names provided from the table. If you use "*" which is the wildcard, you would get the entire table.
SELECT * FROM table_name
To run SQL statements on your table from the Workbench, first click on the new "SQL" button to get a new fresh tab
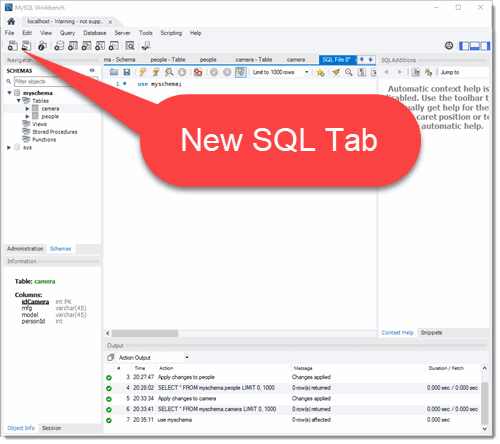
The following shows me selecting the entire database, and then typing the SELECT * FROM cameras; statement, then hitting CTRL-ENTER (which executes the statement)
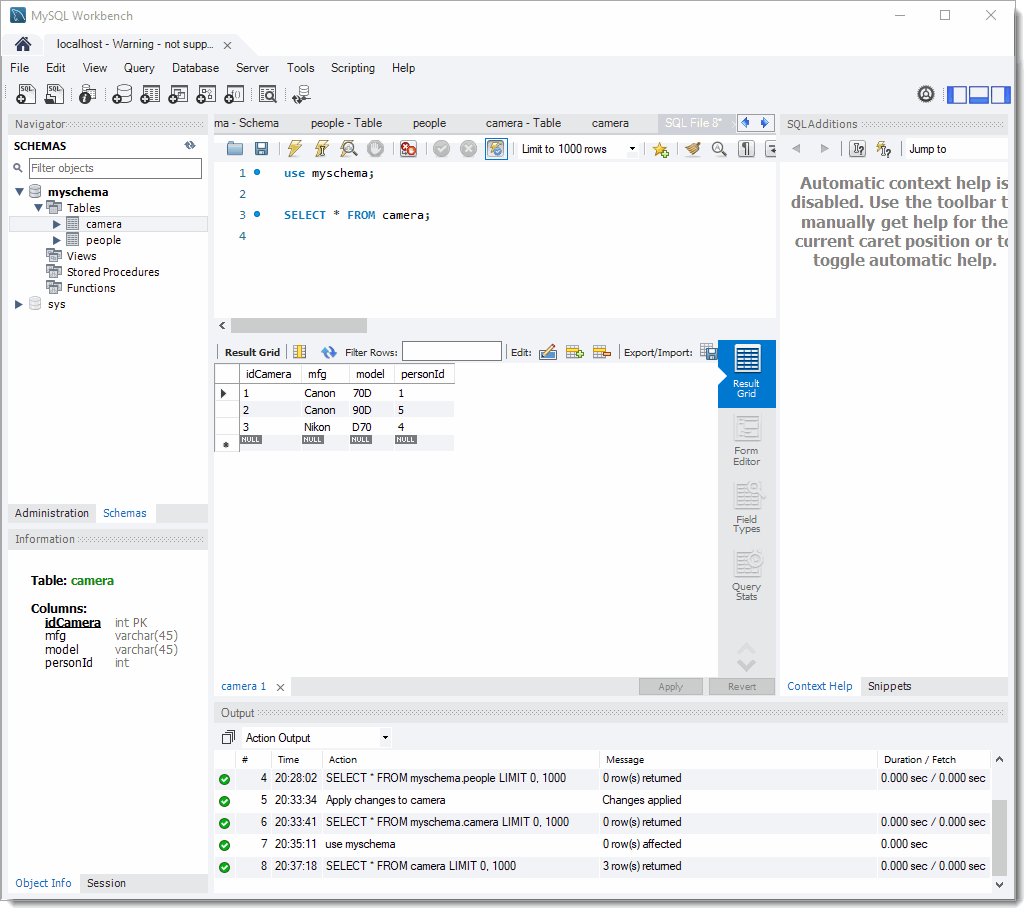
Normally, the SELECT just returns the data. The Netbeans interface pulls off the meta-data from the table and build the column headers for you for display purposes. If you had multiple returns, you can use "SELECT DISTINCT" to return only distinct values.
Now, getting all of the information may be nice, but typically, you are looking for something particular from a table. You use the WHERE clause in a SELECT statement to filter what data you are interested.
Some of the more common terms used in WHERE clauses are as follows.
- General predicates (<, >, <=, >=, =)
- For number values, no quotes around values
- ID < 3
- For Strings, the values are always in single (not double!) quotes
- STATE = 'WY'
- For number values, no quotes around values
- Compound Conditions
- AND, OR, NOT
- ()
- IN - Results that assess to one or more given values
- where colname IN ('value1', 'value2', 'value', ...)
- Pattern Search
- Use the percent sign (%) for any number of characters
- 'Tom%' = values all starting with "Tom"
- Use the underline (_) for a single character wildcard
- Use the percent sign (%) for any number of characters
Here is an example of looking for cameras from Canon
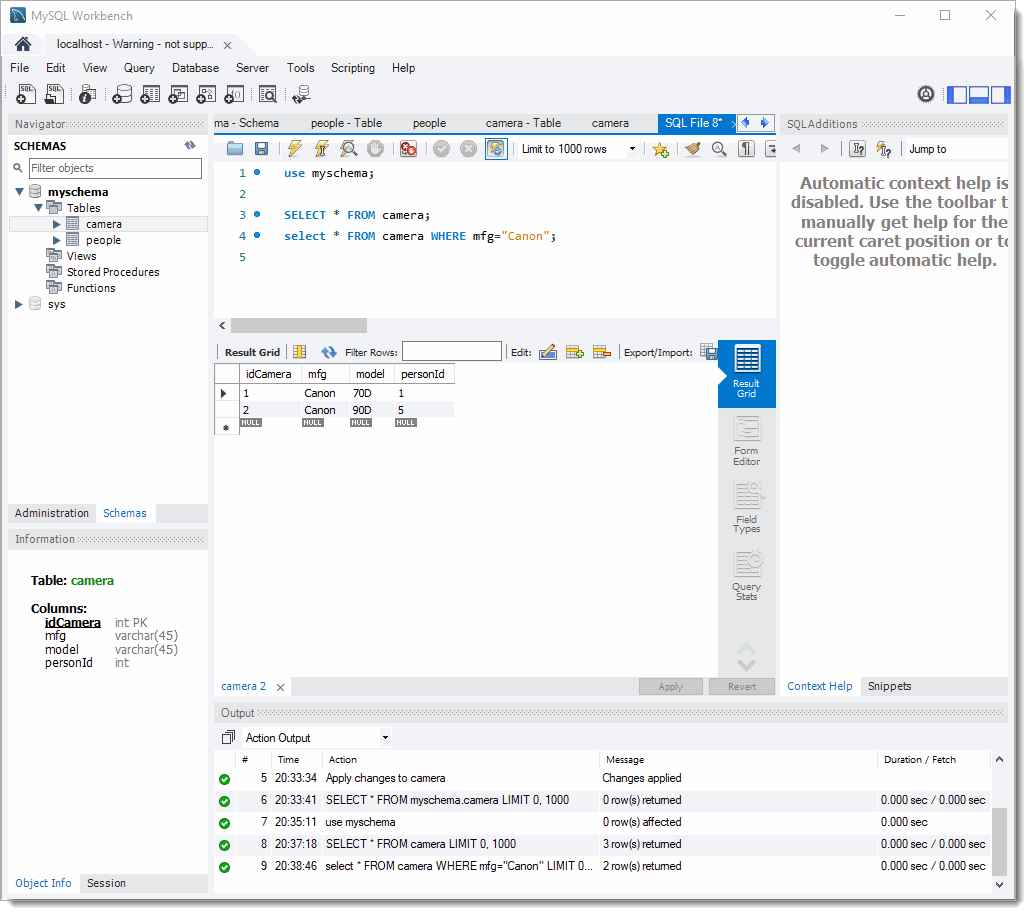
Once you get these filtered results, you can provide the results in a particular order by using the ORDER BY clause. You can specify ascending (ASC) or descending (DESC) ordering.
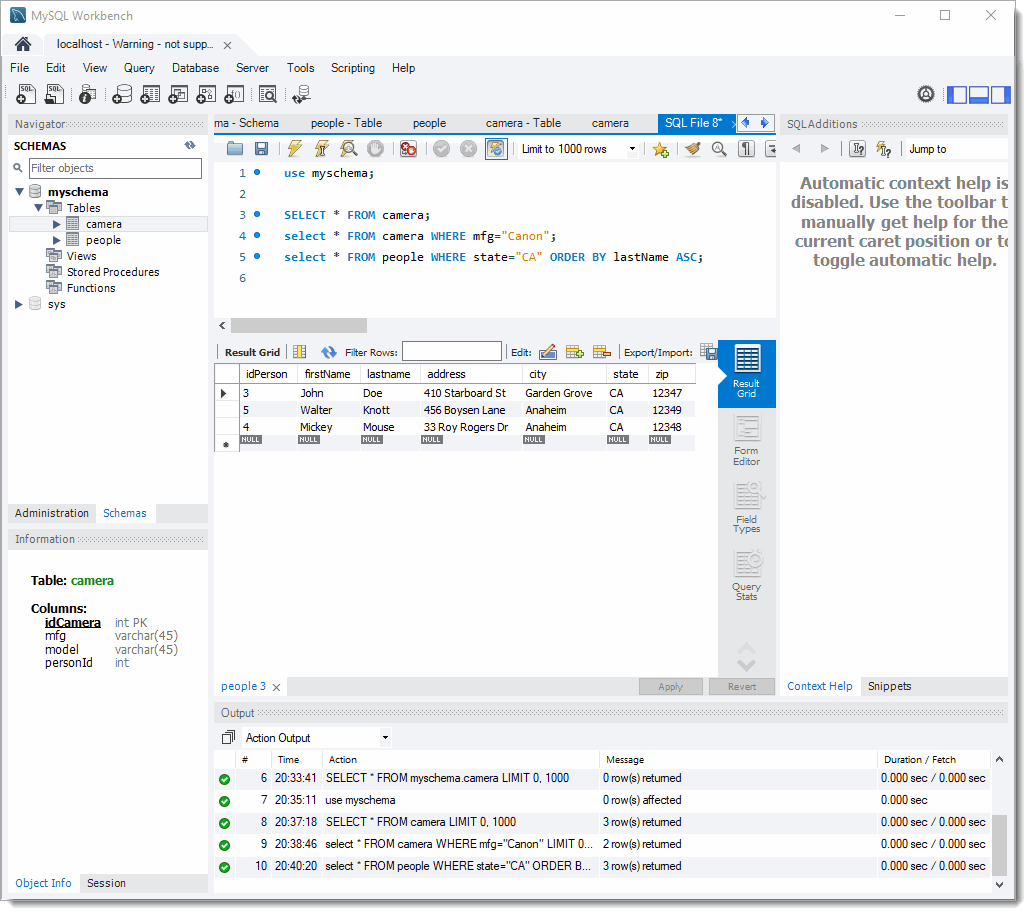
SELECT col_name1, col_name2 FROM table_name ORDER BY col_name1 ASC, col_name2 DESC
The screen below shows the results of selecting data that is returned when looking for people from CA, and sorting the data by last names in ascending order.
SQL Math and Function
Besides simple tests, you can perform Math and arbitrary functions on returned data
- SUM - sums up values in column
- MIN,MAX - gives minimum or maximum value of a column
- AVG - Averages the values in a column
- COUNT - counts the number of items in a column
- select count(*) from table_name gives number of rows
- Math - lets you do simple math
- select total = column1 + column2 from table_name
Data from Multiple Tables - JOINS
Before we join two tables, we'll need two tables. If you didn't already create the People and Cameras table, go backand do s.
Now we have two tables, PEOPLE and CAMERAS. Each table has a PRIMARY key, which is a unique identifier for that row in the table. The magic with SQL is that you get power by combining the tables. Now these aren't the best designed, but they have just enough to show the effects of JOINing two tables. For example, the following statement
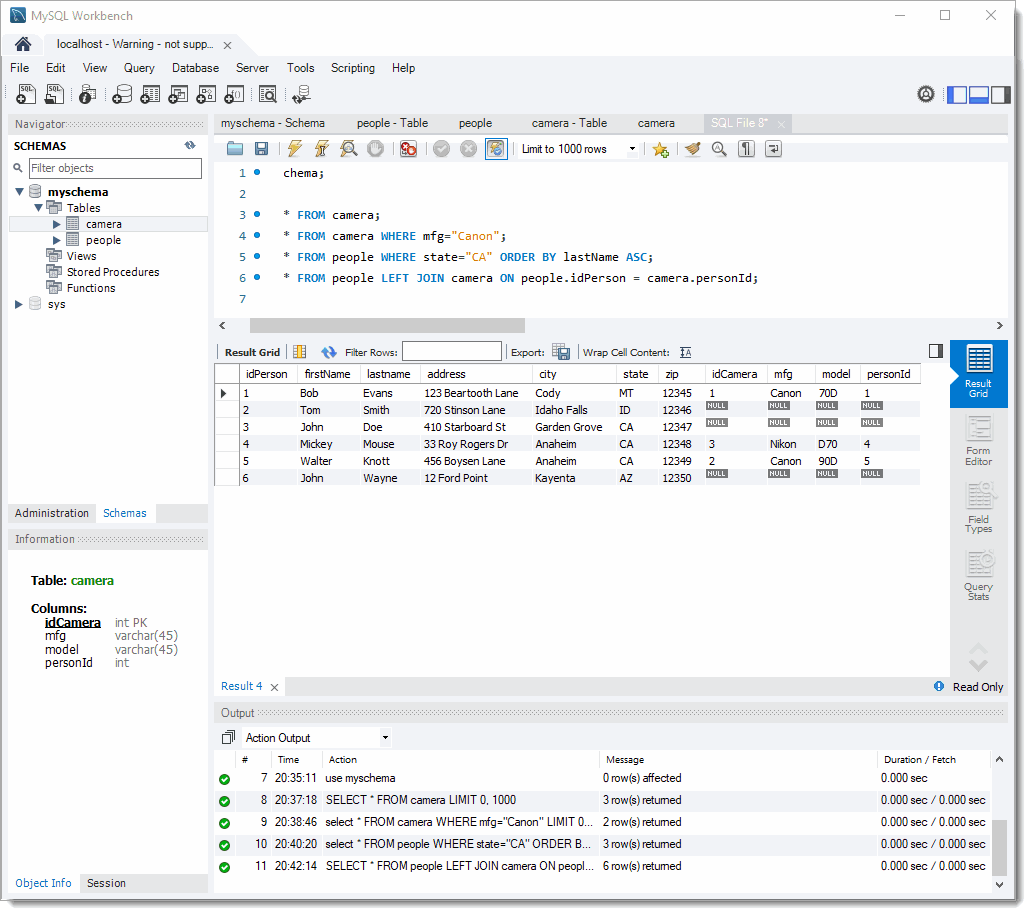
SELECT * FROM people LEFT JOIN cameras ON people.idPerson = cameras.personId;
Will build a result that includes a combining ofthe two tables. Note the qualification of column names by placing the table name before each column name (separated by a ".").
This will return the following:
SELECT * FROM people LEFT JOIN cameras ON people.idPerson = cameras.personId;
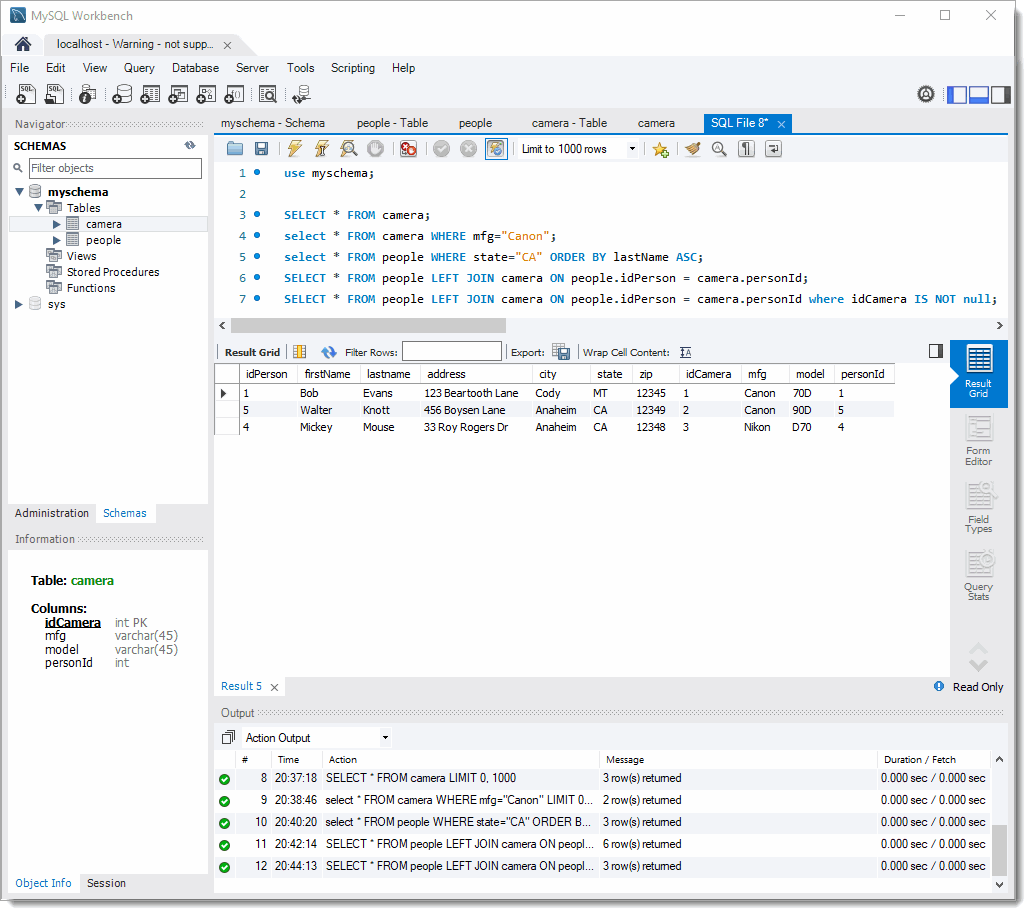
You can also use a JOIN statement which combines two tables on similar keys. The JOIN statement:
select * from APP.PEOPLE INNER JOIN CAMERAS ON PEOPLE.PERSON = CAMERAS.PERSON;
will produce the following output
And you can add qualifiers to the JOIN
Modifying and Deleting Data in a table
Finally, you can modify table in a data by using the UPDATE statement in the form of
UPDATE table_name SET column_name1=new-value1, column_name2=new-value2 WHERE condition
This will modify an existing record in a table.
You can delete a record using the DELETE command
DELETE from table_name WHERE condition
