
JUnit
Recommended Reading
Brief JUniit tutorial which describes some basic features
Optional Reading
Documents at www.junit.org. Note, you do not need to download JUnit if you are using Netbeans, it is already installed (if you accepted the license for it).
What is JUnit
JUnit is a unit testing framework for the Java Programming Language. Every programmer knows that it is good to test their code, but few take the time to write, thorough, repeatable tests that do just that.
JUnit allows you to write those repeatable, automated tests for your code. It supports:
- Assertions for teting expected results
- Text Fixtures for sharing common test data
- Test runners for running tests.
If you try to use JUnit, the benefit is immediatly visible. You are now now longer focused on implementing your design, instead, all you are trying to do is write tests for your code. It helps focus your tests, and you think about the boundary tests without being distracted by your implementation. It also provides a test framework that remains in place as your code evolves, eliminating "creaping bugs" which are introduced as functionality may change.
As an alternative, and as a better way to write much better code, you write your tests FIRST, then you code second. As an example, I'll walk you through the use of JUnit on a brand new class called Order in a Netbeans project called JUnitExample
Example Usage
First, you need to add the Eclipse Test Framework package. Now you can always manually install JUnit, but this gets it configured as quickly as possible. The latest version of JUnit is 5, and there have been some changes since version 4.
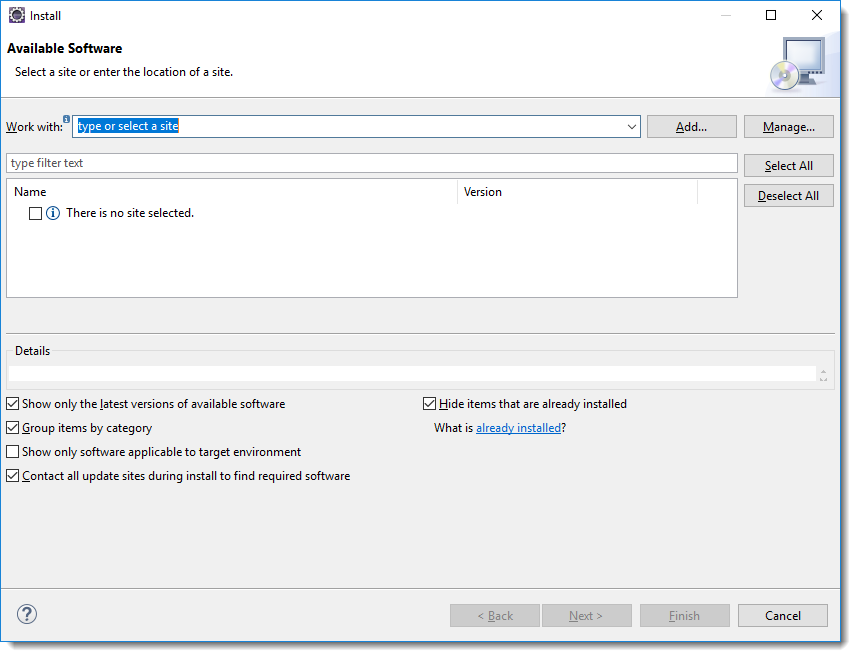
To install, Go the the "Help->Install Software" menu option, you should see the following window come up.
Next select Work with all available sites, and type JUnit in the "type filter text" field.
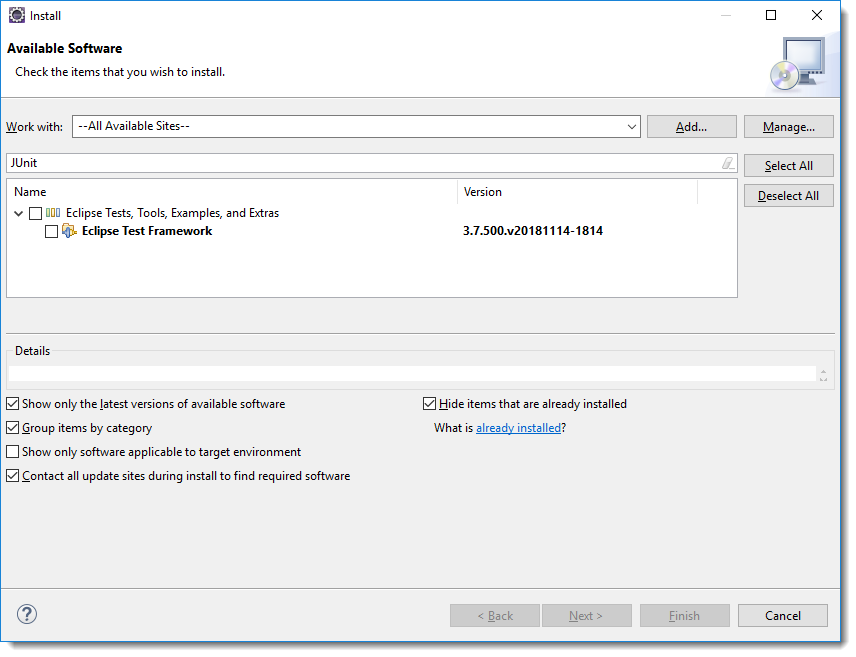
Select the Eclipse Test Framework and then click on the Next> button:
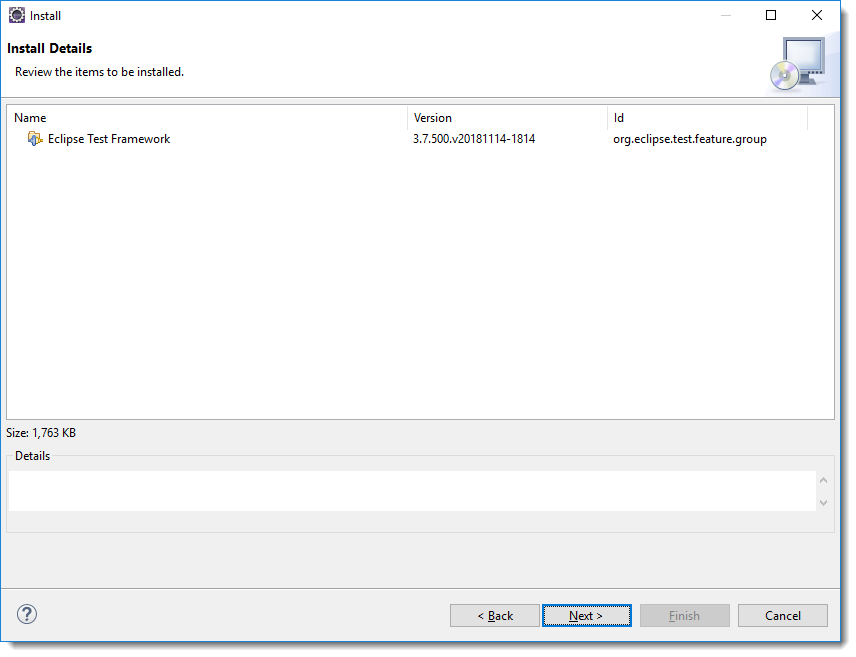
Click Next> again and accept the license (if you wish).
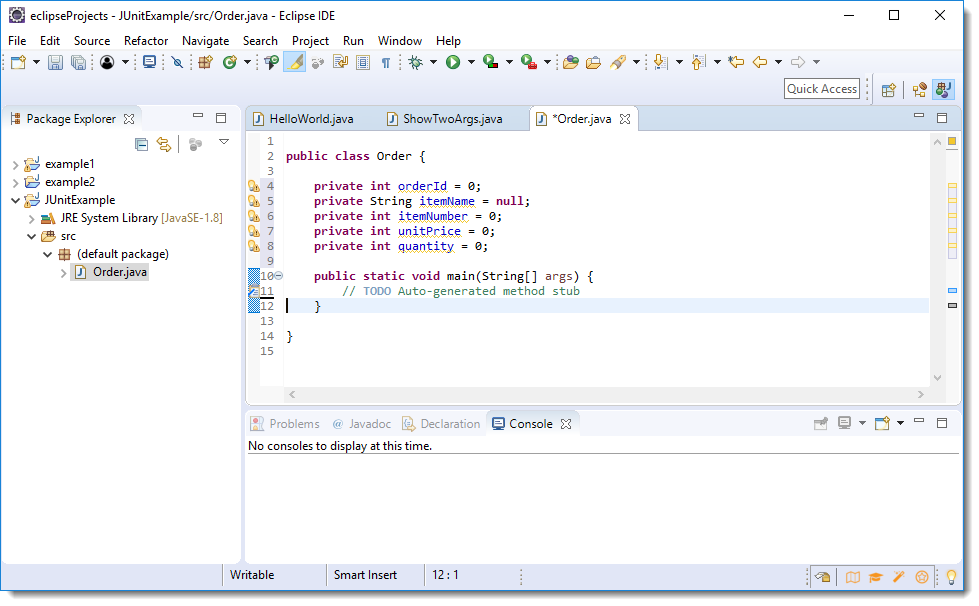
Okay, now we need to come up with some kind of an example. Order is a class that contains the following information
- OrderID
- Item Name
- Item Number
- Quantity
- Unit Price
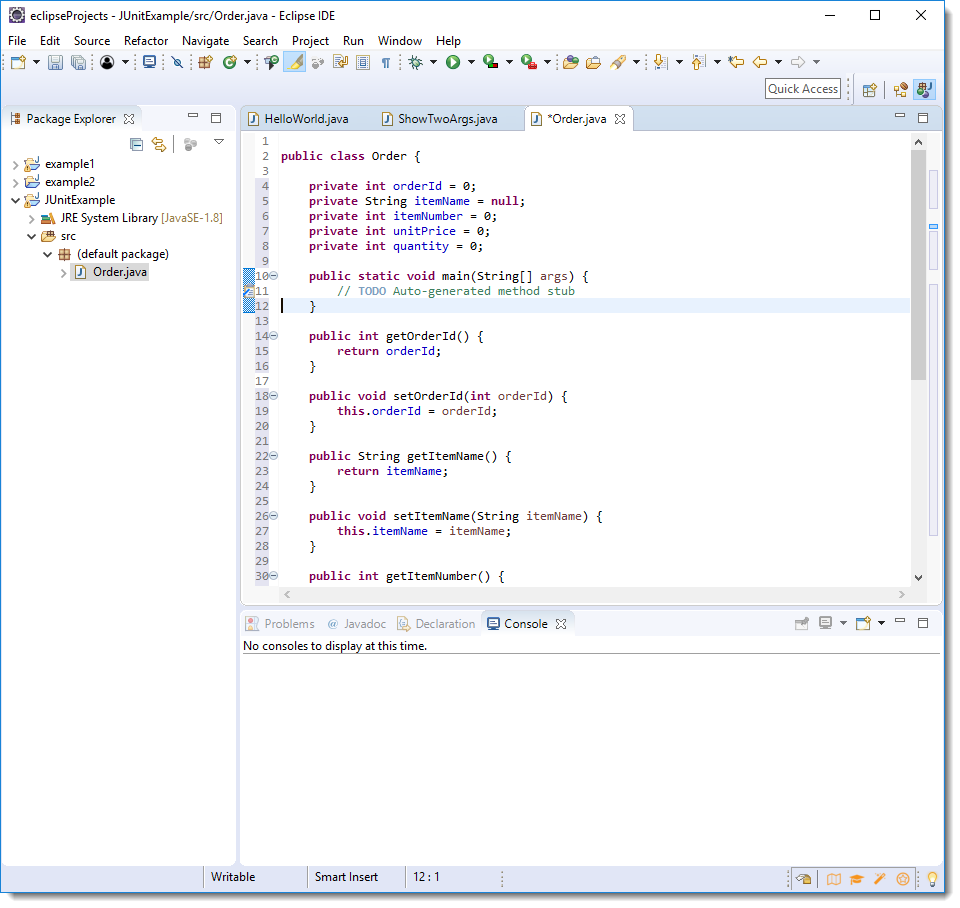
So, first you make your project, define the class Order and set the attributes. The screen shot shows the full constructor, but make a no-arg constructor as well.
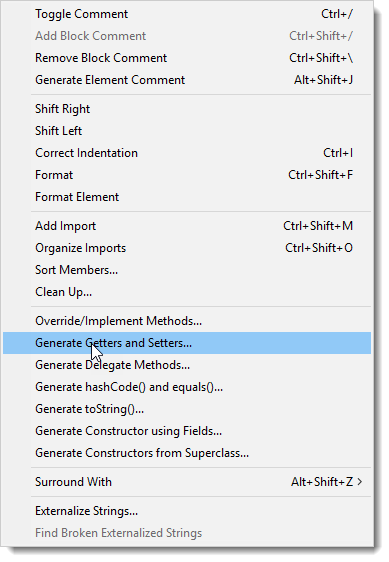
Next you can make the get/set methods by using tools in Eclipse, or by the following menu (Source ->Generate Getters and Setters...) in Eclipse. This will help you automatically generate the get/set methods for the attributes in your class.
This brings up the following window. in this case I've already clicked on Select All....
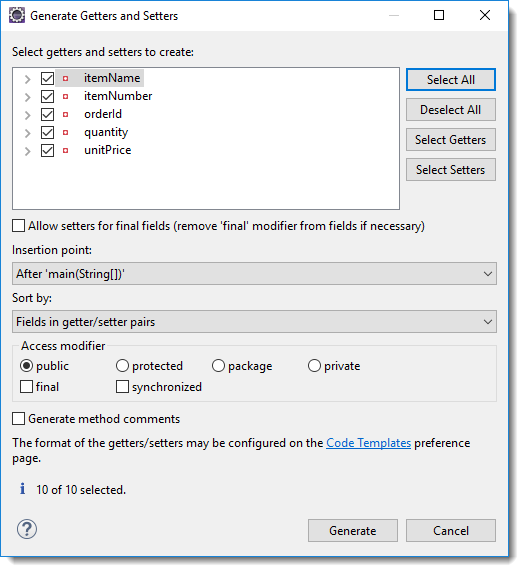
Click on "Generate" and voila! You've already generated a good bit of code.
This should bring up a window that looks something like this. If you choose Select all, you will create getters and setters for all of your attributes:
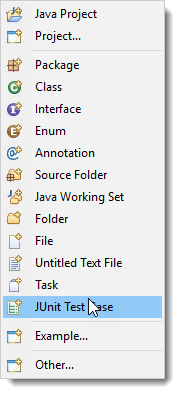
Your next step is to develop a JUnit Test Case. You do so with the File->New->JUnit Test Case menu
So once selected, you come to this window
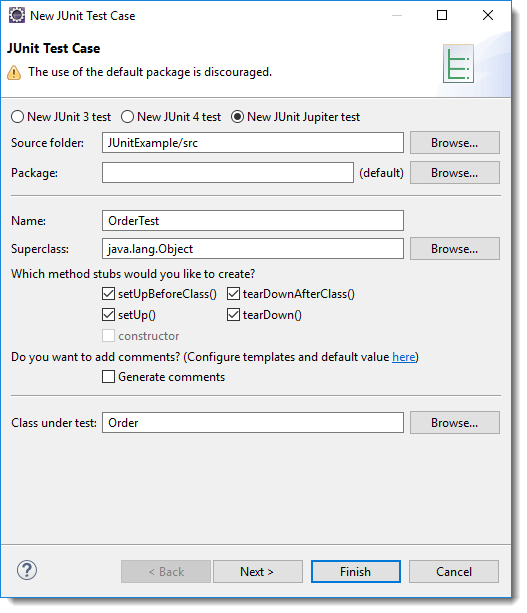
If you now click Next> you see a Dialog window that lets you select the desired methods to test.
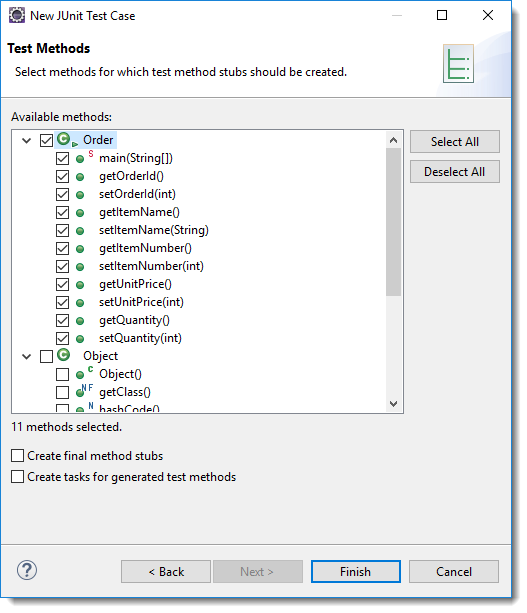
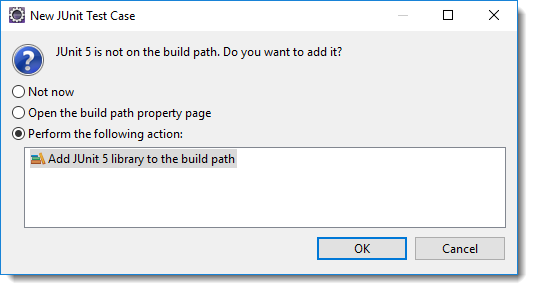
If you select the "Order" class, and select Finish, you'll be prompted to add JUnit to your path
At this point, you have a file holding a lot of empty tests for JUnit to run on your Order class.
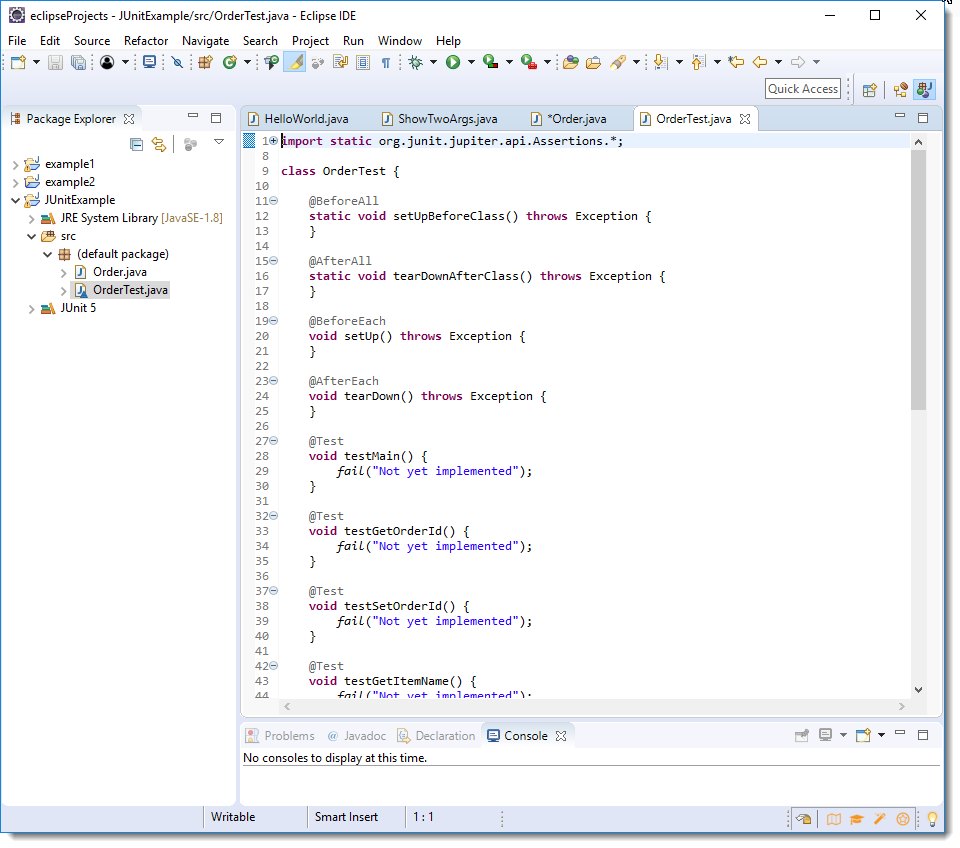
Now you finally have a OrderTest class in the directory. JUnit may do some automatic code generation, but for an empty class like this, it just gives you empty methods that you need to fill in. There a several methods that let you establish initial conditions before the test begins.
If you look at the generated code in the OrderTest.java file, you'll see that all of the tests end with a call to fail("Not yet implemented") and a reason given as a String. This makes you fill in the content of the tests and change the code so that tests may pass.
You can run the JUnit tests at this point by right clicking on the project name and select "JUnit Test"

Of course all of the tests will fail at this point, but you should get the initial idea at how things run:
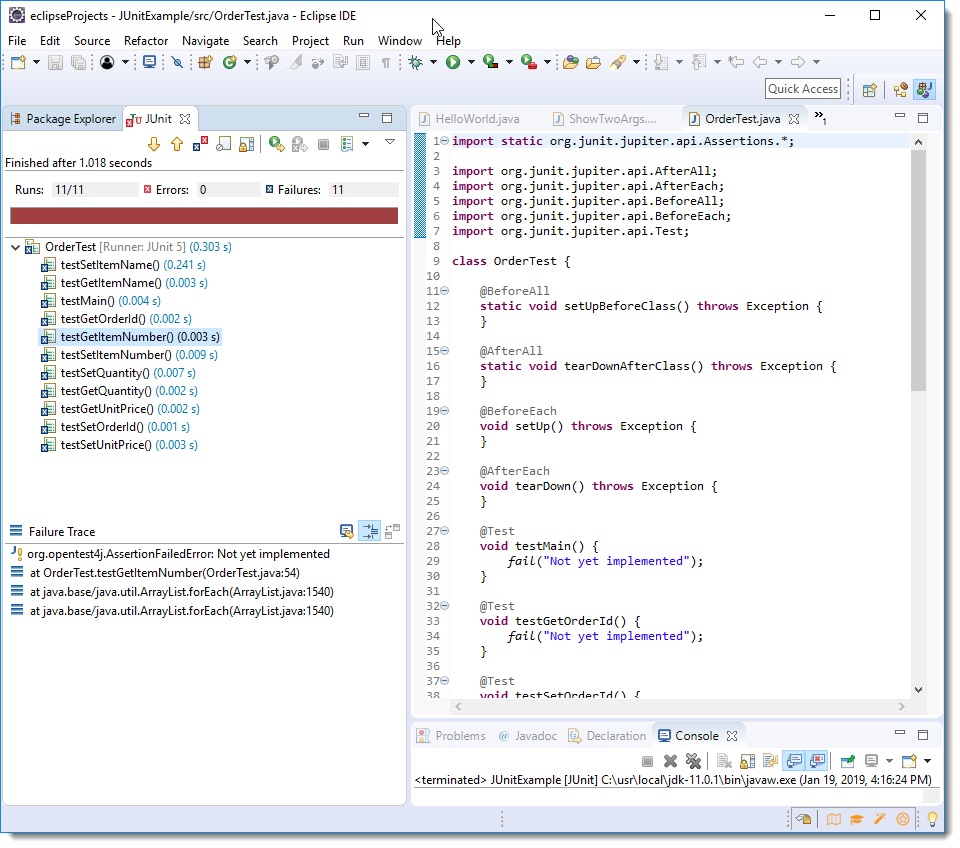
You can click on each test and view the Failure trace.
So, at this point, not much use. What you want to do next is to start implementing the methods for the tests you've written. First, make sure the Order.setOrderId() method is "beefed up" to include some range checking (see below)
 public void setOrderId(int orderId) {
    if (orderId < 0) {
        throw new IllegalArgumentException("orderId can't be a negative number");
    } else if (orderId > 999999) {
        throw new IllegalArgumentException("orderId can't be more than 6 digits");
    } else {
        this.orderId = orderId;
    }
 }
Now in the test case, let's fill in the content of testSetOrderId(). Note that while we check to see if IllegalArgumentExceptions are thrown, we have to know what the error message should be in order to really complete the test
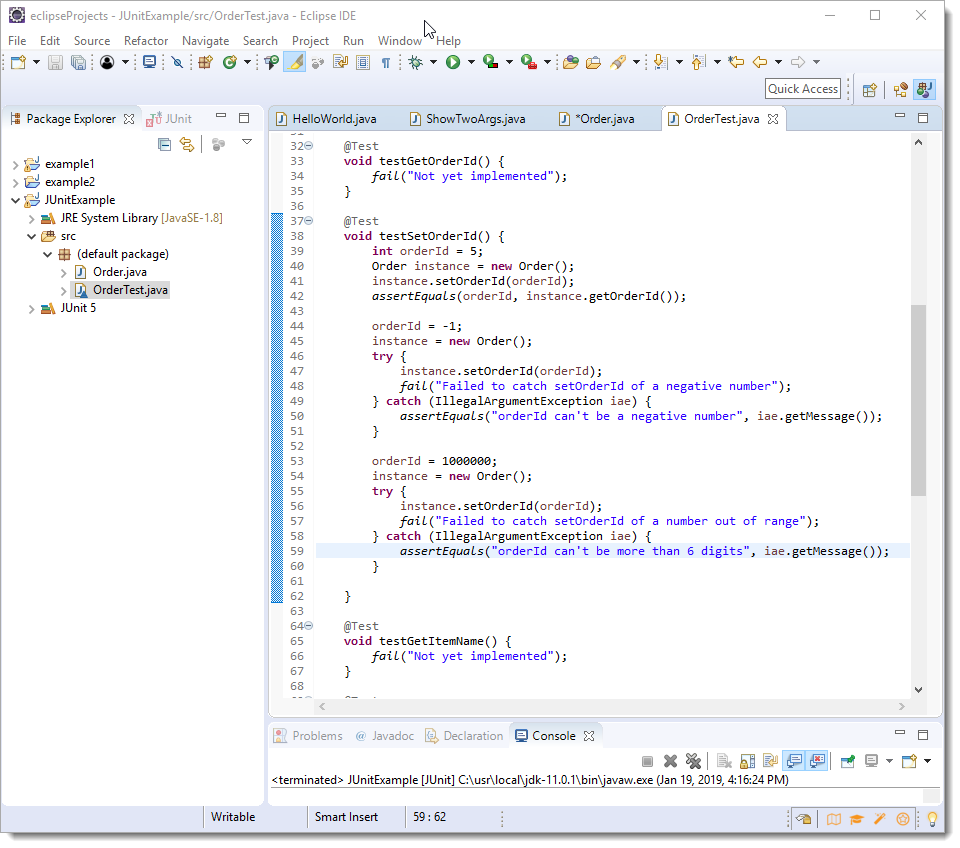
Now when we run the JUnit tests, we see that the testSetOrderId() method has now passed!

At this point, you should go back and fill in all the Test methods, then start implementing the base methods in Order.java. Once you have your test cases completed, any time you do any maintenance to the code, you run your tests cases and you unit test all your methods.
As you read this, hopefully you realize that to fill in test methods for all of your classes will take a bit of work, and you may have to initializee files, databases, connections for each test. Yes it is a lot of work, and yes it is how you should do code development. This unit testing produces good, solid code that works, and that has many fewer bugs than just coding up the design. Plus it allows regression testing for any future changes.
For our class, using JUnit is NOT required, but I just wanted to give a quick intro to a very handy tool.